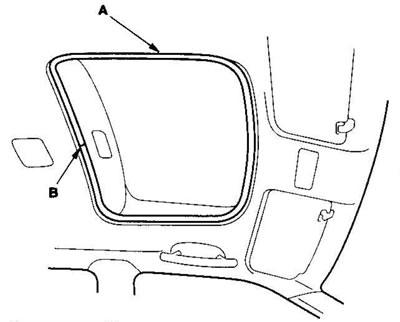
Note:
- When pressing components with a flat-head screwdriver, wrap it with protective tape to avoid damage.
- Do not bend or scratch the inner roof lining.
- Avoid damaging the instrument panel or other interior trim.
1. Remove the following components:
- Front pillar trim, on both sides.
- Upper trim of the B-pillar, on one side.
- Finishing of the small side window pillar, on one side.
- Finishing of the rear pillar, on both sides.
- Individual lighting fixtures on some models.
- Ceiling lamp.
- Luggage compartment light.
2. Remove the sun visor (A) and holder (B) on both sides.
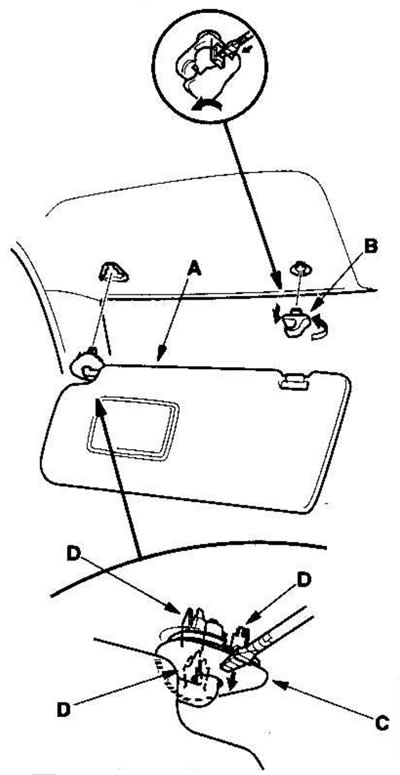
- Pry off the plug (C) with a flat-head screwdriver.
- Pull back the plug sections with clips (D).
- Remove the sun visor from the body and holder.
- Press the hook with a flat-head screwdriver, turn the holder 90° and remove it.
3. If equipped, remove the roof console (A).
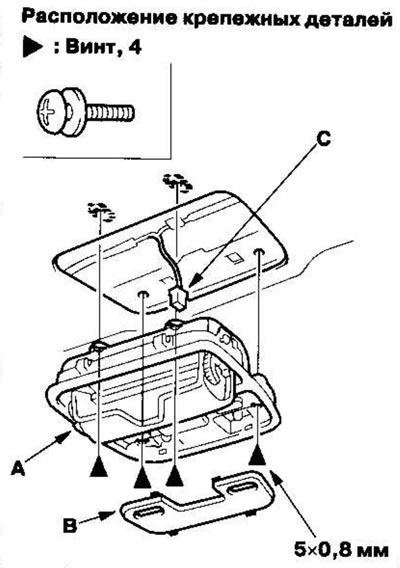
- Remove the diffuser (B).
- Remove the screws.
- Remove the roof console and disconnect the connector (C) from the front reading light.
4. Remove the plugs (A) and screws, then remove the handrails (B) (from the driver and all passengers).
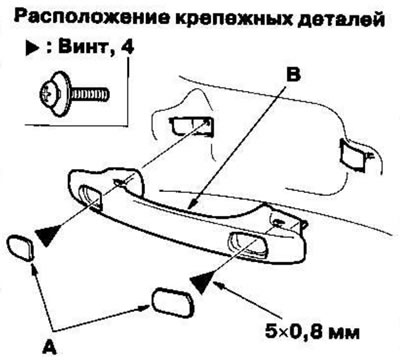
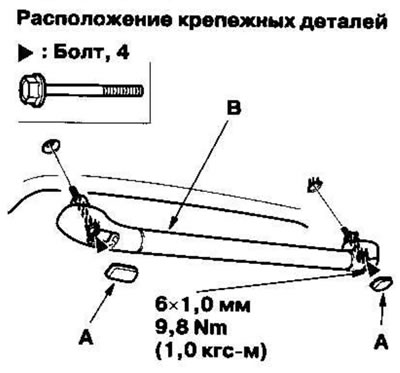
5. If equipped, remove the plugs (A) and unscrew the bolts, then remove the inner roof rails (B) on both sides.
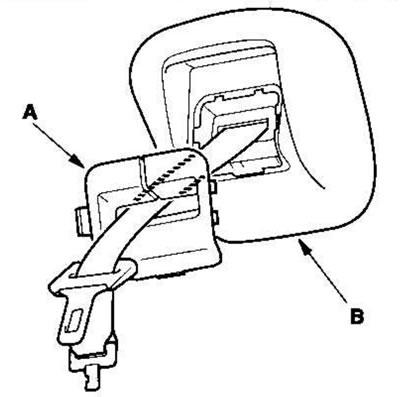
6. If equipped, remove the plug (A) from the center seat belt pretensioner cover (B).
7. With the help of a partner, remove the roof liner (A). The illustration below shows a left-hand drive model; the layout on the right-hand drive model is similar.
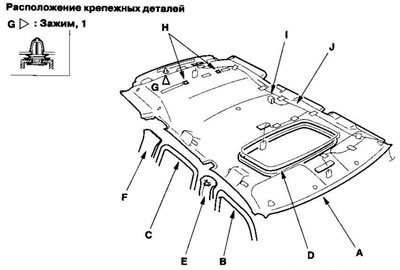
- Remove the remaining front (B) and rear (C) door opening trim from the corresponding roof sections.
- With sunroof: Remove roof trim (D).
- Remove the top portion of the remaining upper B-pillar trim (E) and the small side window pillar trim (F). Be careful not to damage the trim.
- Remove the clamp (G) and release the fasteners (H) by pulling the rear section of the roof liner. Do not damage the inner roof lining.
- Lower the inner roof lining and remove it from the remaining trim, disconnect the sunroof connector (I) (on models with sunroof). Be careful not to damage the passenger compartment wiring harness (J).
8. With the help of a partner, remove the shock-absorbing tape, then remove the interior wiring harness (A) from the roof liner (B). Be careful not to damage the roof liner or the interior wiring harness.
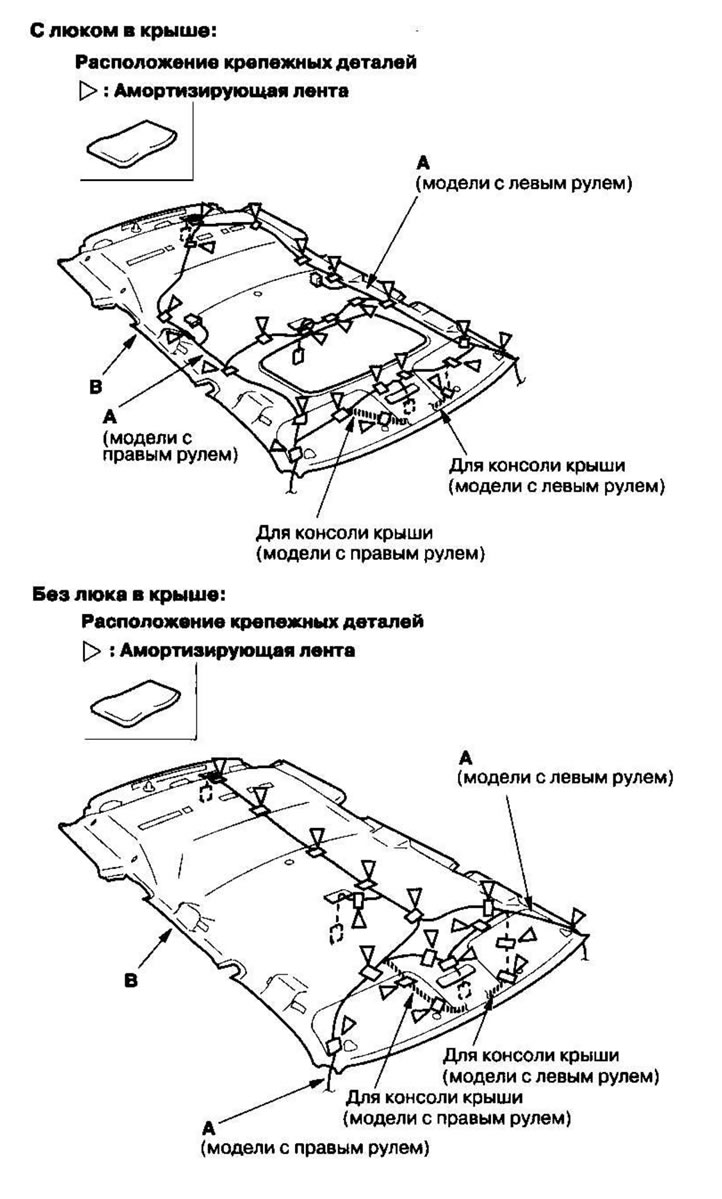
9. Remove the inner roof lining through the rear door opening. Do not damage the inner roof lining.
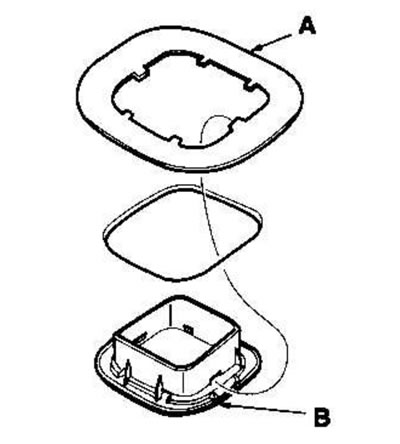
10. If there are anchor bolts, remove the anchor bolt cover bracket (A), then remove the anchor bolt cover (B) from the roof inner lining.
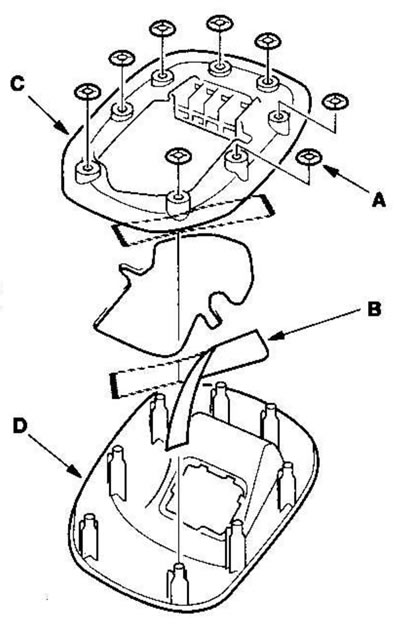
11. If equipped with a center seat belt pretensioner (B), loosen the quick release nuts (A) and remove the shock absorber strap (B), then remove the pretensioner cover bracket (C) and pretensioner cover (D) from the roof inner lining.
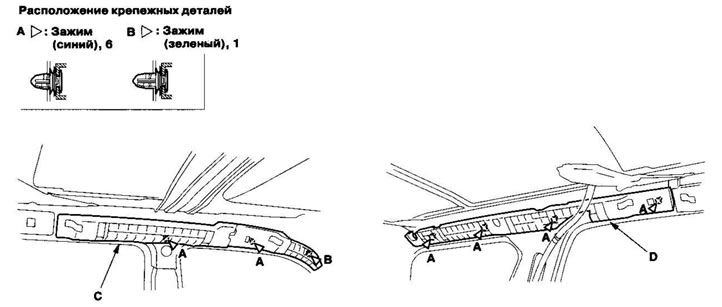
12. Using a puller, separate the clips (A, B), then remove the front (C) and rear (D) roof side gaskets.
13. Installation of the roof sheathing is carried out in the reverse order of removal, taking into account the following:
- When installing the roof liner through the rear door opening, do not bend it. Also, be careful not to scratch the body.
- Replace damaged clamps and shock absorber tape.
- Make sure the interior roof sheathing is securely attached to the trim on both sides.
For vehicles with sunroof: When installing roof trim (A), secure joint (B) as shown in the illustration.