
Contents: Examination ⇊ Replacement ⇊
Examination
1. The ECT sensor is a thermistor (a resistor whose resistance changes with temperature). Changing the resistance of the sensor has a direct effect on the amplitude of the signal sent by the sensor to the ECM/PCM. In this case, as the temperature DECREASES, the resistance of the sensor INCREASES, and vice versa. If the corresponding fault code is present in the ECM/PCM memory (see On-Board Diagnostics (OBD) System - Operating Principle and Error Codes) you should check the condition of the ECT circuit and, if the wiring is OK, replace the sensor.
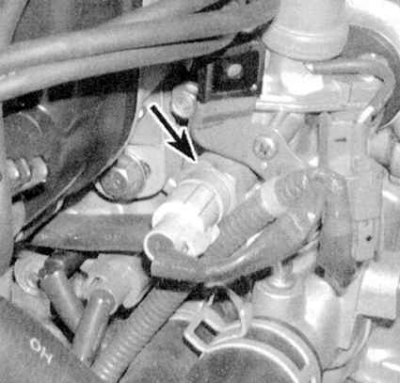
2. The sensor is checked by measuring its resistance (see accompanying illustration) in a cold state (10°C÷27°C). then start the engine and warm it up to normal operating temperature. The sensor resistance should drop.
3. Measure the supply voltage at the red-black wire terminal of the sensor wiring connector with the ignition on (do not start the engine). The measurement result should be about 5.0 V, otherwise check the wire for an open in the section from the sensor to the ECM/PCM.
Replacement
Attention! Before starting the procedure, wait until the engine has completely cooled down.
1. Before installing a new sensor, its threaded part should be wrapped with Teflon sealing tape (with FUM tape).
2. Press the locking tab, then carefully unscrew the sensor. In order to minimize coolant loss, screw in a new sensor as soon as possible.
Caution! Handle the ECT sensor with the utmost care, as damage to it can have a significant impact on the operation of the power supply system as a whole.
3. Installation is carried out in the reverse order. Finally, check the coolant level and make the appropriate adjustments if necessary (see Chapter Routine maintenance).
Material obtained from the website: HondaBook.ru