
Contents: Examination ⇊ Replacement ⇊
Examination
1. The ECT sensor is a thermistor (a resistor whose resistance changes with temperature). Changing the sensor's resistance has a direct effect on the amplitude of the signal it sends to the PCM. At the same time, with a DECREASE in temperature, the sensor's resistance INCREASES, and vice versa. Failure of the ECT sensor results in the recording of code P0116, P0117 or P0118 in the self-diagnostic system memory unit.
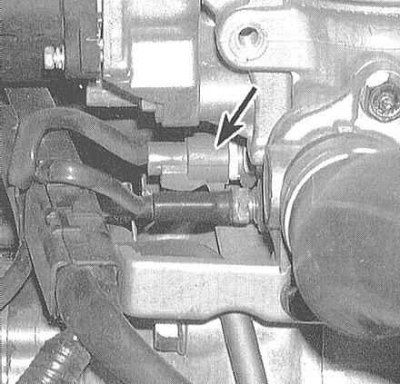
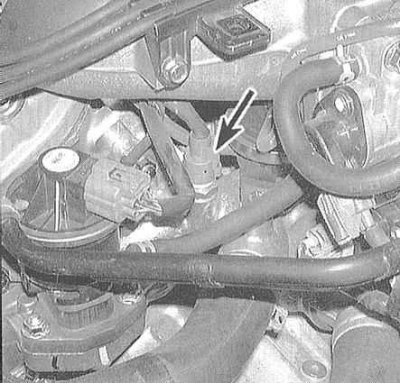
2. The ECT sensor is checked for proper operation by measuring its resistance. Find the sensor and disconnect the wiring from it.
 |
 |
3. Connect an ohmmeter to the two terminals of the sensor assembly. At a temperature of about 20°C, the device should register a reading of about 2500÷3500 Ohm. Now start the engine and warm it up to normal operating temperature (alternatively, the sensor can be removed and warmed up to the required temperature in a hot bath). The resistance of the sensor should drop, and at a temperature of about 83°C, it should be 250÷350 Ohm. If the results of the described check are negative, the ECT sensor should be replaced.
Note: If the engine was running with the sensor disconnected, be sure to clear the self-diagnostic system memory (see Section On-Board Diagnostics (OBD) System - Operating Principle and Error Codes).
Replacement
Attention! Before starting the procedure, wait until the engine has completely cooled down.
1. Disconnect the negative cable from the battery.
Warning! If the car stereo system is equipped with a security code, make sure you have the correct combination to activate the audio system before disconnecting the battery!
2. Before installing a new sensor, its threaded part should be wrapped with Teflon sealing tape (FUM tape).
3. Press the locking tab, disconnect the wiring, then carefully unscrew the sensor. In order to minimize coolant loss, try to screw in the replacement sensor as quickly as possible.
Caution! Handle the ECT sensor with the utmost care, as damage to it can have a significant impact on the operation of the power supply system as a whole.
4. Installation is carried out in the reverse order. Finally, check the coolant level and make the appropriate adjustments if necessary (see Chapter Settings and ongoing maintenance).