
Attention! The vehicles covered in this manual are equipped with airbags (SRS). When performing any work near the shock sensors, steering column or instrument panel, turn off the SRS (see wiring diagrams at the end of the Chapter Onboard electrical equipment).
Latch
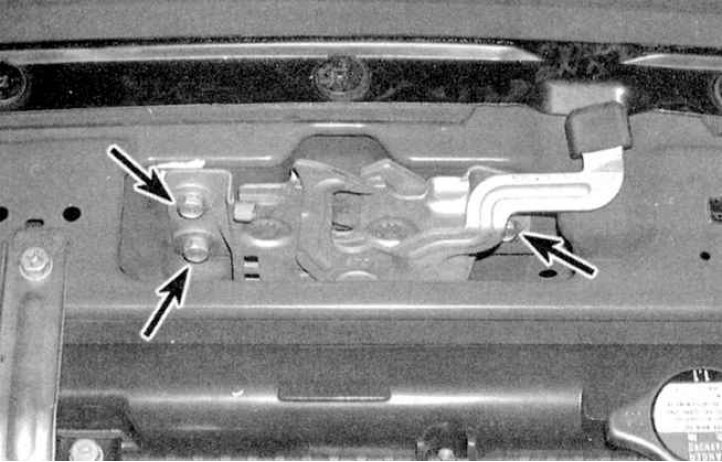
1. Remove the decorative grille hinged cover, then circle the latch assembly with a marker or scriber to ensure it is seated correctly during assembly. Turn out from the panel of a support of a radiator fixing bolts and remove a latch (see illustration).
2. Disconnect the lock release cable from the latch assembly.
3. Installation is carried out in the reverse order.
Note. Adjust the position of the latch so that the hood is securely locked in the closed position by the lock - the rubber pads of the supports should flatten slightly.
Drive cable
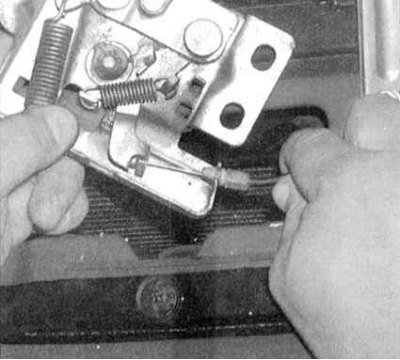
1. Disconnect the hood release cable from the latch assembly (see accompanying illustration).
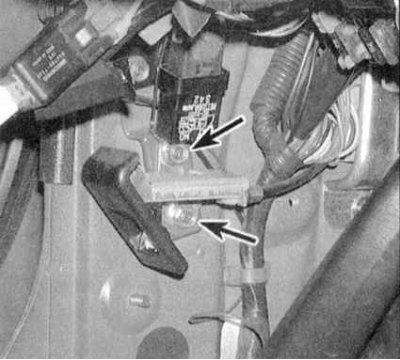
2. In the passenger compartment, remove the upper trim of the driver's door sill, then give two fixing bolts and disconnect the hood release lever from the bulkhead (see accompanying illustration). Disconnect the drive cable from the lever.
3. Tie a piece of stiff wire to the end of the cable that is connected to the latch, then "take a walk" along the cable to the rear bulkhead of the engine compartment, releasing it from the intermediate clamps along the way.
4. Push the rubber grommet through the bulkhead and pull the cable into the vehicle's engine compartment. Make sure the new cable assembly is equipped with a bushing. Untie the old cable from the wire and tie a replacement one in its place.
5. Pull the new cable assembly by the wire through the bulkhead into the engine compartment.
6. Further assembly is carried out in the reverse order of dismantling.
Note. Using your fingers, firmly push the cable bushing into the bulkhead of the engine compartment - make sure that the bushing fits correctly in the bulkhead.