
Attention! In the cartridge of gas-filled lamps of intense glow (HID) when the main light switch is switched on, a high voltage is generated for a short time (25,000 V), which can cause severe electrical shock or even death if the following safety precautions are not observed.
Attention! It is forbidden to turn on the light with the central switch until the HID gas-filled lamps are fully installed in their sockets and until the headlights are assembled.
To avoid electric shock, do not handle headlight assemblies in wet conditions, in rain or snow, near a sprinkler system, or when your hands are wet. Do not touch the lamps with bare hands and do not allow oil or grease to get on the glass surface of the lamp. Do not disassemble the inventory and igniter units. Do not attempt to connect the gas-filled lamp to any power source other than your vehicle's battery.
1. Turn off the lighting with the central switch.
2. Disconnect the negative cable from the battery, then disconnect the positive cable.
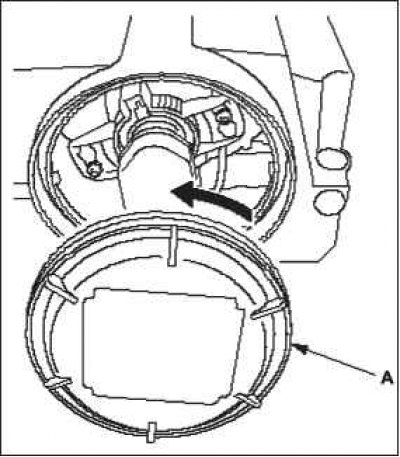
3. Rotate housing A 45°counterclockwise and remove it from the headlight assembly.
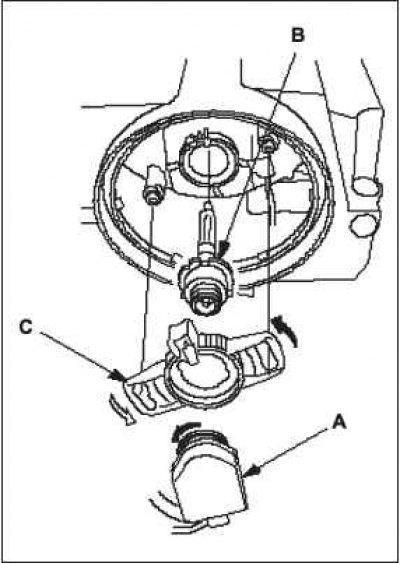
4. Rotate lamp socket A 45°counterclockwise and remove it from lamp base B.
5. Remove bracket C, then remove the bulb.
6. Install a new light bulb in the reverse order of removal. Make sure the slots in the lamp base line up with the projections on the headlight housing.
7. After connecting the battery, proceed to step 1 of the learning procedure.
Replacing the HID block
1. Turn off the lighting with the central switch.
2. Disconnect the negative cable from the battery, then disconnect the positive cable.
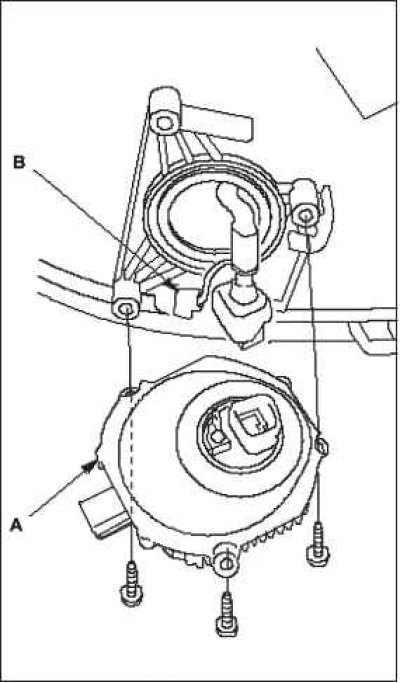
3. Remove the headlight assembly.
4. Remove the socket from the high intensity lamp (HID).
5. Remove the three fixing screws and remove the HID A.
6. Disconnect the 4-pin connector (4P) connector B from the HID box.
7. Check if the gasket is damaged. If damaged, replace it.
 |  |
8. Install in the reverse order of removal.
9. Follow the procedure for learning the position of the headlights