HondaBook.ru
Auto companies Volkswagen Auto companies Ford Auto companies Lada Auto companies Skoda Auto companies BMW Auto companies Mazda Auto companies Peugeot
English Русский
Български
Беларускі
Український
Српски
Hrvatski
Română
Polski
Slovenský
Magyar
Bookmark Contacts Sitemap   


Accord Civic Fit / Jazz CR-V HR-V Others Articles
HR-V 1 (1998-2006, petrol)

Replacing light bulbs (Honda HR-V 1)

  • Main
  • Honda HR-V
  • 1 (1998-2006, petrol)
  • General information
  • User manual
  • Replacing light bulbs
0
Contents: Headlights ⇊ Front direction indicator/hazard…⇊ Clearance light ⇊ Brake light, turn signal/hazard…⇊ License plate lights ⇊ Front interior light/local light ⇊ Rear compartment light ⇊ Luggage compartment light ⇊
If the fuses are not blown, and some lamps are not lit, it can be assumed that they have burned out. It is necessary to check the functionality of the lamps and replace the burnt out ones.
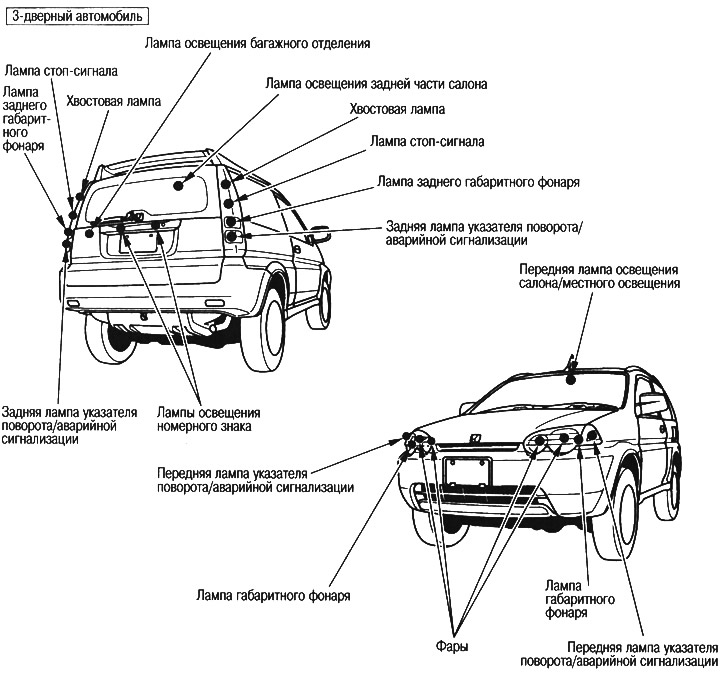
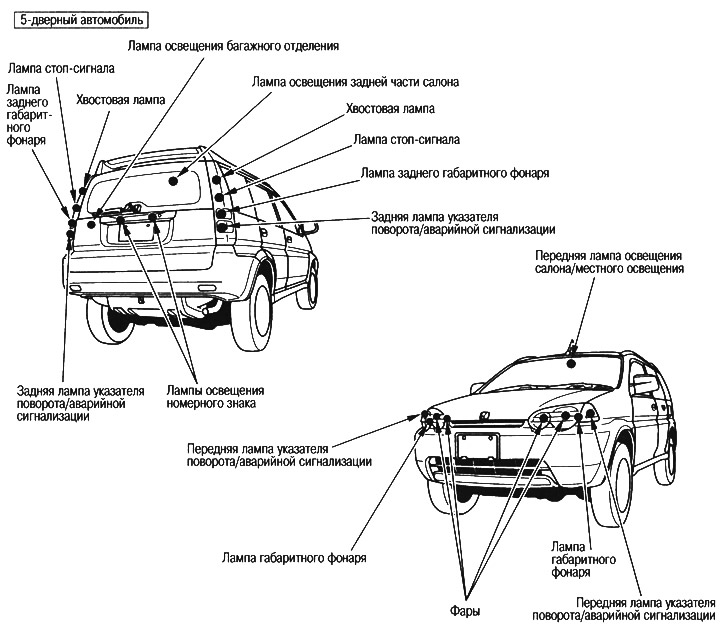
If the fuses are not blown, and some lamps are…


If the fuses are not blown, and some lamps are…


Note:
  • When removing the lamp or lens, care must be taken not to scratch the bodywork.
  • When replacing a lamp, the power of the lamps being replaced must match.
  • The gas pressure in halogen and glass lamps is quite high, so be careful not to drop, hit or scratch them. Also, try not to touch the surface of the lamp with your hand, as this will leave greasy stains on its surface, which will significantly reduce the service life of the lamp.
  • When installing the lens, do not overtighten the screws. There is a risk of lens breakage.
  • When driving in the rain or after washing the car, a matte water film may temporarily form on the surface of the headlight and brake light lenses. This is due to the temperature difference between the inside of the lamp and the surrounding environment.
  • If a large number of water drops appear inside the lens or in the headlight, you should contact a service station.


Headlights


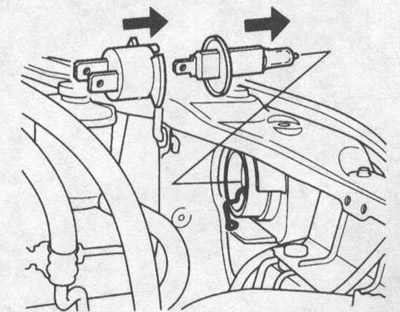
The headlights use halogen bulbs, so care must be taken when removing and installing them.

Low beam


1. Remove the connector.
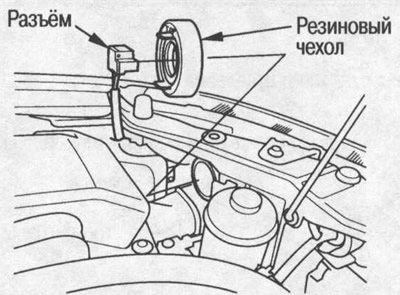
1. Remove the connector.


2. Remove the rubber boot.
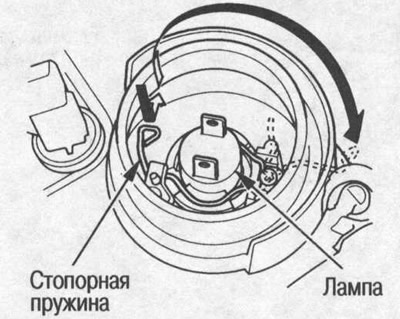
2. Remove the rubber boot.


3. Remove the retaining spring and take out the lamp holder.
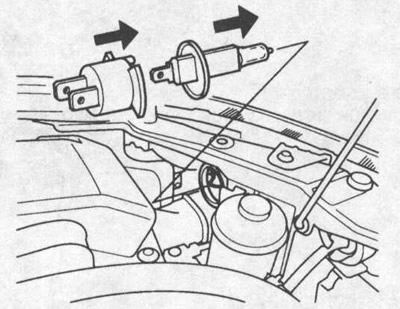
3. Remove the retaining spring and take out the…


4. Remove the lamp from the socket.

High beam


1. Remove the connector.

2. Remove the rubber cover
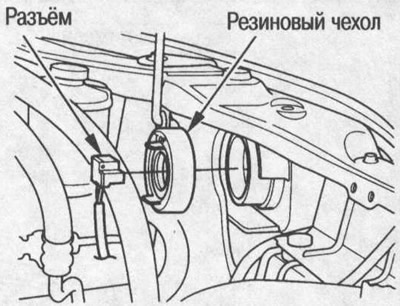


2. Remove the rubber cover


3. Remove the retaining spring and take out the lamp holder.
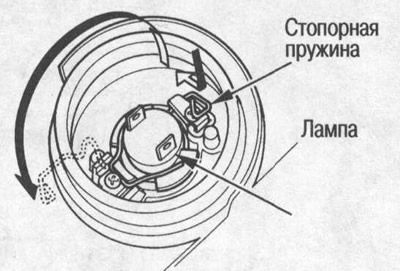
3. Remove the retaining spring and take out the…


4. Remove the lamp from the socket.

4. Remove the lamp from the socket.


Front direction indicator/hazard warning light


Turn the socket to the left and remove the lamp.
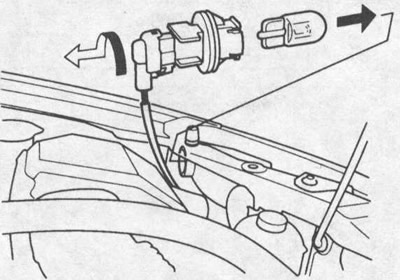
Turn the socket to the left and remove the lamp.


Clearance light


Turn the socket to the left and remove the lamp.
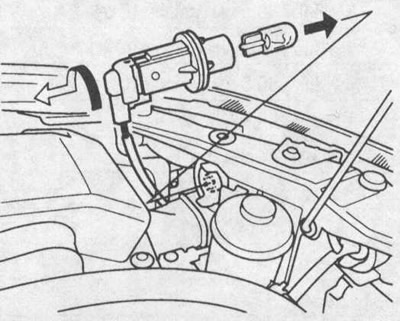
Turn the socket to the left and remove the lamp.


Brake light, turn signal/hazard warning light, side light bulbs


1. Loosen the screws and remove the lamps.
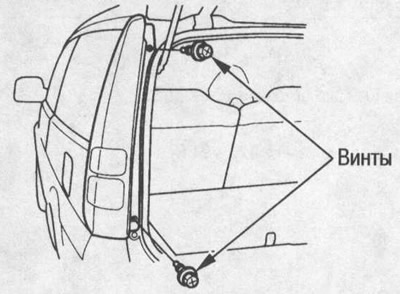
1. Loosen the screws and remove the lamps.


2. To remove the brake light and parking light bulbs, turn the socket to the left. To remove the turn signal/hazard warning light bulbs, press and turn the socket to the left.
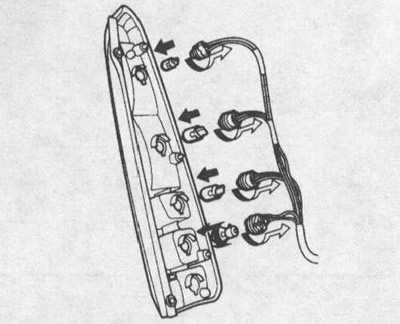
2. To remove the brake light and parking light…


License plate lights


License plate lights


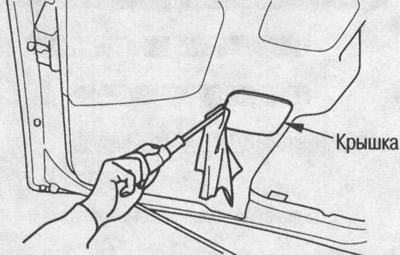
1. Open the trunk lid, wrap a rag around the end of the screwdriver and remove the cover.

2. Press the latch to remove the connector.
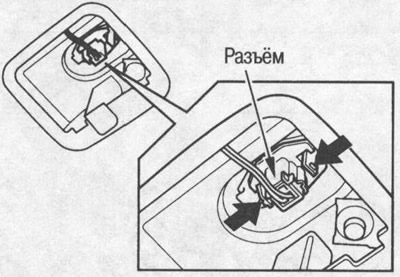
2. Press the latch to remove the connector.


3. Remove the lamp.
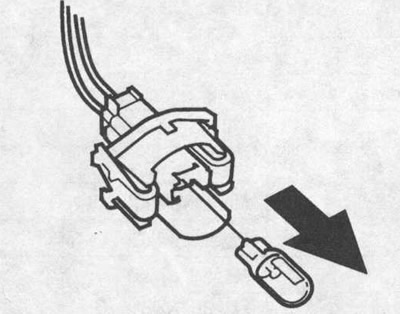
3. Remove the lamp.


Front interior light/local light


1. Remove the cover.
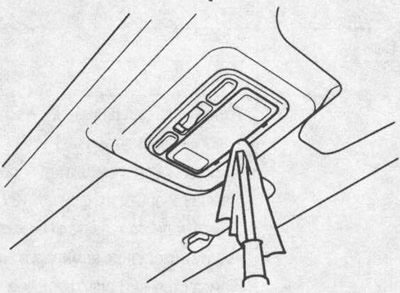
1. Remove the cover.


2. Remove the bulbs.
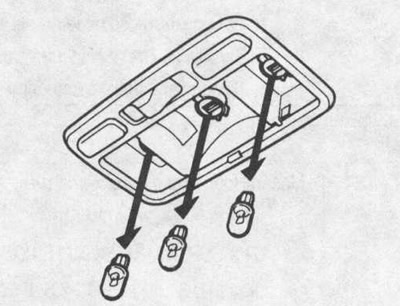


2. Remove the bulbs.


Rear compartment light


1. Remove the cover.
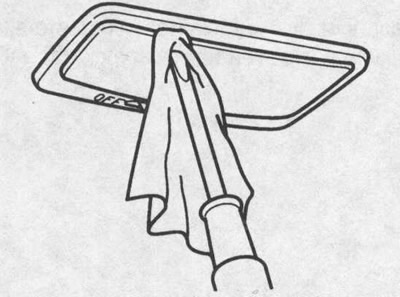
1. Remove the cover.


2. Remove the light bulb.
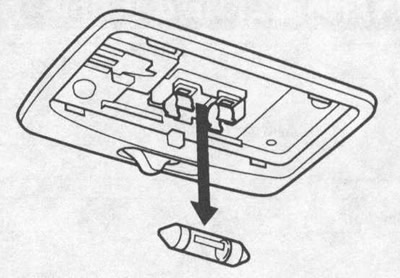
2. Remove the light bulb.


Luggage compartment light


1. Remove the cover.
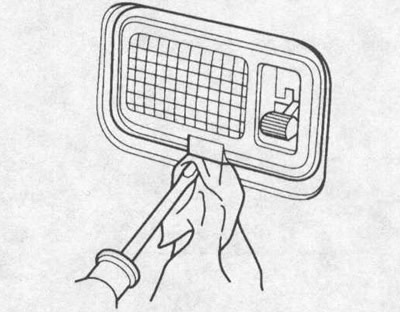
1. Remove the cover.


2. Remove the light bulb.
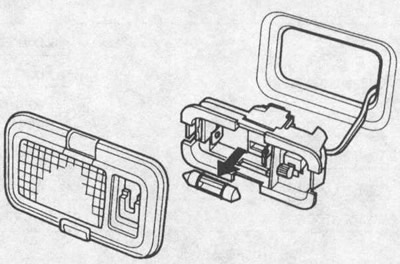
2. Remove the light bulb.
This article is available at: russian, bulgarian, belarusian, ukrainian, serbian, croatian, romanian, polish, slovak, hungarian
This information has been verified: Emil Safonov
Share with friends:
◀ Previous
HR-V 1: User manual
Next ▶

Lighting fixture failures
Wheel replacement
Spare wheel
Procedure for using a jack
Towing a car
Wheel rotation
Technical data of the car
Vehicle Identification Numbers
Locations of warning/cautionary signs
See also other articles from Honda manuals:
Checking and replacing the reverse light switch sensor Honda Accord 6 (1997-2002)
Replacing front fog light bulbs Honda Civic 8 (2005-2011)
Light signaling in the car Honda Fit 1 (2001-2008)
Spark plugs — checking and replacing Honda CR-V 1 (1995-2001, petrol)
IHCC indicator and warning light Honda Avancier 1 (1999-2003, petrol)
Link in different formats to this article
Comments and feedback from visitors
No comments yet


How much will 42 + 27 ?


HR-V 1 (1998-2006, petrol) 
  • General information
  • User manual
  • Maintenance
  • Power unit
  • Engine repair
  • Lubrication system
  • Cooling system
  • Fuel injection and control
  • Power and exhaust system
  • Engine electrical equipment
  • Transmission
  • Clutch
  • Mechanical gearbox
  • Automatic gearbox
  • Rear differential
  • Drive shafts and cardan
  • Chassis and running gear
  • Steering
  • Car suspension
  • Brake system
  • Body and interior
  • Exterior (external elements)
  • Interior (internal elements)
  • Doors, locks and windows
  • Electrical equipment
  • Equipment and devices
  • Lighting system
  • Electrical circuits
HondaBook.ru © 2018–2026 • Mobile version • Sitemap: EN BG BY UA RS HR RO PL SK HU • Feedback • Driver Information • Search system • Bookmark
Accord 3 (1985-1989) • Accord 6 (1997-2002) • Civic 3 and 4 (1983-1991) • Civic 5 and 6 (1991-2000) • Civic 6 (1995-2000) • Civic 7 (2000-2005) • Civic 8 (2005-2011) • Fit 1 (2001-2008) • CR-V 1 (1995-2001) • CR-V 2 (2002-2006) • HR-V 1 (1998-2006) • Avancier 1 (1999-2003) •
 
This website uses cookies to ensure proper functioning. By clicking "OK," you agree.