
Contents: Adjusting the horizontal clearance ⇊ Adjusting vertical clearances ⇊ Adjusting the position of the hood…⇊ Removal and installation the…⇊ Removal and installation the hood…⇊ Removal and installation the hood…⇊ Removal and installation the hood…⇊
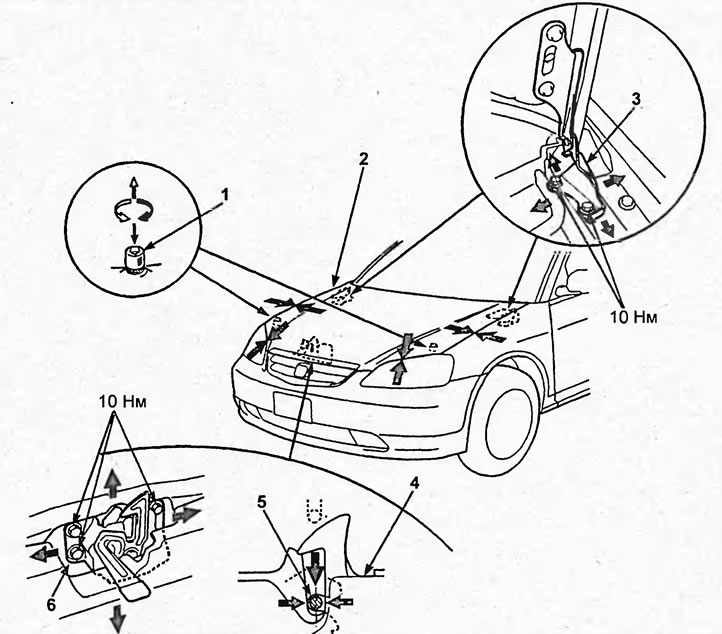
Adjusting the hood. 1 - pillow, 2 - hood, 3 - hood hinge, 4 - hood lock, 5 - lock bracket, 6 - hood lock.
Adjusting the horizontal clearance
Loosen the hinge mounting bolts to the body and adjust the gap. After adjustment, tighten the mounting bolts.
Tightening torque - 10 Nm
Adjusting vertical clearances
Adjust the height of the front edge of the hood by turning the cushions as shown in the "Adjusting the Hood" illustration.
Adjusting the position of the hood lock
Loosen the hood lock mounting bolts and adjust the lock position vertically and horizontally as shown in the "Hood Adjustment" figure. After adjustment, tighten the mounting bolts.
Tightening torque - 10 Nm
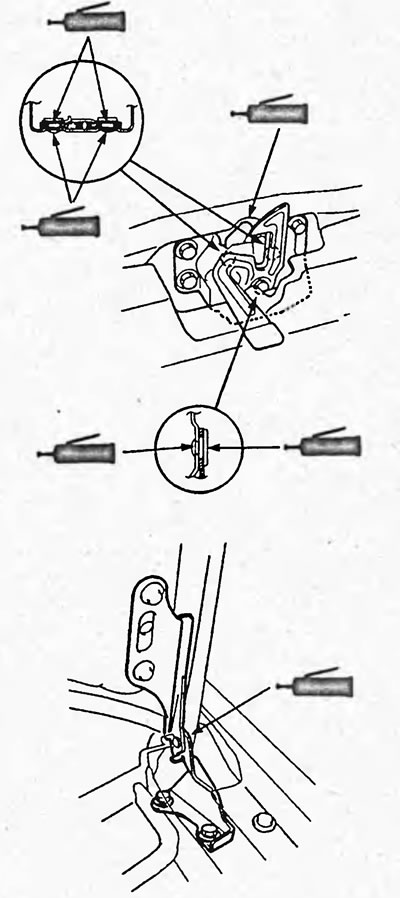
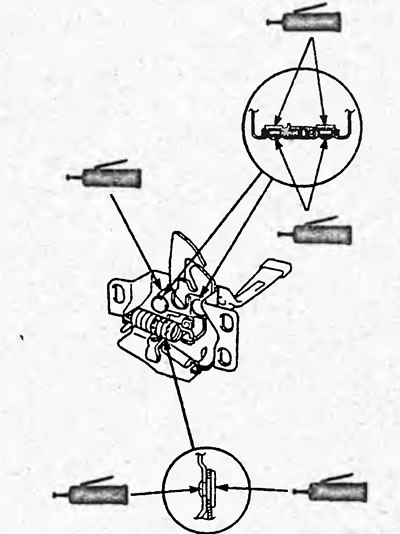
After adjustment, apply grease as shown in the figure.
Removal and installation the protective screen
1. Remove the protective screen.
a) Disconnect the windshield washer hose.
b) Using a puller, disconnect the fasteners and clamps, then remove the protective screen.
2. Installation is carried out in the reverse order of removal.
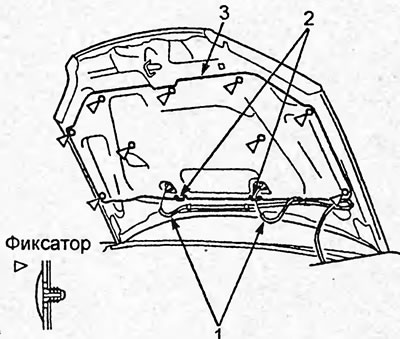
1 - windshield washer hose, 2 - clamp, 3 - protective screen.
Removal and installation the hood seal
1. Using a puller, disconnect the clips, then remove the hood seal as shown in the figure.
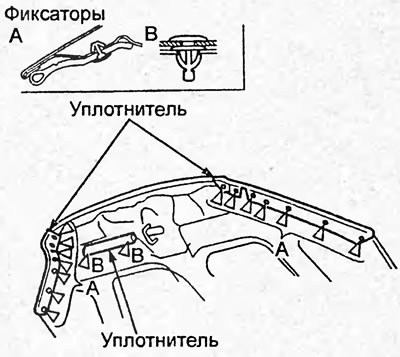
Sedan.
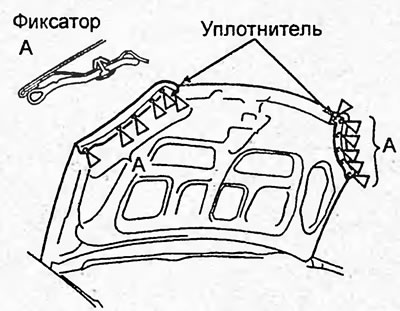
Hatchback.
2. Installation is carried out in the reverse order of removal.
Removal and installation the hood lock drive cable
1. Remove the front bumper (see section "Front bumper").
2. Remove the mudguard liner (see section "Front wing").
3. Remove the front side trim (see section "Interior trim").
4. Disconnect the cable from the hood lock, unscrew bolts "A" and remove the hood lock drive lever.
Tightening torque - 10 Nm
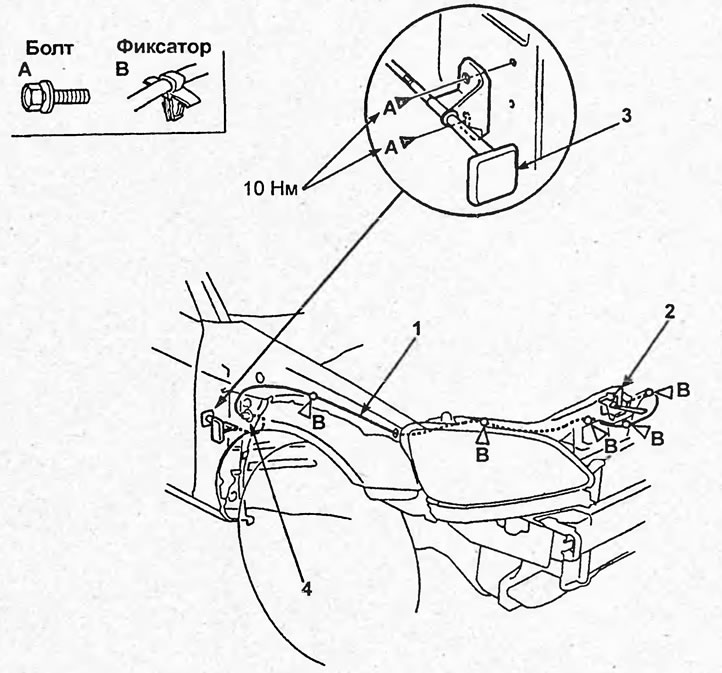
Hood lock drive cable. 1 - hood lock drive cable, 2 - hood lock, 3 - hood lock drive lever, 4 - bushing.
5. Using a puller, disconnect the "B" fasteners, remove the bushing, then remove the hood lock drive cable.
6. When removing the hood lock drive cable, follow the assembly drawing "Hood lock drive cable". The tightening torques of the bolts securing the parts are indicated in the assembly drawing.
7. Installation is carried out in the reverse order of removal.
Removal and installation the hood lock
1. Loosen the bolts, then disconnect the hood lock from the body.
Tightening torque - 10 Nm
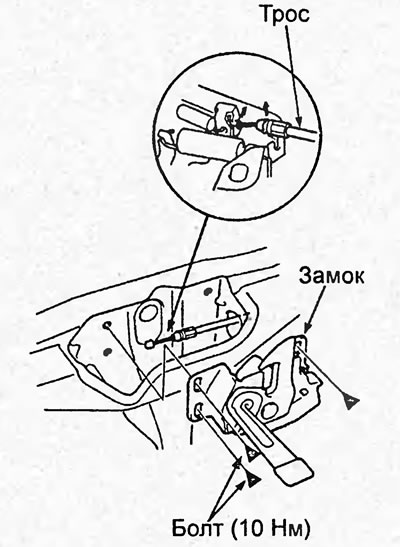
1 - cable, 2 - hood lock.
2. Disconnect the drive cable from the hood lock.
3. Installation is performed in the reverse order of removal. Before installing the hood lock, apply grease to the places indicated in the figure.
(Publication reprinted from the website HondaBook)