- Door panel.
- Plastic cover.
2. Carefully move the glass until you can see the bolts, then loosen them. Pull out the guide, remove the glass from the guide and carefully pull the glass through the window slot.
Note: Be careful not to drop the glass inside.
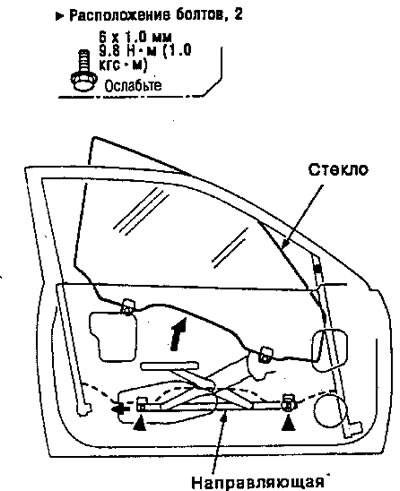
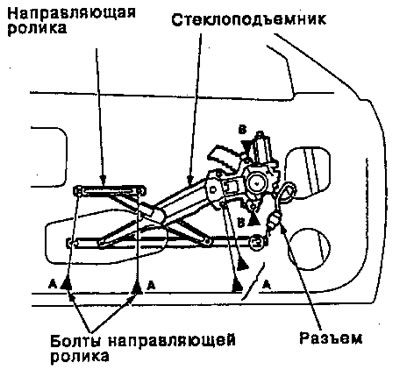
3. Disconnect the connector and separate the cable clamp, then remove the window regulator through the hole in the door.
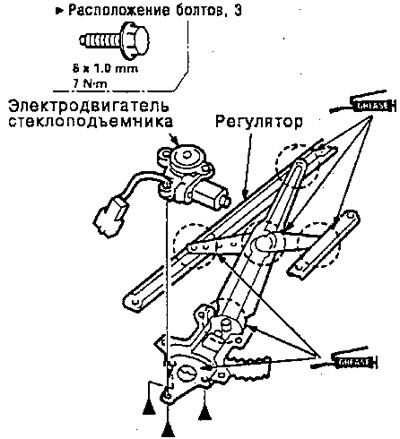
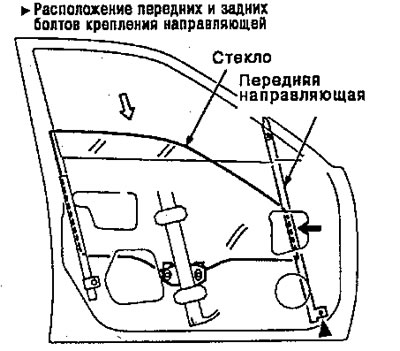
Note: Draw a line around the rear roller guide bolt to mark the initial adjustment.
4. Apply lubricant to all sliding surfaces of the window regulator in the indicated areas.
Note:
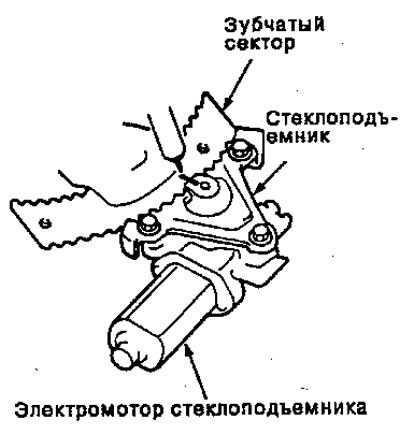
- If necessary, remove the power window motor from the power window.
- Before removing the power window motor, draw a line through the toothed sector and the power window.
5. Install in the reverse order of removal.
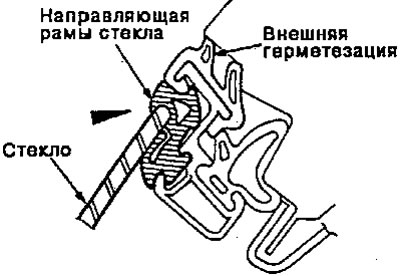
Note: Raise and lower the glass to ensure it moves freely and does not jam. Also make sure there is no gap between the glass and the glass guide frame when the window is closed. If necessary, adjust the position of the glass.
Glass adjustment
Note:
- When adjusting the glass, place the vehicle on a hard, level surface.
- Check the glass frame seal and guide for damage or destruction and replace if necessary.
1. Remove:
- Door panel.
- Plastic cover.
2. Adjust the glass.
4D:
- 1. Raise the window completely.
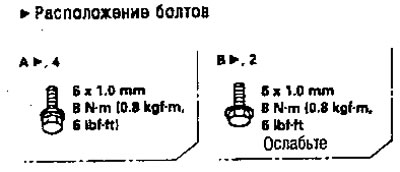
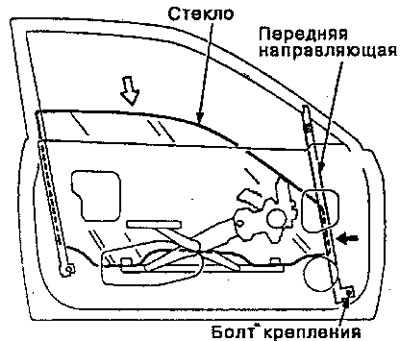
- 2. Loosen the glass bolts (front door) and bolts for fastening the window regulator.
- 3. Push the glass back (front door glass) or forward (rear door glass).
- 4. Tighten the glass bolts (front door) and window lifter mounting bolts.
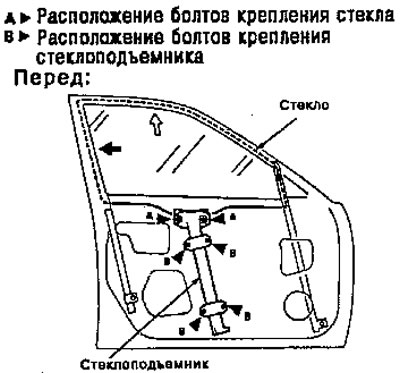
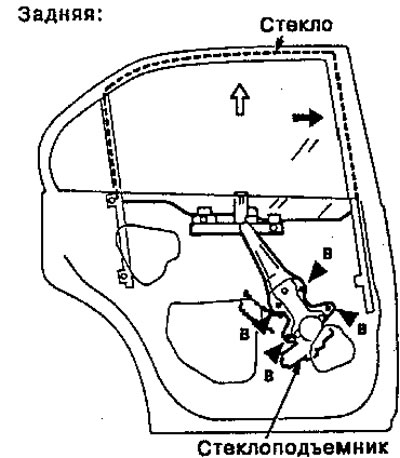
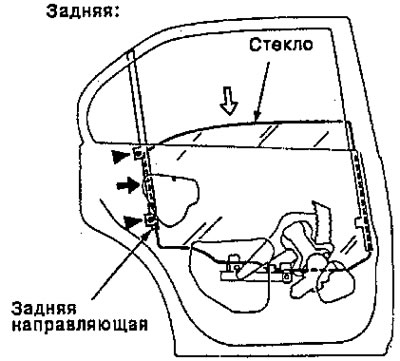
- 5. Loosen the front rail mounting bolts (front door) or rear guide mounting bolts (backdoor).
- 6. Lower the window.
- 7. Slide the front or rear guides toward the glass, then tighten the mounting bolts.
3D:
- 1. Raise the glass as far as possible and secure it to the glass frame guide.
- 2. Loosen the roller guide bolts and adjust the glass guide.
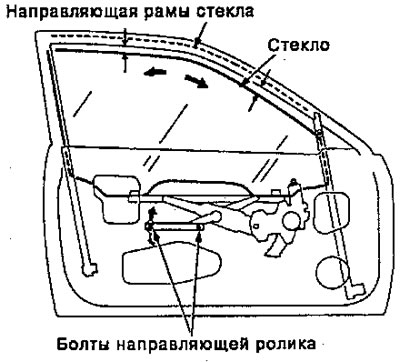
- 3. Tighten the roller guide bolts.
- 4. Loosen the front rail bolts.
- 5. Lower the window.
- 6. Slide the front guide onto the glass, then tighten the mounting bolts.
3. Check if the glass moves smoothly.
4. Raise the glass completely and check for gaps.
5. Check the operation of the glass.
Note: Check that the glass is in direct contact with the glass frame guide.
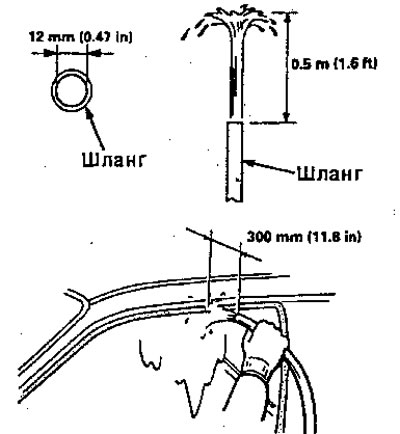
6. Check for water leaks. Spray water onto the roof and seal areas as indicated.
Note:
- Adjust the water pressure as shown.
- Do not squeeze the end of the hose.
7. Attach the plastic cover, then install the door panel.
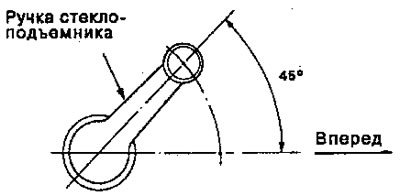
8. Install the window handle so that it points forward and upward at an angle of 45" with the glass closed...
Position adjustment
Note: To perform door adjustments, place the vehicle on a hard, level surface.
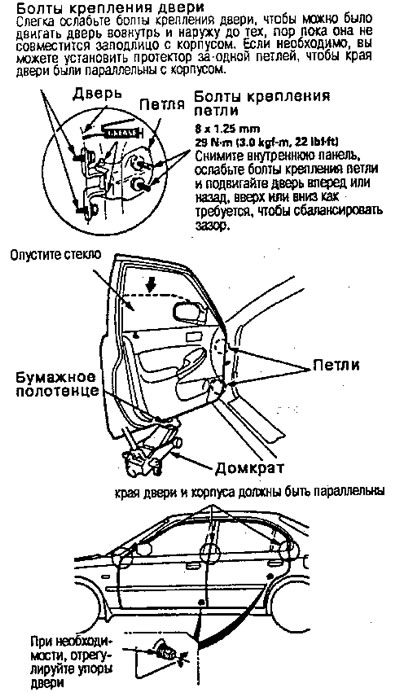
After installing the door, check that it is flush with the frame, then check that the gaps between the front, back, and bottom edges of the door and the frame are equal. The door and the edges of the body must also be parallel. Adjust the hinges as shown.
Attention. Place a paper towel on the jack to prevent damage to the door when loosening the door and hinge bolts for adjustment.
Note: Check for water leaks.
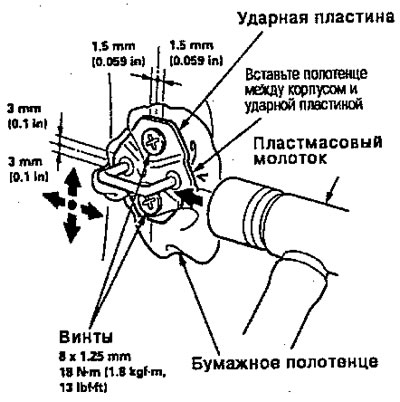
Adjusting the Impact Plate
Make sure the doors latch securely without having to slam.
If adjustment is required:
Note: The impact plate screws are secured. The strike plate can be adjusted 1.5mm up or down and 3mm in or out.
1. Loosen the screws, then insert a paper towel between the body and the strike plate.
2. Lightly tighten the screws.
3. Wrap the impact plate with a paper towel, then adjust by tapping it with a plastic hammer.
Caution: Do not hit the impact plate too hard.
Note: Hold the outside handle up and press the door against the frame to ensure the strike plate allows for a flush alignment.
4. If the door latches correctly, loosen the screws, then remove the towel. Tighten the screws and check again.