
Removal and installation components
Caution: When using a flat-head screwdriver as a lever, apply protective tape around the parts being removed.
Note: Be careful not to damage the instrument panel and the removed parts.
Removing the instrument cluster:
Note: The pictures show the left-hand drive model, the right-hand drive model is symmetrical.
1. Lower the steering column.
2. Loosen the screws and remove the clips, then carefully remove the instrument cluster,
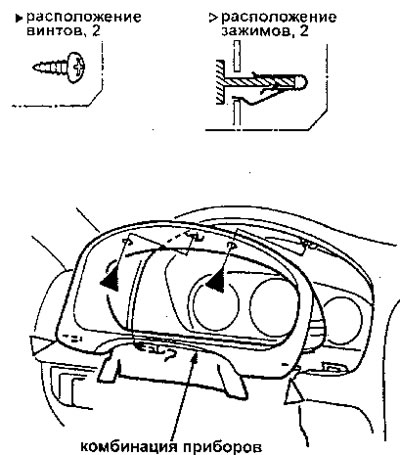
3. Installation is carried out in the reverse order of removal.
Lower instrument panel cover:
This part of the vehicle contains the SRS system components.
Note: The pictures show the left-hand drive model, the right-hand drive model is symmetrical.
Remove the screws and clips, then remove the lower instrument panel cover. Disconnect the connectors and air hose for the climate control system (if installed).
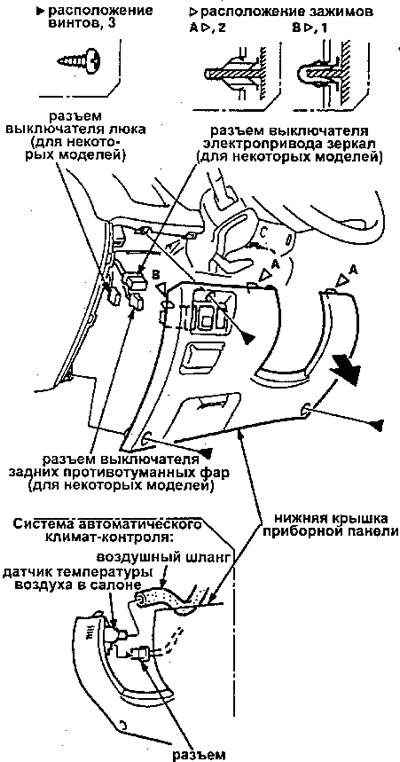
Removing the glove box:
Note: The pictures show the left-hand drive model, the right-hand drive model is symmetrical.
Remove the bolts, then remove the glove box.
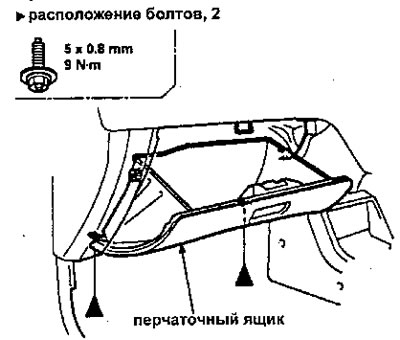
Installation is carried out in the reverse order of removal.
Removing the side deflector:
Note: The pictures show the left-hand drive model, the right-hand drive model is symmetrical.
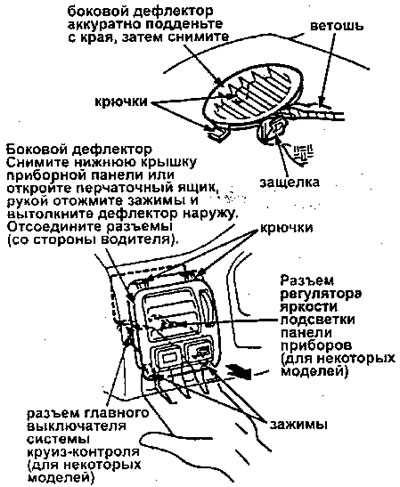
Central lower cover of the instrument panel:
Note: The pictures show the left-hand drive model, the right-hand drive model is symmetrical.
1. Remove:
- lower cover of the instrument panel
- glove box
2. Open the ashtray and remove the screws and bolts, then remove the center lower cover of the instrument panel. Disconnect the cigarette lighter connector.
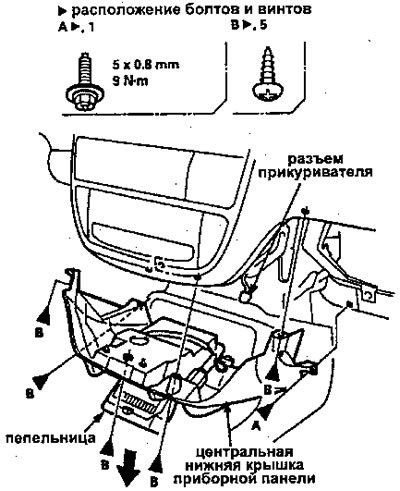
3. Installation is carried out in the reverse order of removal.
Removing the center panel:
Note: LHD shown, RHD symmetrical.
1. Remove:
- The lower cover of the instrument panel.
- Stereo radio/cassette player.
2. Remove the rear window defroster button and hazard warning button and disconnect the connectors.
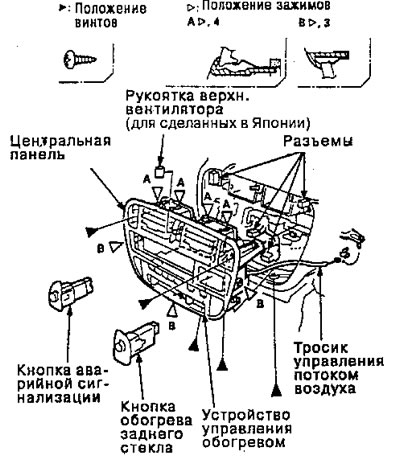
3. Disconnect the air flow control cable (hand heater), and remove the screws, then pull out the center panel.
4. Disconnect the connectors from the heating control unit or climate control unit.
5. Install in the reverse order of removal.
Note:
- Make sure the connectors are connected correctly.
- Adjust the air flow control cable.
Publication reprinted from the website: HONDABOOK