
Removal, installation and checking the windshield wiper and washer switch
1. Remove the lower instrument panel trim.
2. Remove the steering column cover.
3. Disconnect the connector (B) from the switch (A).
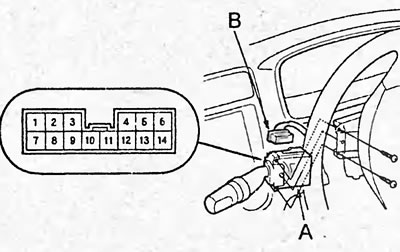
4. Remove the two screws and the windshield wiper and washer switch.
5. Check the conductivity at the switch terminals according to the tables.
Windshield wiper and washer switch.
| Switch position | Conclusions |
| OFF * | 9-10 |
| INT | 9-10, 7-8 |
| LO | 3-10 |
| HI | 2-3 |
| MIST | 2-3 |
| The washer is on | 1 -7 |
| Work interval regulator | 11-12 [0 <-> 36 kOhm] |
Rear window wiper and washer switch.
| Switch position | Conclusions |
| Washer on, wiper off | 4-6, 13-14 |
| OFF | 13-14 |
| ON | 5-14 |
| Washer and wiper included | 5-14,4-6 |
If the conductivity is not as described, replace the wiper/washer switch.
6. Install in the reverse order of removal.
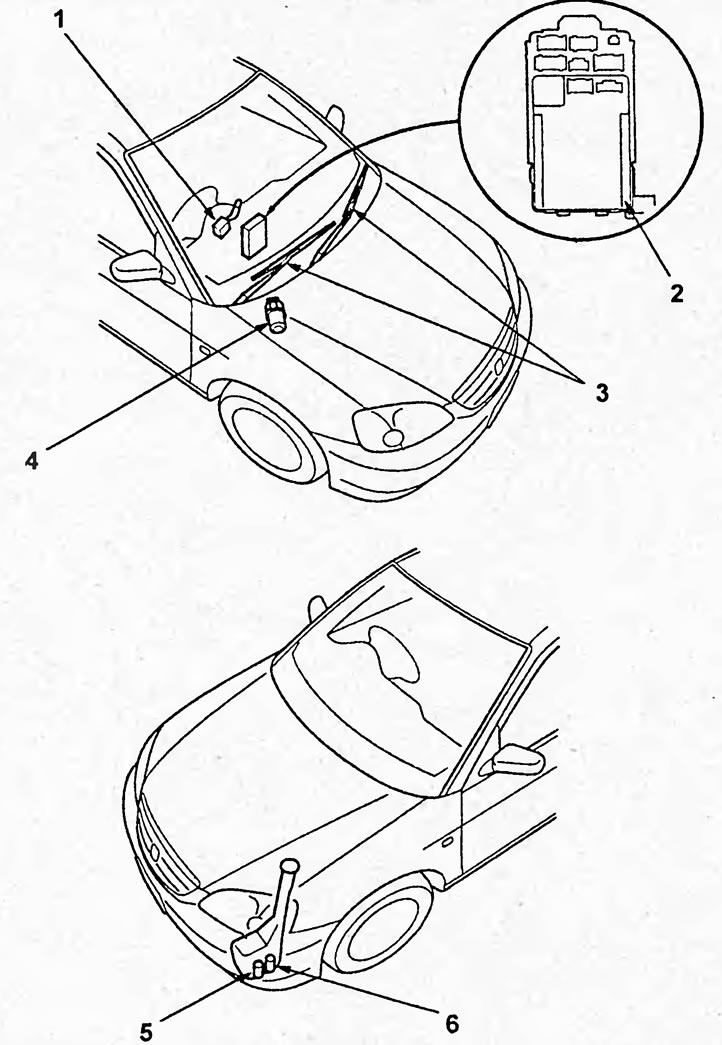
Location of windshield wiper and washer components. 1 - windscreen wiper and washer switch, 2 - Multiplex system unit, 3 - windscreen wiper levers and blades, 4 - windscreen wiper drive motor, 5 - rear window washer electric pump, 6 - windscreen wiper motor.
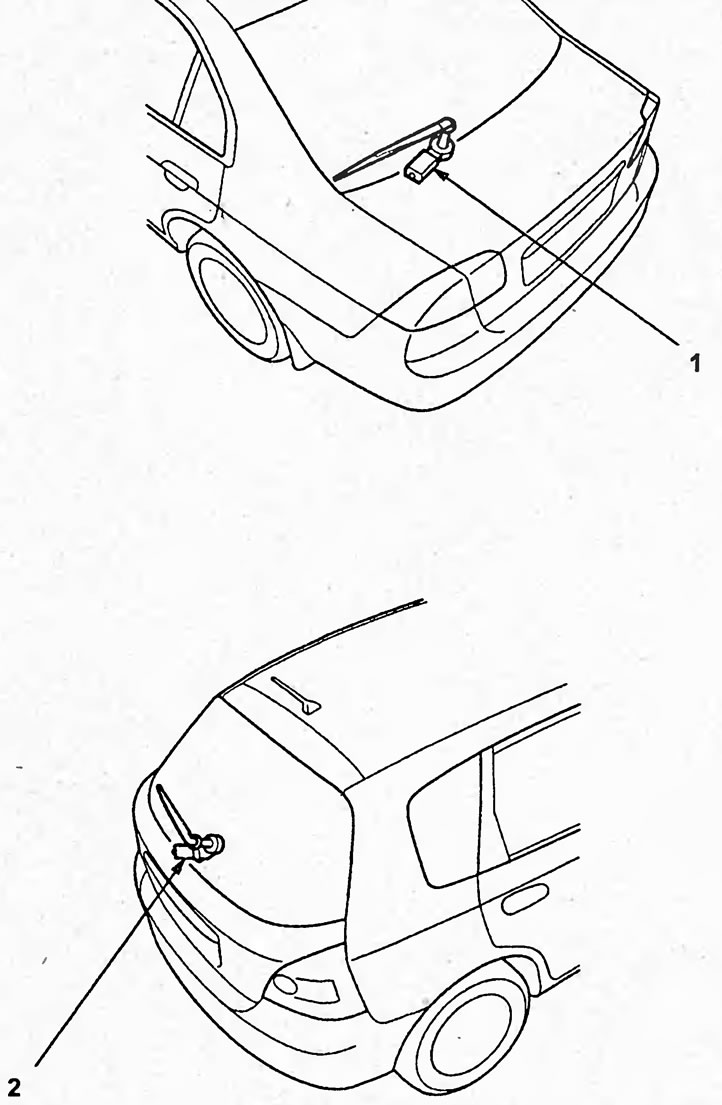
Location of windshield wiper and washer components. 1.2 - rear window wiper motor.
(The text was taken from the website www.HondaBook.ru)