
Removal and installation
1. Remove the hub and axle (2WD models) or bearing holder (4WD models).
2. Jack up the trailing arm (A) of the rear suspension.
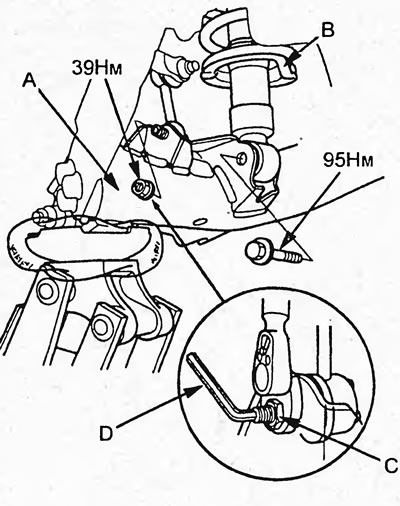
3. While holding the stabilizer link pin with a hex key (D), loosen the nut (C) and disconnect the stabilizer link (B) from the trailing arm.
Tightening torque - 39 Nm
4. Loosen the bolt and disconnect the rear suspension strut from the trailing arm.
Tightening torque - 61 Nm
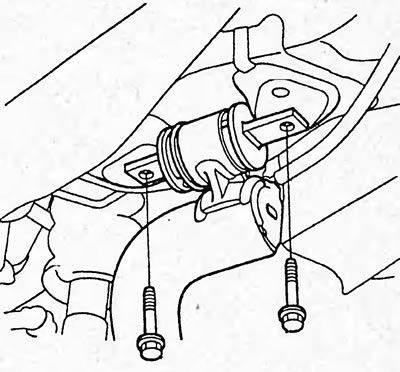
5. Unscrew the two bolts securing the trailing arm.
Tightening torque - 103 Nm
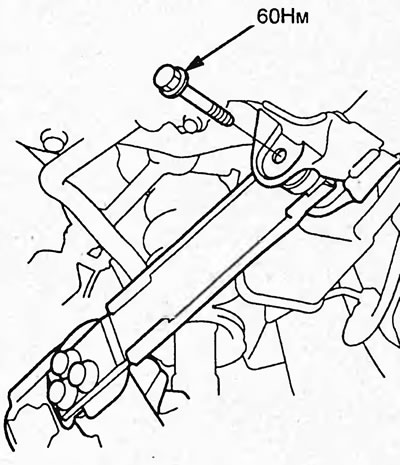
6. Loosen the bolt and, lowering the jack, remove the rear suspension trailing arm.
Tightening torque - 60 Nm
Note:
- Installation is carried out in the reverse order of removal.
- When installing, tighten the bolts and nuts that secure the elements, and tighten them to the specified torque only when the suspension is loaded.
- After installation, check and, if necessary, adjust the rear wheel alignment angles.
(Original article on the website: HONDABOOK)