
Note: New connecting rod bearings must be matched to the identification marks on the connecting rod and crankshaft (see below).
Lubricate all internal parts with engine oil when assembling.
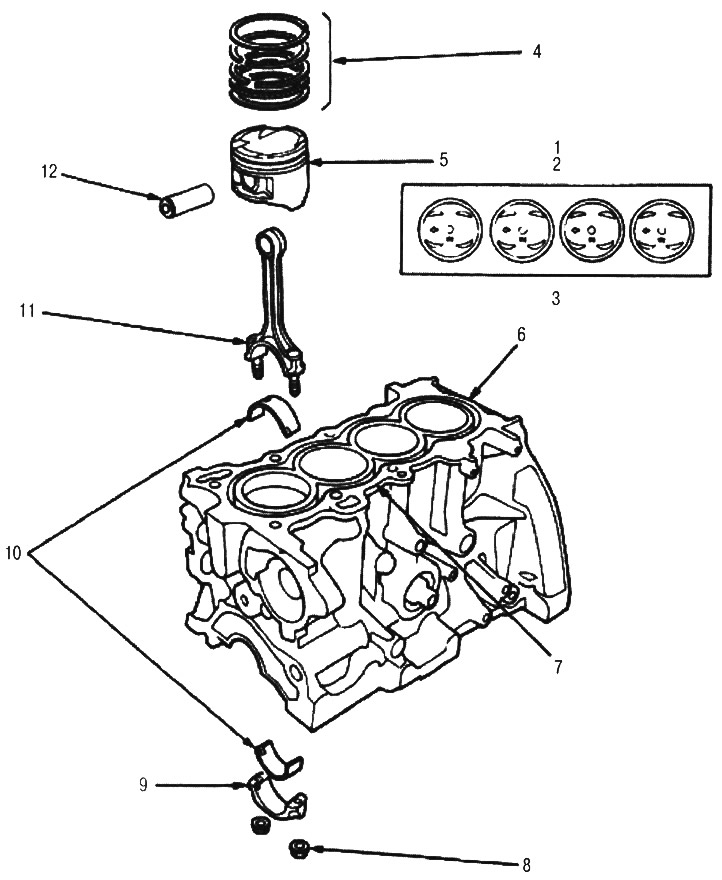
1. PISTON INSTALLATION DIRECTION
2. RELEASE
3. INLET
4. PISTON RINGS. Replacement (see below). Measurement (see below).
5. PISTON. Examination (see below)
Note: Before removing the pistons, check to see if the top of the cylinder has a carbon ring. If necessary, remove soot.
6. CYLINDER BLOCK. Cylinder check (see below). Warping check (see below). Cylinder honing (see below)
7. Before removing the piston, check to see if an annular protrusion from soot has formed in the upper part of the cylinder. If necessary, remove soot.
8. CONNECTING ROD CAP NUT, 8x0.75 mm, 31 Nm (3.2 kgf/m). Apply engine oil to the nut threads.
Note: After tightening each bearing cap, turn the crankshaft to make sure it does not bind.
9. CONNECTING ROD BEARING CAP. Installation (see below)
Note: Install the covers so that the notches in the bearings are on the same side as the notches in the connecting rods.
10. ROD BEARINGS. Gap (see below). Selection (see below)
11. CONNECTING ROD. Axial play (see below). Selection (see below)
12. PISTON PIN. Withdrawal (see below) Installation (see below). Examination (see below)