
Note:
- Do not turn the camshaft during inspection.
- Remove the rocker arms and valve rocker shafts.
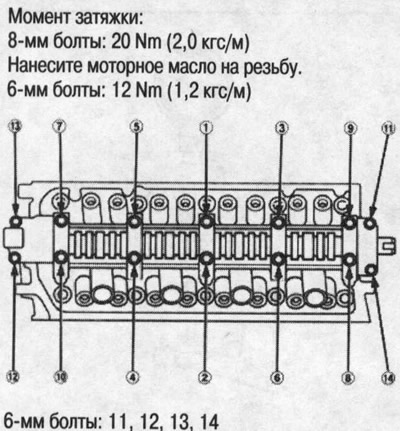
1. Place the camshaft and brackets on the cylinder head and tighten the bolts to the specified torque.
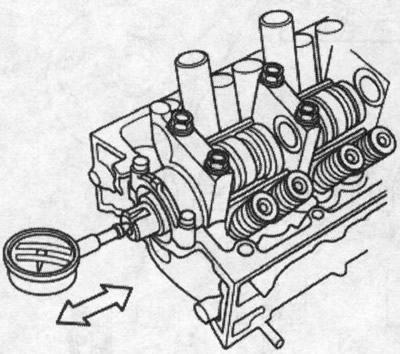
2. Move the camshaft towards the rear of the cylinder head.
3. Set the indicator to zero by resting it against the end of the camshaft. Move the camshaft and read the axial clearance.
Axial clearance of the camshaft:
- Standard (new): 0.05-0.15 mm
- Redraw: 0.5 mm
4. Remove the bolts, then remove the camshaft brackets from the cylinder head.
- Remove the camshaft from the cylinder head, wipe it clean, then inspect the cams. Replace the camshaft if the cams show signs of pitting, scratches, or excessive wear.
- Clean the camshaft mounting surfaces in the cylinder head, then place the camshaft back in place.
- Place lengths of calibrated Plastigage plastic wire on the camshaft bearing journals.
5. Install the camshaft brackets and tighten the bolts to the specified torque.
6. Remove the camshaft brackets, then measure the widest part of the flattened wire on each journal.
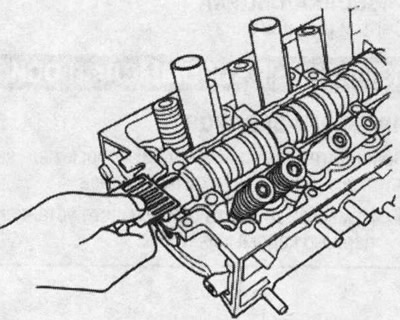
Oil clearance between camshaft and brackets:
- Standard (new): 0.060-0.089 mm
- Limit: 0.15 mm
7. If the oil clearance between the camshaft and brackets is outside the tolerance:
- If the camshaft has already been replaced, you will need to replace the cylinder head.
- If the camshaft has not been replaced, first check the runout by securing the camshaft on prisms.
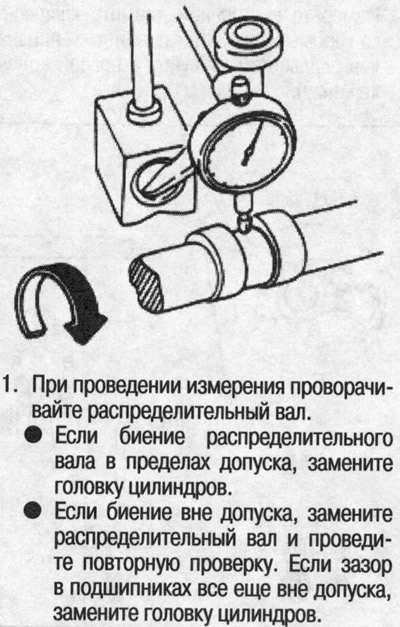
1. When taking measurements, turn the camshaft.
- If the camshaft runout is within tolerance, replace the cylinder head.
- If the runout is out of tolerance, replace the camshaft and recheck. If the bearing clearance is still out of tolerance, replace the cylinder head.
Camshaft runout:
- Standard (new): 0.03 mm
- Limit: 0.04 mm
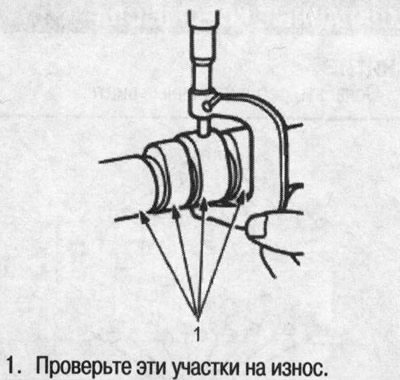
8. Check the cam wear. Cam height:
Standard (new):
- Intake: 35.299 mm
- Release: 37.281 mm
(The original text of the article is located on the website: Hondabook.ru)