
Note:
- To avoid damaging the paintwork, cover the fenders with cloth.
- To avoid damaging the wiring, disconnect it carefully by grasping the connector.
- To avoid incorrect connections, label all electrical wiring and hoses. Also make sure they do not come into contact with other wiring or hoses or interfere with other components.
1. Lock the hood in the open position (secure the support rod into the bottom hole).
2. First disconnect the cable from the negative battery terminal, then from the positive one.
3. Remove the battery.
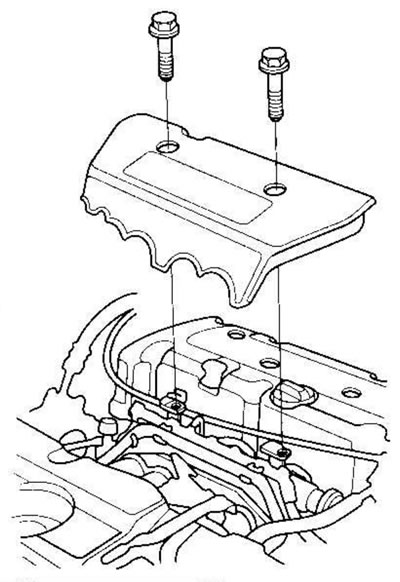
4. Remove the cover from the intake manifold.
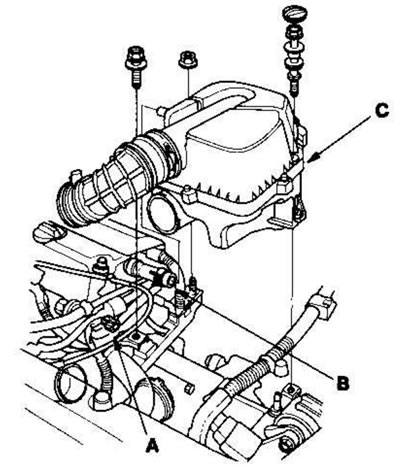
5. Disconnect the intake air temperature (IAT) sensor connector (A) and remove the breather hose (B), then remove the air cleaner housing (C).
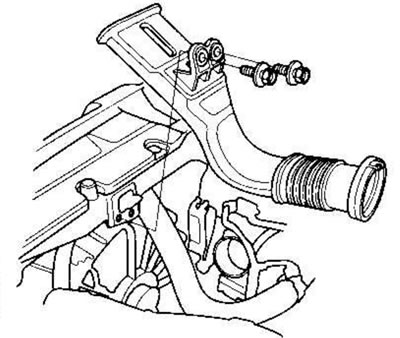
6. Remove the air intake.
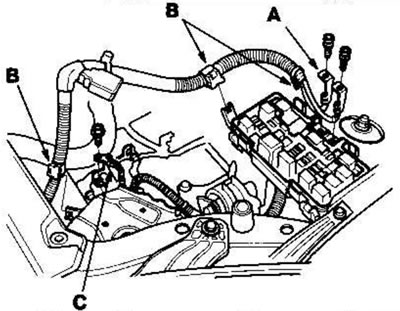
7. Disconnect the battery cables from the underhood fuse/relay box, then remove the harness clamps (B) and disconnect the ground cable (C).
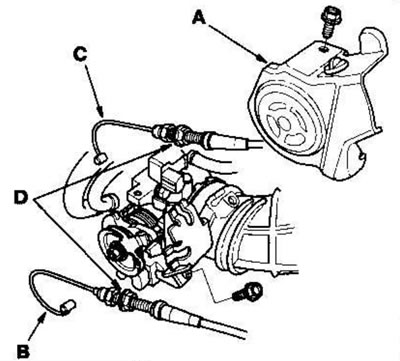
8. Remove the throttle cover (A). Fully open the throttle linkage and cruise control linkage by hand, then disconnect the throttle cable (B) and cruise control cable (C) from the linkages. Loosen the locknuts (D), and then remove the cables from the bracket.
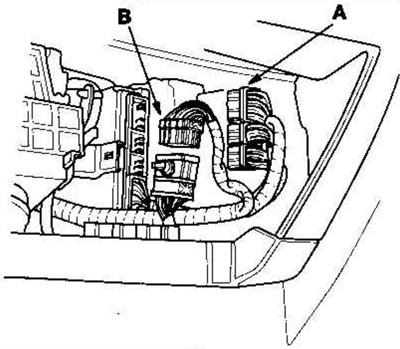
9. Disconnect the connectors (A) from the ECM/PCM and the main wiring harness connector (B).
Left hand drive models
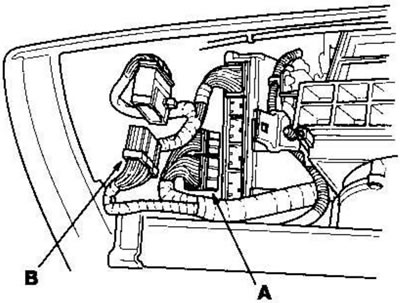
Right hand drive models
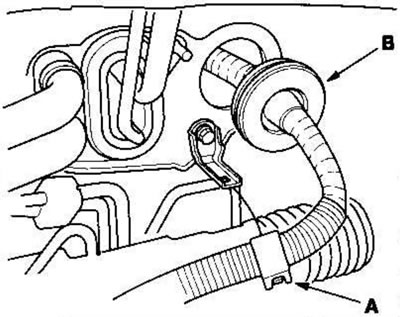
10. Remove the harness clamps (A) and rubber grommet (B), then pull the engine wiring harness out through the bulkhead.
Left hand drive models
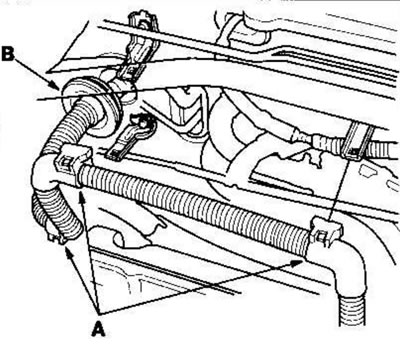
Right hand drive models
11. Relieve the fuel pressure.
12. Disconnect the fuel supply hose.
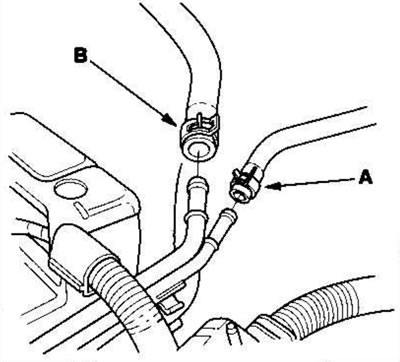
13. Disconnect the hose (A) from the carbon filter (EVAP) and the vacuum hose (B) from the power brake.
14. Remove the clutch slave cylinder and clutch line bracket (manual transmission).
15. Remove the gear shift cable and selector cable (manual transmission).
16. Remove the power steering pump (P/S) drive belt.
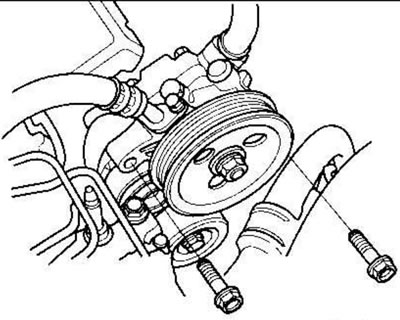
17. Remove the power steering (P/S) pump without disconnecting the hoses.
18. Remove the radiator cap.
19. Raise the winch to its full height.
20. Remove the front wheels.
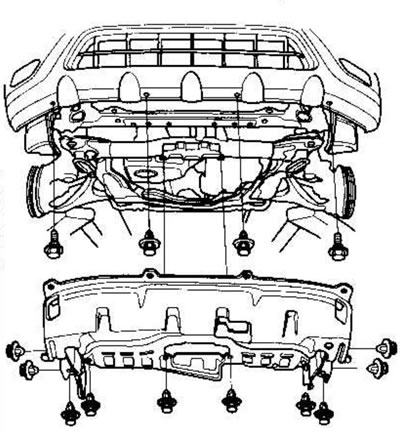
21. Remove the mud deflector.
22. Loosen the radiator drain plug and drain the engine coolant.
23. Drain the transmission fluid.
- See ch. "Manual transmission"
- See ch. "Automatic transmission"
24. Drain the engine oil.
25. Disconnect the primary heated oxygen sensor connector (A) (primary HO2S) (except for the K20A5 engine).
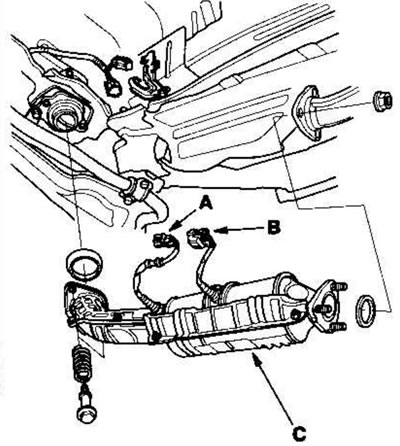
26. Disconnect the secondary heated oxygen sensor connector (B) (secondary HO2S) (models KE, KG, KS, KR, KU, KZ, KQ, FO).
27. Remove the TWC catalytic converter (C) assembly (engines K20A4, K24A1) or exhaust chamber (C) (k20A5 engines).
28. Separate the propeller shaft from the transfer case (4WD models).
29. Disconnect the stabilizer rods.
30. Disconnect the ball joints of the lower suspension arms.
31. Remove the drive shafts. Apply clean motor oil to all components. Place plastic bags over the ends of the drive shafts and tie them.
32. Disconnect the gear shift cable (automatic transmission).
33. Disconnect the lower hose.
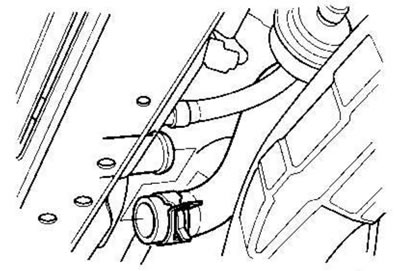
34. Unscrew the mounting bolt (A) of the ATF filter (automatic transmission).
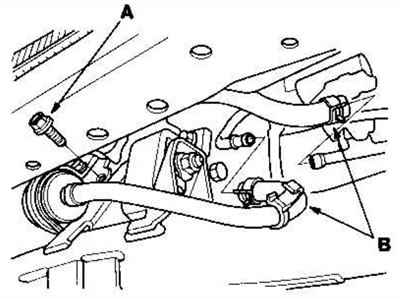
35. Disconnect the ATF cooler hoses (B), then plug the ATF cooler hoses and pipes (AT).
36. Lower the winch.
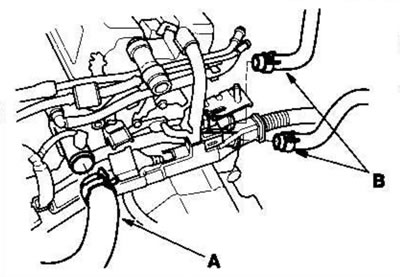
37. Disconnect the upper hose (A) and heater hoses (B).
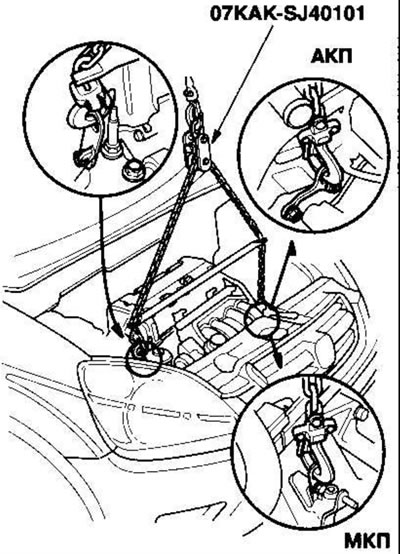
38. Secure the lifting device (available for sale for models supplied to EEC countries) behind the engine, as shown in the figure at the top of the right column.
39. Remove the gearbox support bracket mounting bolts/nuts.
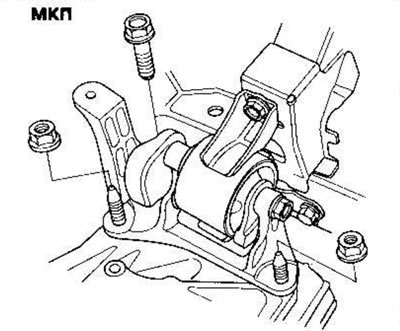
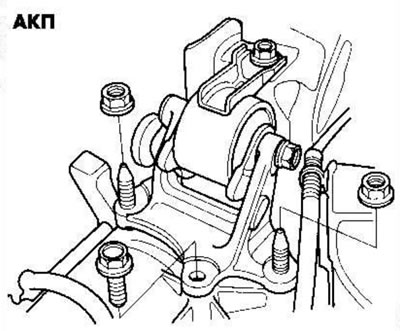
40. Unscrew the mounting bolt and nut of the upper bracket.
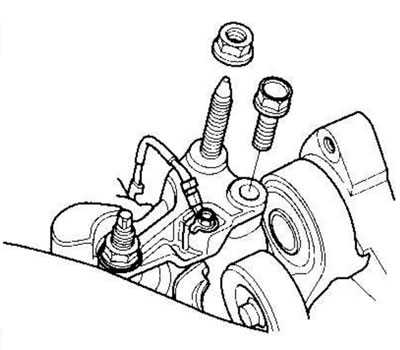
41. Make sure the winch brackets are installed correctly. Raise the winch to its full height.
42. Unscrew the rear support mounting bolts.
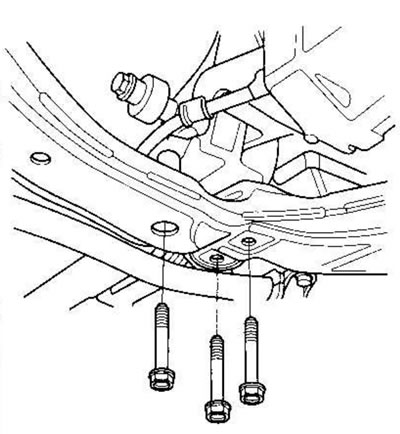
43. Unscrew the front support mounting bolts.
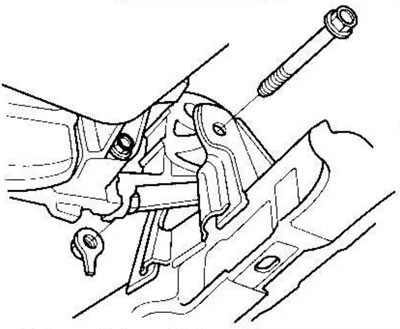
44. Using a marker, make alignment marks on the reference lines that align with the centers of the rear subframe mounting bolts (B).
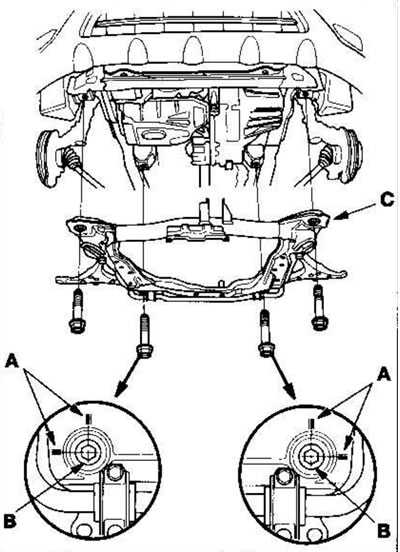
45. Remove the front subframe (C).
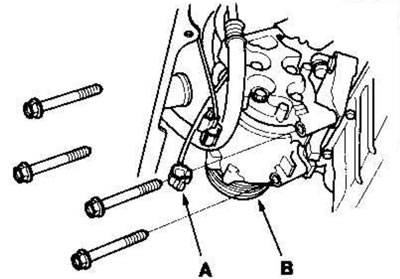
46. Disconnect the connector (A) from the compressor clutch, then remove the air conditioning compressor (B) without disconnecting the hoses from the air conditioning system.
47. Make sure you have completely disconnected the vacuum hoses, fuel hoses, coolant hoses and electrical wiring from the engine/transaxle assembly.
48. Slowly lower the engine approximately 150 mm. Check again that all hoses and wiring are disconnected from the engine/gearbox assembly.
49. Lower the engine. Remove the chain winch.
50. Remove the engine from under the vehicle.
(Original material on the website «HondaBook»)