
Withdrawal
Attention: do not allow working fluid to come into contact with painted surfaces. If the working fluid comes into contact with the painted surface, wash it off immediately.
1. Pump out the brake fluid from the clutch reservoir.
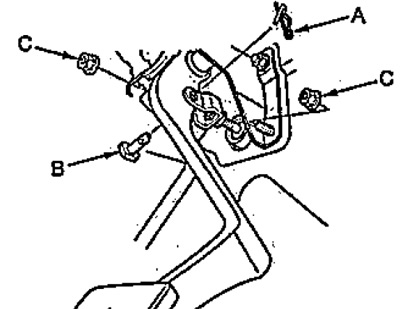
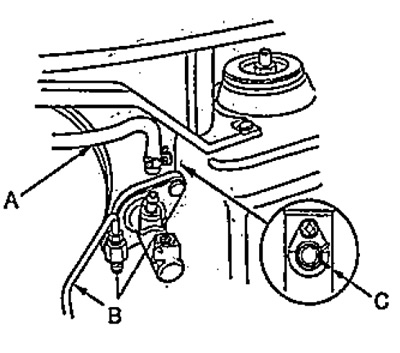
2. Remove the latch (A). Disconnect the handset (IN).
Note: after disconnecting the tube, install a plug on it.
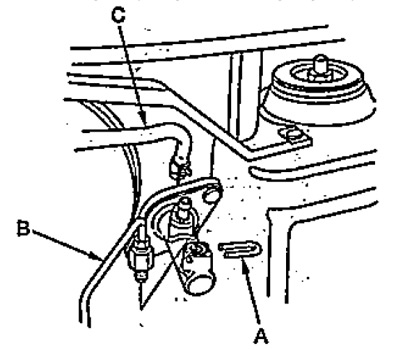
3. Disconnect the hose (WITH) from the clutch master cylinder.
Note: after disconnecting the hose, install a plug on it.
4. Remove cotter pin (A) and remove the fork axle (IN). Loosen the nuts (WITH).
5. Remove the clutch master cylinder.
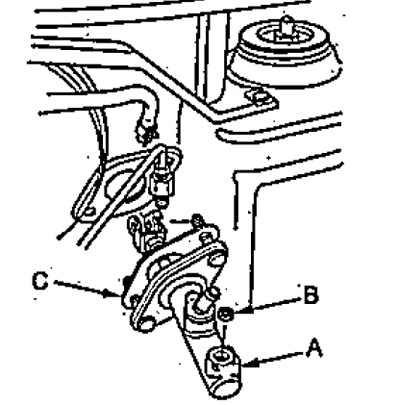
6. Remove the O-ring (IN) and gasket (WITH) from the clutch master cylinder.
Installation
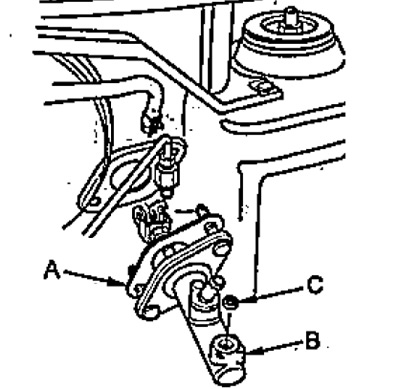
1. Install the O-ring (WITH) and gasket (A) to clutch master cylinder (IN). Install the clutch master cylinder.
2. Install the fork axle (A) and secure it with a pin (IN).
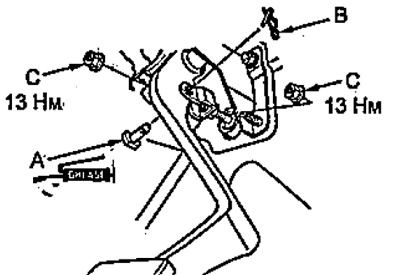
3. Tighten the nuts (WITH) mounting the clutch master cylinder.
- Tightening torque - 13 Nm
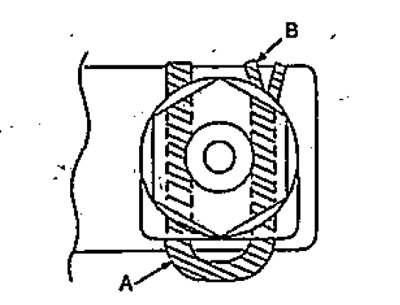
4. Connect the hose (A) and a tube (IN) to the clutch master cylinder. Make sure the clamp is installed as shown in the picture.
5. To prevent the latch from popping out (A) using a slotted screwdriver, bend the end (IN) latch as shown in the figure.
6. Fill in a brake liquid in a tank.
7. Bleed the clutch (see section "Bleeding the hydraulic clutch release").
8. Check the fluid level in the reservoir.