HondaBook.ru
Auto companies Volkswagen Auto companies Ford Auto companies Lada Auto companies Skoda Auto companies BMW Auto companies Mazda Auto companies Peugeot
English Русский
Български
Беларускі
Український
Српски
Hrvatski
Română
Polski
Slovenský
Magyar
Bookmark Contacts Sitemap   


Accord Civic Fit / Jazz CR-V HR-V Others Articles
CR-V 1 (1995-2001, petrol) CR-V 2 (2002-2006, petrol)

Brake disc — removal and installation (Honda CR-V 1)

  • Main
  • Honda CR-V
  • 1 (1995-2001, petrol)
  • Chassis and running gear
  • Brake system
  • Brake disc — removal and installation
0
1. Remove some of the liquid from the tank.

2. Raise the car and remove the wheel.

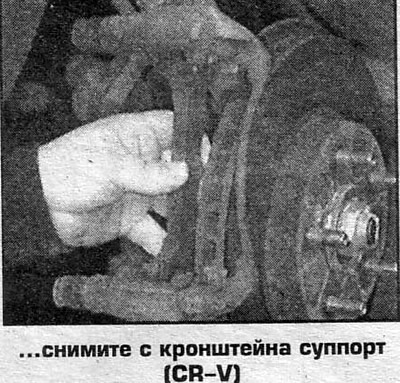
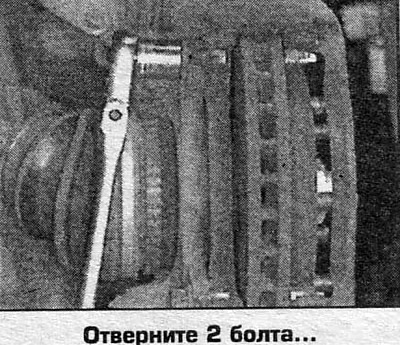
3. Remove the caliper. Loosen the bolts and remove the caliper bracket.

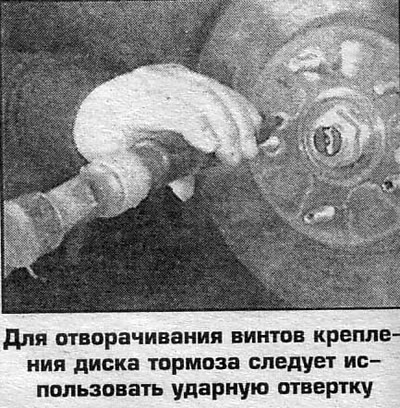
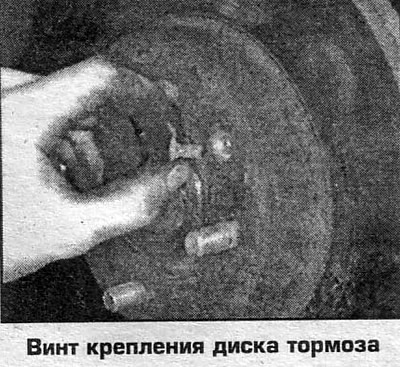
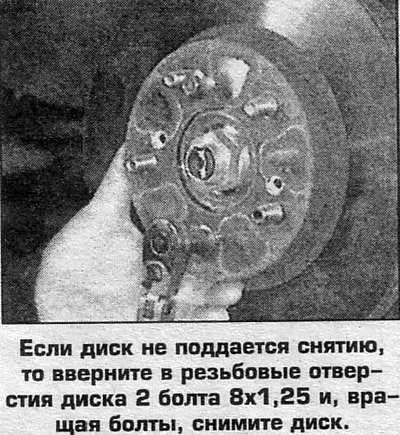
4. Loosen the screws and remove the disc by pushing it off the studs by hand. If the disc cannot be removed, screw 2 bolts 8x1.25 into the threaded holes of the disc and, by turning the bolts, remove the disc.

5. Installation is carried out in reverse order. Before installing the pads, spread the pistons in the caliper. When finished, press the brake pedal to press the pads against the disc.

Examination


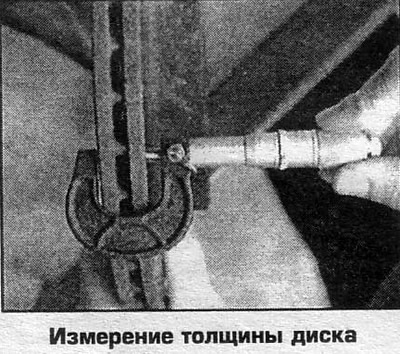
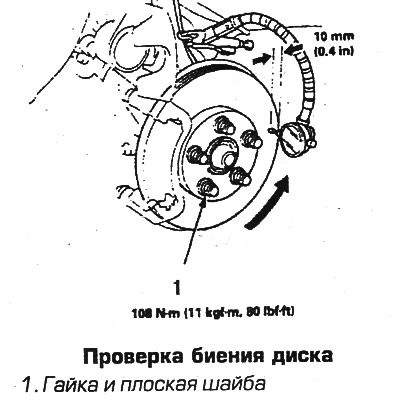
Check the hub runout with the disk removed, which should be no more than 0.05 mm. If the runout exceeds the norm, replace the hub. The maximum permissible thickness value is cast on the disk. If after grinding the thickness is less than this value, replace the disc. Check the disc thickness, thickness uniformity and runout. To check the runout of the brake disc, you need to remove the pads. After removing the wheel, tighten the wheel nuts to 108 Nm. Check the condition of the disc (measurements are performed only on a disk without noticeable damage) and install the dial indicator and, rotating the disk, check the runout. If the runout exceeds 0.10 mm, check the thickness of the disc. If the thickness is greater than the maximum permissible, then sand the disk with special sandpaper without removing it from the car.

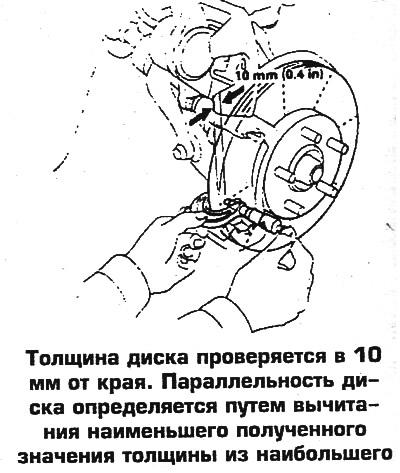
The thickness of the disc is checked 10 mm from the edge, every 45° (1/8 turn). Disk parallelism (uniformity of thickness) determined by subtracting the smallest obtained thickness value from the largest. If the unevenness exceeds 0.015 mm, sand the disc. If after grinding the thickness is less than the maximum permissible value, replace the disc.


The thickness of the disc is checked 10 mm from…

The thickness of the disc is checked 10 mm from…

The thickness of the disc is checked 10 mm from…

The thickness of the disc is checked 10 mm from…


Original published on this resource: HondaBook.ru
This article is available at: russian, bulgarian, belarusian, ukrainian, serbian, croatian, romanian, polish, slovak, hungarian
This information has been verified: Emil Safonov
Share with friends:
◀ Previous
CR-V 1: Brake system
Next ▶

Support — removal and installation
Rear disc brake pads
Front disc brake pads
Bleeding the brake system
Brake Hydraulic Hoses and Lines — Removal and Installation
Drum brakes — removal and installation
Drum brake shoes — removal and installation
Wheel cylinders of drum brakes — removal and installation
Parking brake parts
Parking brake cables — removal and installation
See also other articles from Honda manuals:
Rear Disc Brake Caliper — Removal and Installation Honda Accord 3 (1985-1989)
Brake disc — inspection, removal and installation Honda Civic 3 and 4 (1983-1991)
Emergency Brake Assistance (EBA) Honda Fit 1 (2001-2008)
Front Brake Disc — Checking Runout Honda HR-V 1 (1998-2006, petrol)
Front Brake Discs — Brake Disc Grinding Honda Avancier 1 (1999-2003, petrol)
Link in different formats to this article
Comments and feedback from visitors
No comments yet


How much will 31 + 27 ?


CR-V 2 (2002-2006, petrol) 
  • General information
  • User manual
  • Technical data
  • Maintenance
  • Power unit
  • Engine repair
  • Lubrication system
  • Cooling system
  • Exhaust system
  • Fuel system
  • Engine management
  • Engine electrical equipment
  • Transmission
  • Clutch
  • Manual gearbox
  • Automatic gearbox
  • Rear differential
  • Drive shafts
  • Chassis and running gear
  • Steering
  • Front suspension
  • Rear suspension
  • Brake system
  • Body and interior
  • Exterior (external elements)
  • Interior (internal elements)
  • Doors, locks and windows
CR-V 1 (1995-2001, petrol) 
  • General information
  • Maintenance
  • Tips for car owner
  • Power unit
  • Engine repair
  • Engine overhaul
  • Cooling and lubrication system
  • Engine electrical equipment
  • Control system
  • Fuel system
  • Transmission
  • Clutch and drive shafts
  • Car gearbox
  • Chassis and running gear
  • Front suspension
  • Rear suspension
  • Steering
  • Brake system
  • Body and interior
  • Body service
  • Exterior (external elements)
  • Interior (internal elements)
  • Electrical equipment
  • Equipment and devices
  • Electrical circuits
HondaBook.ru © 2018–2026 • Mobile version • Sitemap: EN BG BY UA RS HR RO PL SK HU • Feedback • Driver Information • Search system • Bookmark
Accord 3 (1985-1989) • Accord 6 (1997-2002) • Civic 3 and 4 (1983-1991) • Civic 5 and 6 (1991-2000) • Civic 6 (1995-2000) • Civic 7 (2000-2005) • Civic 8 (2005-2011) • Fit 1 (2001-2008) • CR-V 1 (1995-2001) • CR-V 2 (2002-2006) • HR-V 1 (1998-2006) • Avancier 1 (1999-2003) •
 
This website uses cookies to ensure proper functioning. By clicking "OK," you agree.