
1. Remember that if you install larger pistons, you will also need to use new rings of the correct size.
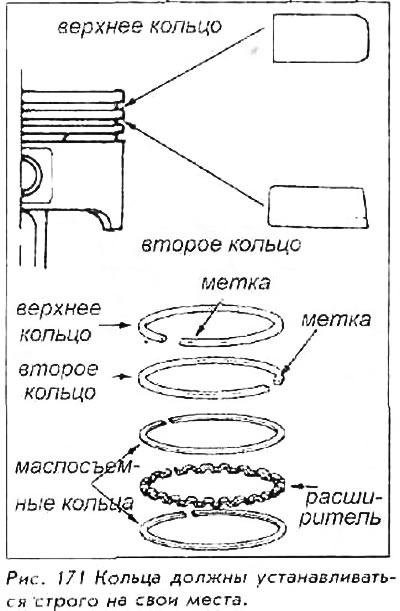
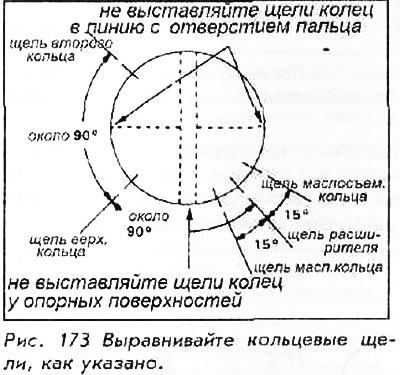
2. Install the rings on the piston, bottommost first. Typically, the oil scraper ring is carefully installed by hand. Other rings require the use of a piston ring extractor. There is a risk of ring breakage or piston damage if a puller is not used. Proper alignment of the annular slots is critical to ensure oil scraping. No two slots should be aligned; they should be evenly distributed around the piston.
3. Using a piston ring plier, install the number two compression ring and then the top compression ring. Note that these rings are the same thickness but different profiles; they must be installed strictly in their places. Make sure all markings face up and that all annular spaces are correctly spaced. These spaces should also not be in line with the pin or piston bearings.
4. All pistons, connecting rods and caps must be installed in their cylinders. Make sure all labels and imprinted numbers are present and correct. Double check that the piston rings and connecting rod bearings are installed correctly. Reinstall the pieces of rubber hose onto the connecting rod bolts.
5. Copiously coat the cylinder walls and crankshaft journals with clean, fresh engine oil. Also coat the bearing surfaces on the connecting rod and cap.
6. Locate the FRONT marker on each piston and connecting rod. Place the piston and connecting rod assembly into each cylinder with the markers facing towards the camshaft drive belt. Make sure the number printed on each piston matches the cylinder number.
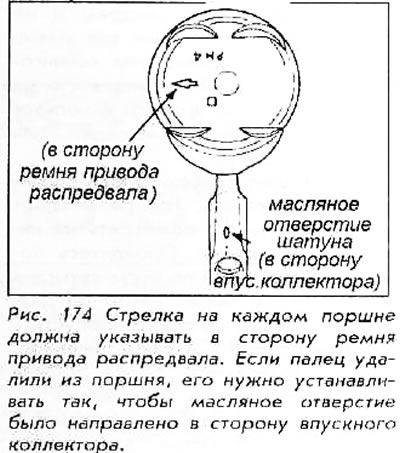
WARNING: An error in the correct location of the marker pointing to the front of the engine can lead to sudden and catastrophic engine failure.
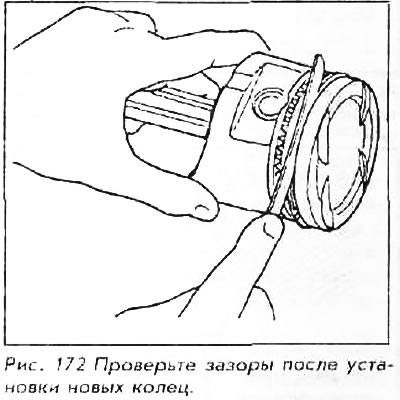
7. Install an annular compressor around one piston and gently tighten it until the rings are almost completely compressed.
8. Gently press down on the top of the piston with the handle of a wooden mallet, pushing the piston into the barrel of the qi lindr. As soon as all three rings are in the sleeve, the piston will begin to move almost freely.
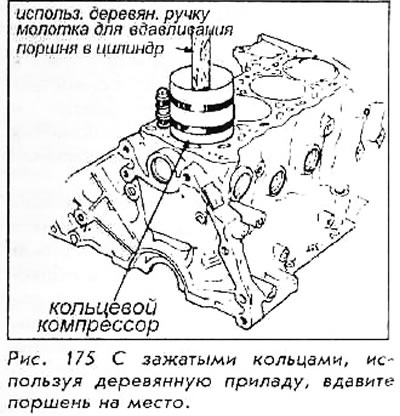
WARNING: If there is any resistance or binding during installation - DO NOT use force. Tighten or adjust the ring compressor and/or reinstall the piston. Brute force will destroy the ring (A) or damage the piston.
9. From below, install the connecting rod in its place on the crankshaft. Remove the rubber hoses from the bolts. Check the connecting rod cap, make sure the bearings are in place and properly installed, then install the cap (with correct number and position) and nuts. Leave the nuts lightly tightened - this will allow the other pistons to be installed more easily.
10. Assemble the remaining pistons in the same way, repeating steps 7, 8 and 9.
11. Having installed all the pistons and lightly tightened all the nuts on the covers, proceed to the final tightening of the nuts. Check the tightening torque against the table given in this Chapter. Tighten each pair of nuts in 3 steps, alternating nuts with each other. Each of the passes when tightening should be approximately one third of the final tightening torque; for example, if the final tightening torque is 48 Nm, then the steps will be 16, 32 and then 48 Nm. The point is to install each cover on the crankshaft without distortion and with even pressure.
12. Turn the crankshaft a few turns, make sure everything moves smoothly and without gearing. When connecting the piston and connecting rod, the crank may be hard to turn. Try to rotate it continuously evenly so as to eliminate the hard cranking of the crankshaft.
13. Install the oil pan. Even if the engine must be left outside the vehicle for other repairs, install a drip tray to protect the bottom edge. Install all pan bolts and tighten properly.
14. If no further work is required, continue assembly by installing the head, camshaft drive belt, etc.
15. When you start the engine after assembly, the exhaust will be very smoky for some time - this burns out the oil inside the cylinders. This is fine; The smoke will quickly disappear as it warms up. Depending on the condition of the spark plugs, they should be checked after the engine is turned off for oil contamination.
16. Reminder: after you assemble the engine, remember that you have a rough, essentially new engine - follow the rules for operating rough engines.