
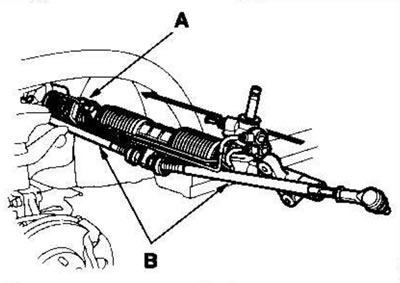
2. Carefully move the steering gear towards the passenger side until the worm shaft touches the wheel arch opening on the frame. Continue to slide the mechanism toward the passenger side until it snaps into place.
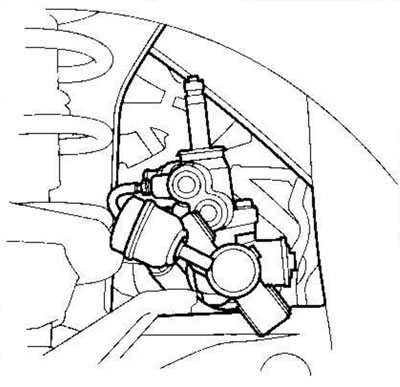
Note: Make sure the power steering outlet hose is routed between the steering gear and the right tie rod.
3. Install the rubber bushing (A) onto the worm shaft.
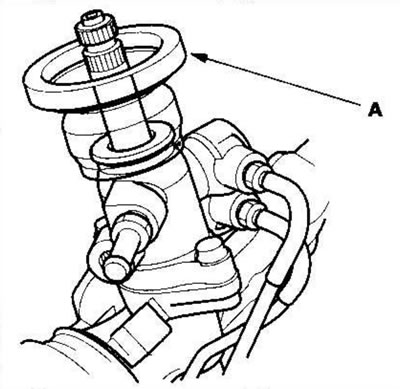
4. Install the support cushion on the steering gear from the cylinder side.
5. Insert the worm shaft through the bulkhead and install the steering gear onto the mounting brackets. Make sure the rubber bushing fits securely onto the worm shaft.
6. Install two 10mm flange bolts and washers on the left side of the steering gear (on right-hand drive models: on the right side).
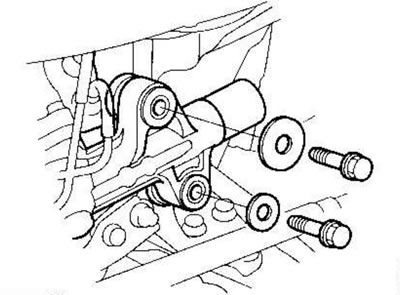
7. Position the cutout (A) on the support pad (B) as shown in the figure and install it on the steering gear housing. Install the mounting bracket (C) onto the support pad.
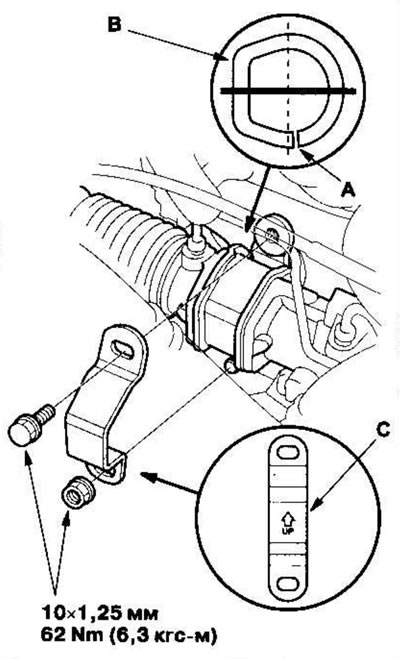
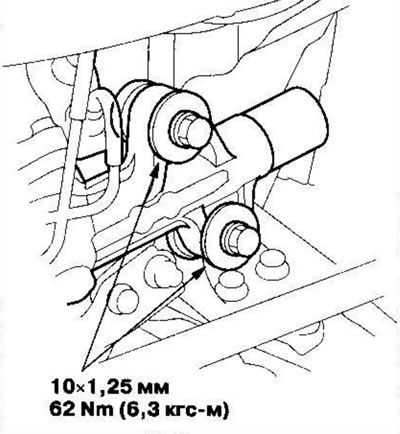
8. First, install the 10mm flange bolt and nut, then tighten them alternately to the specified torque in two passes or more.
9. Tighten the flange bolts on the left side of the steering gear (on right-hand drive models on the right side) with the required moment.
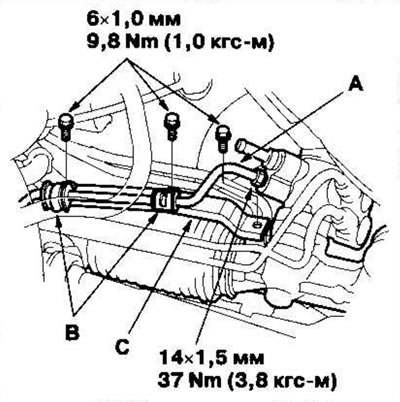
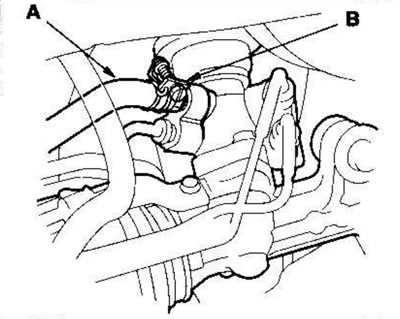
10. Securely connect the feed pipe (A) on the driver's side and tighten the 14 mm socket nut to the specified torque.
Left hand drive cars
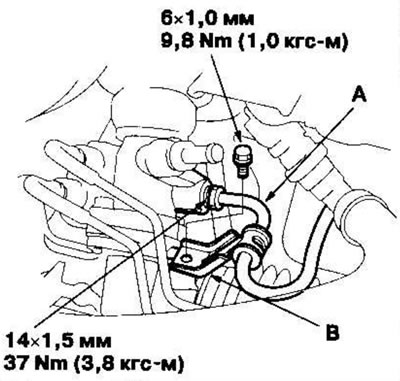
Right hand drive cars
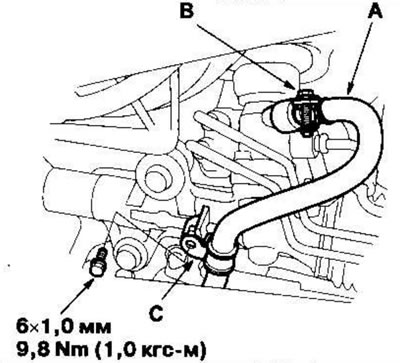
11. Install the clamps (B) on the power steering inlet pipe and outlet pipe bracket (C) (on left-hand drive models) on the steering mechanism.
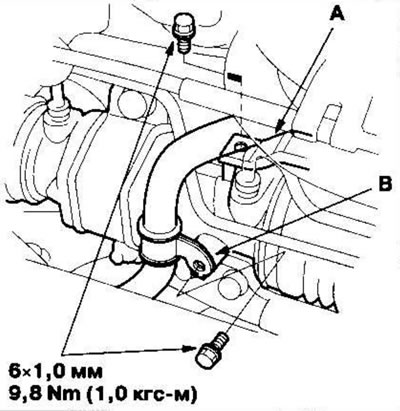
12. Securely connect the outlet hose (A) and tighten the adjustable hose clamp (B). Install the outlet pipe clamp (C) (on right-hand drive models) on the steering mechanism.
Left hand drive cars
Right hand drive cars
13. Install the power steering outlet pipe bracket (A) (on left-hand drive models) and the clamp of the outlet pipe (B) on the steering gear. Make sure the tubes do not interfere with or interfere with other parts.
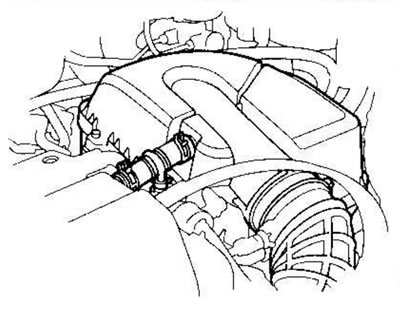
14. Install the air cleaner.
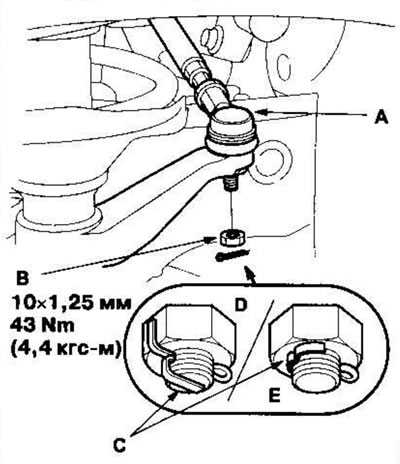
15. Remove any grease or dirt from the cone area and threads of the ball joints. Then connect the tie rod end (A) to the steering arm. Install the 10mm nut (B) and tighten to the specified torque.
16. Install a new cotter pin (C) and bend it as shown in figure (D) or (E).
17. Install the steering column joint (A) and connect the steering gear shaft (B) to the worm shaft (C). Make sure that the steering column joint is connected as follows:
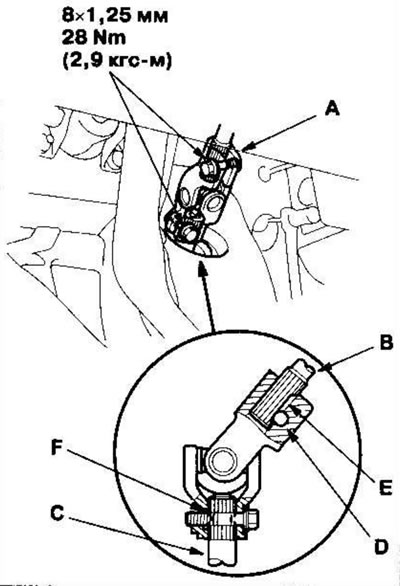
- Place the upper end of the steering column joint onto the steering gear shaft (align the bolt hole (D) with the flat area (E) on the shaft).
- Place the lower end of the steering column joint onto the worm shaft (C) (align the bolt hole with the groove (F) on the shaft) and tighten the lower joint bolt. Make sure the lower steering column pivot bolt is securely seated in the groove on the worm shaft.
- Pull on the steering column joint to ensure it is fully seated. Then insert the top hinge bolt and tighten it. Tighten the steering column joint bolts to the specified torque.
18. Install the driver's side instrument panel lower cover.
19. Install the front wheels and place them in a position corresponding to straight-ahead movement
20. Center the coiled wire by first turning it clockwise until it stops. Then turn it counterclockwise (approximately two and a half turns) so that the arrow on the label points straight up. Install the steering wheel.
21. Fill the system with power steering fluid and bleed air from the system.
22. After installation, perform the following checks.
- Start the engine, let it run at idle speed, turn the steering wheel from lock to lock several times and warm up the fluid. Check for any leaks from the steering gear.
- Adjust the front wheel alignment.
- Check the angle of the steering wheel spokes.
If the angles of the steering wheel spokes to the right and left are not the same (steering wheel and rack are not centered), adjust the engagement of the joint/worm shaft splines, then, if necessary, adjust the front wheel toe-in by turning the right and left steering rods.
The article is based on information from the website: HONDABOOK