
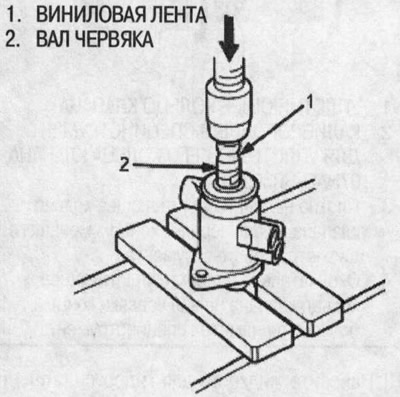
21. Press the worm shaft/valve out of the valve body.
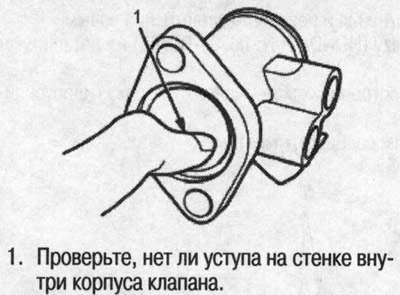
22. Check the inner wall in the valve body where the sealing ring slides by inserting your finger. If there is a ledge in the wall, the valve body is worn. Replace the valve body.
Note:
- There may be marks on the valve body wall from the sliding of the sealing ring. Replace the valve body only if there is a step in the wall.
- When replacing the valve body, place new gaskets on the bearing surface of the body and adjust the thickness.
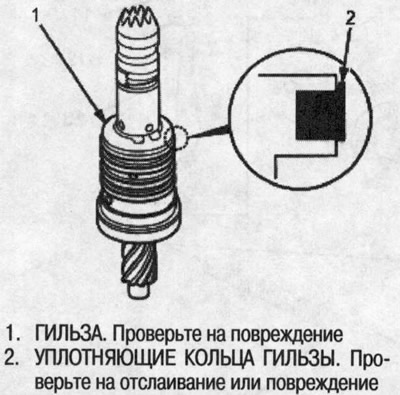
23. Check the edges of the grooves in the liner for wear, burrs or other damage.
Note: The worm shaft and sleeve are precision-fitted. If either the worm shaft or sleeve is replaced, replace them as a unit.
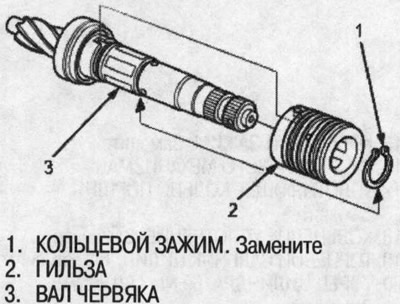
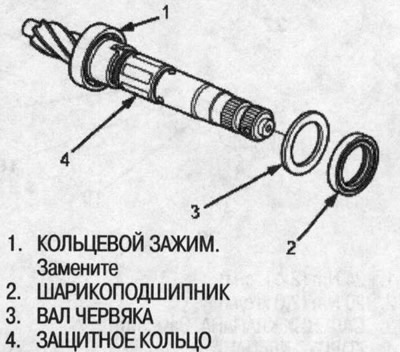
24. Remove the ring clamp and worm shaft sleeve from the worm shaft.
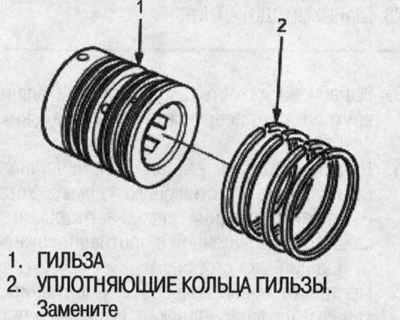
25. Using a milling cutter or similar tool, cut and remove the four sealing rings from the liner. When removing the sealing rings, be careful not to damage the edges of the liner grooves or the outer surface.
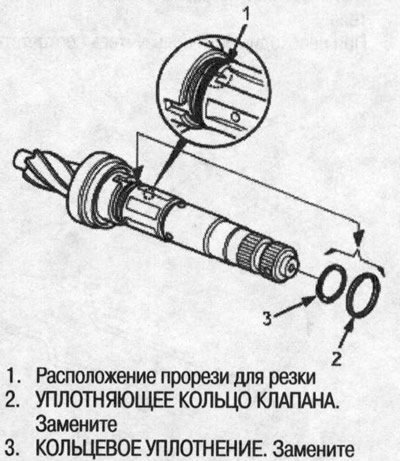
26. Using a milling cutter or similar tool, cut off the valve seal ring and O-ring in the groove on the worm shaft. Remove the valve seal ring and O-ring. When removing the valve seal ring and O-ring, be careful not to damage the edges of the groove on the worm shaft and the outside surface.
27. Remove the valve seal and the protective ring from the worm shaft. Disassemble taking into account the following:
- Check the ball bearing by slowly rotating the outer race. If there is excessive play, replace the worm shaft and sleeve assembly.
- The worm shaft and sleeve are fitted to each other with a high degree of precision; do not mix old and new worm shafts and sleeves.
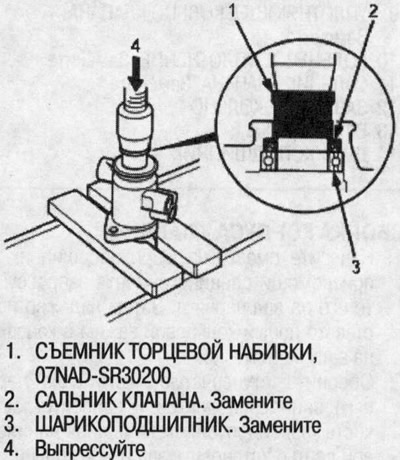
28. Using a special tool, press the valve seal and ball bearing out of the valve body as shown in the figure.
[The article was copied from the website «HondaBook.ru»]