
HondaBook.ru
Auto companies Volkswagen Auto companies Ford Auto companies Lada Auto companies Skoda Auto companies BMW Auto companies Mazda Auto companies Peugeot
English Русский
Български
Беларускі
Український
Српски
Hrvatski
Română
Polski
Slovenský
Magyar
Bookmark Contacts Sitemap   


Accord Civic Fit / Jazz CR-V HR-V Others Articles
Accord 3 (1985-1989) Accord 6 (1997-2002)

Changing engine oil and filter (Honda Accord 3)

  • Main
  • Honda Accord
  • 3 (1985-1989)
  • General information
  • Maintenance
  • Changing engine oil and filter
0
The oil and filter should be changed at least every 7,500 miles, although circumstances often dictate more frequent changes. The type of engine used in the Accordax and Prelude - with the crankshaft on top - is particularly sensitive to proper lubrication with clean oil. Don't risk expensive repairs or loss of power by neglecting the easiest part of car maintenance. Change the oil and filter regularly. The filter should be changed every time the oil is changed.

The oil drain plug is located at the bottom, behind the oil pan (engine base, at the bottom of the car). The oil plug has a washer to seal it to the oil pan.
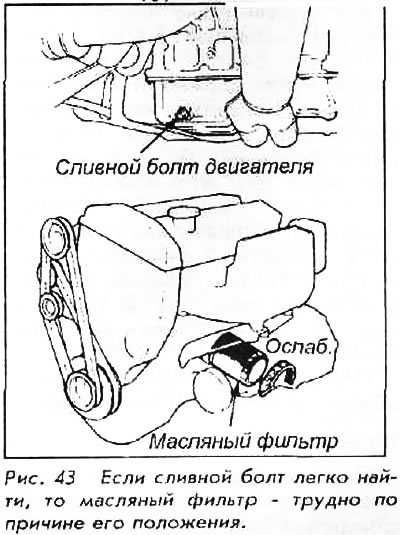
The oil drain plug is located at the bottom,…


The oil drain plug is located at the bottom,…


The washer should always be replaced with a new one after draining the oil. When buying a filter - buy a washer too. The oil filter is located on the engine side.


The oil filter cannot be replaced except by working from underneath. The vehicle must be raised, securely supported and the filter accessible between the block and bulkhead. There is very little space to work on removing the filter with a standard open-end wrench; it is recommended to use a tip.


The mileage calculations shown in the data are Honda's recommended intervals under assumed normal driving conditions. Normal driving means the vehicle is driven long enough to warm up the oil; typically this is about 15 km. If your daily commute is shorter than this distance, your vehicle use qualifies as severe duty.
The mileage calculations shown in the data are…


Severe operating conditions also include: dusty, dirty or off-road conditions, as well as frequent starting and braking, towing. Regular towing of a trailer also puts the vehicle in this category, as constantly working at the limit of its load capacity. Change the oil and filter twice as often as in normal operation.
Severe operating conditions also include: dusty,…


Always drain the oil after the engine has been running long enough for the oil to reach normal temperature. Hot oil will flow more easily and remove more contaminants than if the drain was done when the engine was cold. To change the oil and filter:


1. Start the engine and let it warm up to normal temperature, then turn it off.

2. Raise the front of the vehicle and support it.

3. Place a drainage tray with a capacity of at least 4 liters under the drain.

CAUTION: Oil and motor components will be hot. Be careful not to burn yourself.


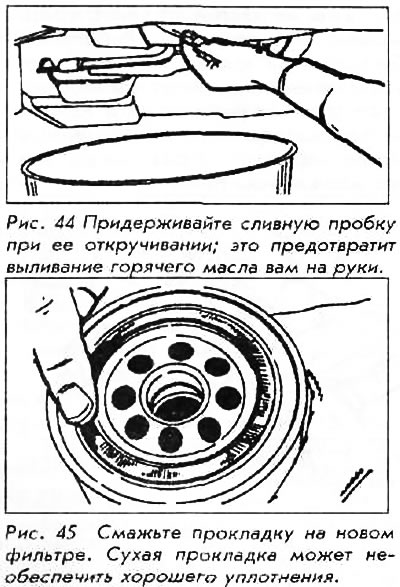
4. Loosen the drain plug with a wrench. Unscrew it by hand. Hold the internal pressure with the plug, as you unscrew it, the oil will not flow out along the threaded cut. When the last turn of the thread is unscrewed, brush the plug aside and the hot oil will flow into the pan.

5. Allow the oil to drain completely, then install the drain plug and tighten it to 45 Nm. Do not overtighten the plug, or you will have to buy a new crankcase or plug due to thread stripping.

6. Use a filter wrench when removing the filter. Keep in mind that it holds almost 1 quart of dirty, hot oil. Make sure the old gasket is torn off the filter and not stuck to the block.

7. Empty the old filter into the drain pan.

8. Using a clean rag, wipe the filter holder on the engine block. Make sure the rag does not leave any residue that would obstruct the flow of oil.

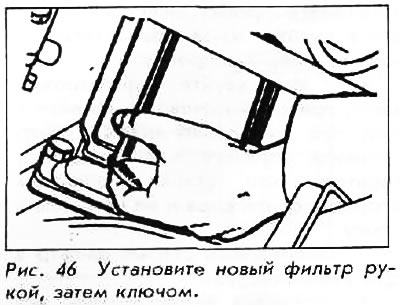
9. Coat the rubber gasket on the filter with new oil. Screw the filter onto the engine by hand; when the gasket touches the surface of the holder, turn it another 1/2-3/4 - no more, or you will crush the gasket and it will leak.

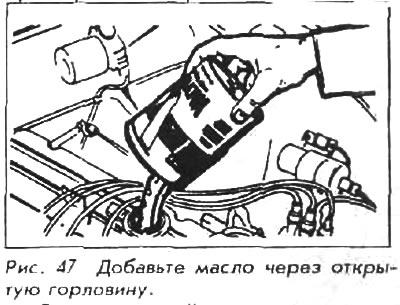
10. Double check the drain plug; is it in place? Fill the engine with the required amount of new oil. See the table "Capacities".

11. Double check everything: Is the filler cap in place? Is the dipstick in place? Have the drain pan and tools been removed from underneath the car? Lower the car to the ground.


12. Check the oil level with the dipstick. It is normal for the level to be slightly above the full fill marker. Start the engine without using the accelerator pedal and let it idle for a few minutes.

CAUTION: Do not run the engine above idle until it has developed oil pressure, as indicated by the oil pressure indicator.


13. Turn off the engine, let the oil drain for a minute, and check the level. Check for leaks around the filter and drain plug, and correct if necessary.

(Based on materials from the website: hondabook.ru)
This article is available at: russian, bulgarian, belarusian, ukrainian, serbian, croatian, romanian, polish, slovak, hungarian
This information has been verified: Yaroslav Shiryaev
Share with friends:
◀ Previous
Accord 3: Maintenance
Next ▶

Checking the engine oil level
Fuel recommendations
Engine Oil Recommendations
Wheels and tires — replacement and wheels
Air Conditioning System — System Discharge
Manual transmission
Automatic transmission
Cooling system
Master brake cylinder
Power steering pump
See also other articles from Honda manuals:
Replacing the engine oil filter Honda Civic 8 (2005-2011)
Engine oil and filter Honda Fit 1 (2001-2008)
Checking and replacing engine oil and filter Honda CR-V 1 (1995-2001, petrol)
Engine Starting Procedure Honda HR-V 1 (1998-2006, petrol)
Starting the engine Honda Avancier 1 (1999-2003, petrol)
Link in different formats to this article
Comments and feedback from visitors
No comments yet


How much will 11 + 42 ?


Accord 6 (1997-2002) 
  • General information
  • Introduction to the guide
  • User manual
  • Maintenance
  • Power unit
  • Four-cylinder engines
  • Six-cylinder engines
  • Engine overhaul
  • Cooling system
  • Heater and air conditioner
  • Power and exhaust systems
  • Engine electrical equipment
  • Engine management
  • Transmission
  • Mechanical gearbox
  • Automatic gearbox
  • Clutch and drive shafts
  • Chassis and running gear
  • Brake system
  • Car suspension
  • Steering
  • Body and interior
  • Exterior (external elements)
  • Interior (internal elements)
  • Electrical equipment
  • Equipment and devices
  • Electrical circuits
Accord 3 (1985-1989) 
  • General information
  • Maintenance
  • Power unit
  • Engine adjustment
  • Engine repair
  • Engine electrics
  • Emission management
  • Engine management (carburetor)
  • Electronic injection
  • Programmable injection
  • Schematic of emission system
  • Fuel system
  • Feedback management
  • Transmission
  • Manual gearbox
  • Automatic gearbox
  • Clutch
  • Chassis and running gear
  • Front suspension
  • Rear suspension
  • Steering
  • Brake system
  • Electrical equipment
  • Ventilation and heating
  • Air conditioner
  • Cruise control system
  • Equipment and devices
HondaBook.ru © 2018–2026 • Mobile version • Sitemap: EN BG BY UA RS HR RO PL SK HU • Feedback • Driver Information • Search system • Bookmark
Accord 3 (1985-1989) • Accord 6 (1997-2002) • Civic 3 and 4 (1983-1991) • Civic 5 and 6 (1991-2000) • Civic 6 (1995-2000) • Civic 7 (2000-2005) • Civic 8 (2005-2011) • Fit 1 (2001-2008) • CR-V 1 (1995-2001) • CR-V 2 (2002-2006) • HR-V 1 (1998-2006) • Avancier 1 (1999-2003) •
 
This website uses cookies to ensure proper functioning. By clicking "OK," you agree.