
2. Disconnect the O/D switch/shift lock solenoid valve/parking pin switch connector.
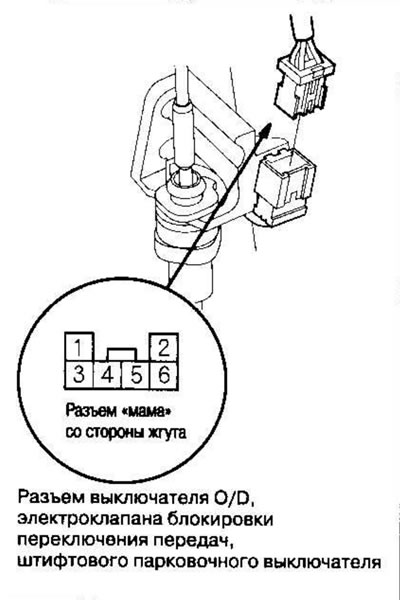
Note: Left hand drive model shown; the layout on the right-hand drive model is symmetrical.
3. Check if there is continuity between terminals No. 5 and No. 6 of the O/D switch/shift lock solenoid valve/pin park switch connector when the O/D switch is pressed and released.
4. If the O/D switch is OK, reconnect the connector and install the removed components.
If the O/D switch is faulty, proceed to step. 5 to replace the O/D switch.
5. Shift the selector lever to the [R] position.
6. Slide the locking tab (A) from the holder (B) along the gear shift cable.
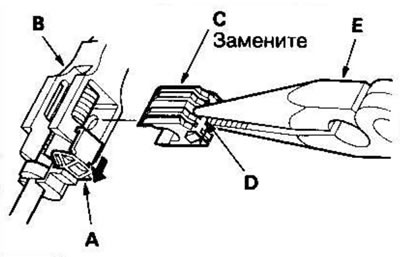
7. Remove the shift cable retainer (C) by grasping it at the center (D) with needle-nose pliers (E) from the shift cable end and the shift cable end holder.
Note: Do not attempt to pry the cable retainer with a screwdriver, otherwise you may damage the shift cable end holder.
8. Separate the gear shift cable end from the gear shift cable end holder.
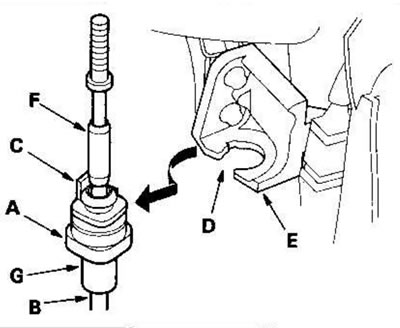
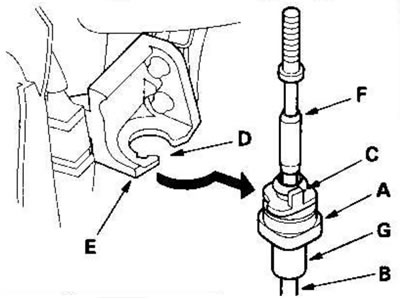
9. Turn the cartridge holder (A) on the gear shift cable (B) a quarter turn; the tab (C) on the cartridge holder will fit into the slot (D) of the cartridge holder bracket (E). Then slide the holder and remove the shift cable from the cartridge holder bracket.
Note: Do not remove the shift cable by twisting the cable guide (F) and shock absorber (G).
Left hand drive models
Right hand drive models
10. Remove the selector lever assembly.
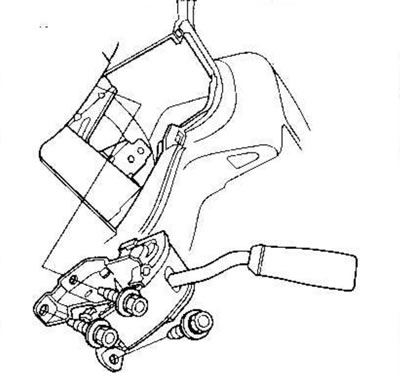
Note: Left hand drive model shown; the layout on the right-hand drive model is symmetrical.
11. Remove the harness from the clamp at the base of the selector lever bracket and remove the strapping tape from the harness.
12. Pry up the retaining tabs on the rear side of the O/D switch/shift lock solenoid valve/pin park switch connector (A) and remove the rear cover (B).
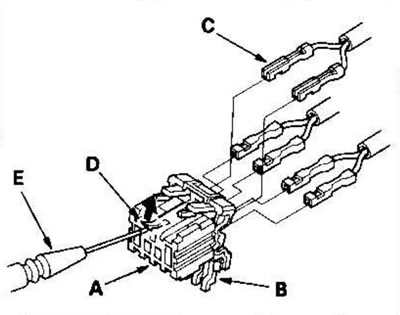
13. Remove the contact (C) from the connector by pressing the locking tab (D) in the connector using a thin-tip screwdriver (E). Remove all six contacts.
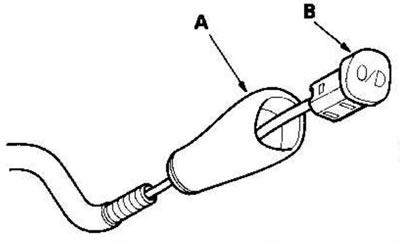
14. Remove the selector lever handle (A), then remove the O/D switch (B) from the handle.
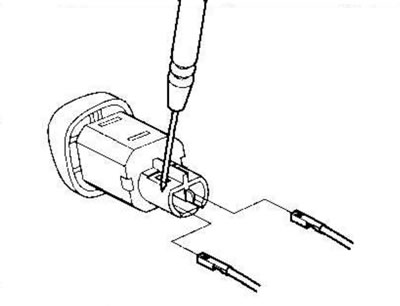
15. Remove the contacts from the O/D switch connector by pressing on the locking tabs in the connector using a thin-tipped screwdriver.
16. Pull the O/D switch harnesses (A) from the selector lever bracket side and remove them. When removing the harnesses, leave the harness tube (B).
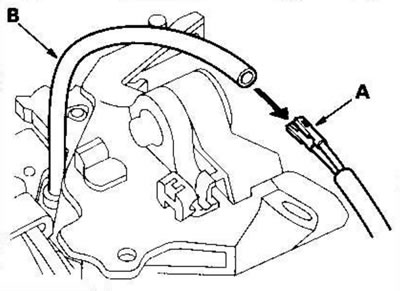
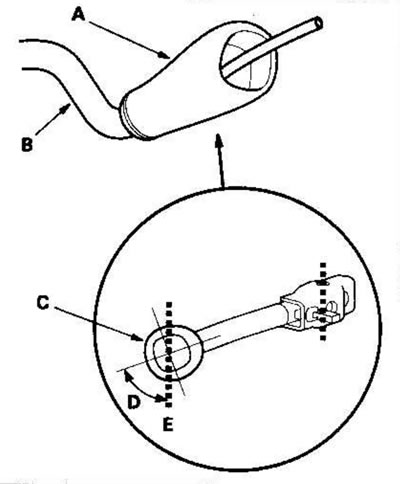
17. Install the handle (A) on the selector lever (B) and align the hole (C) of the switch with a 50° angle (D) to the vertical axis (E).
18. Insert the new O/D switch harness contacts (A) into the remaining harness tube (B), then tie the tube with twine (C) so that the contacts do not fall out of the tube.
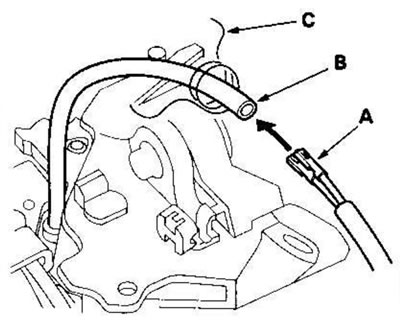
19. Pull the old tube from the side of the selector lever handle and install the O/D switch harnesses.
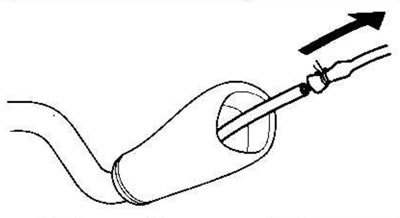
20. Remove the old harness tube from the O/D switch harness terminals.
21. Insert the harness contacts into the new O/D switch. Both harness contacts can be inserted into any socket.
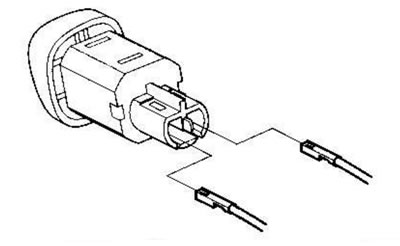
22. Insert the new O/D switch into the selector lever handle.
23. Insert the O/D switch harness contacts (A) into slots #5 and #6. Both O/D switch harness contacts can be inserted into either slot #5 or #6.
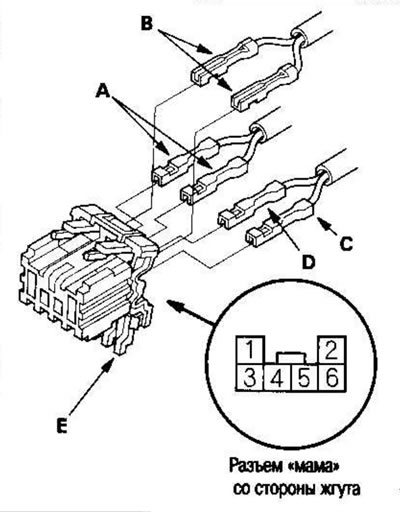
24. Insert the pin park switch harness contacts (B) into sockets #1 and #2. Both pin park switch harness contacts can be inserted into either socket #1 and #2.
25. Insert contact blue harness (C) of the gearshift lock solenoid valve into socket No. 3, and contact red harness (D) - into socket No. 4. Make sure that all six contacts are securely fixed, then install the rear cover (E).
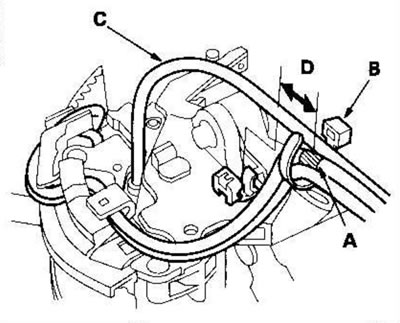
26. Align the marks (A) on the strands and secure the strapping tape (B) over the marks. Secure the O/D switch harness (C) with a clamp at a distance of 15 mm (D) from the strapping tape.
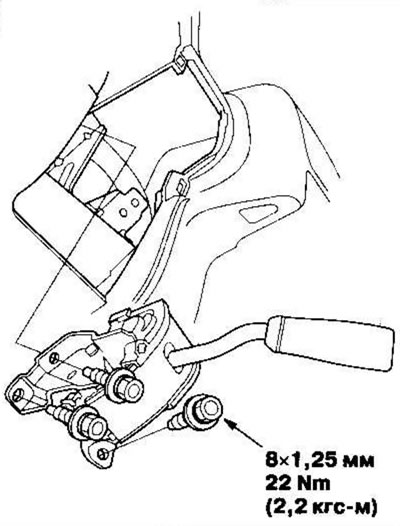
27. Install the selector lever assembly.
Note: Left hand drive model shown; the layout on the right-hand drive model is symmetrical.
28. Turn the ignition switch to the ON (II) position and check that the [R] position indicator comes on.
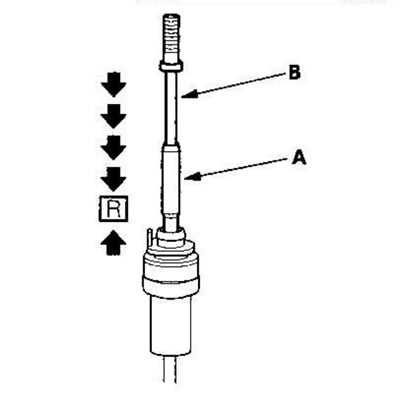
29. If necessary, press the gear shift cable all the way in, then release. Pull the shift cable back one notch so that it is in the [R] position. Do not adjust the shift cable while holding the shift cable adjustment guide (B).
30. Turn the ignition key to the OFF position.
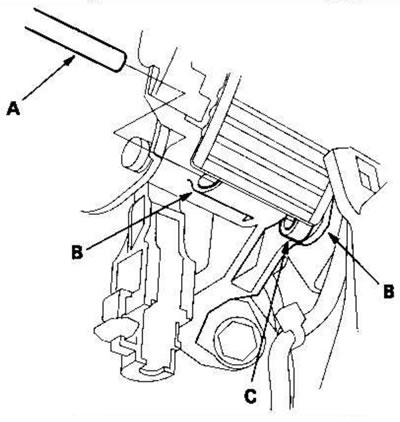
31. Insert a 6.0 mm diameter rod (A) into the guide holes (B) in the base of the selector lever bracket through the hole (C) in the selector lever. The selector lever is locked in the [R] position.
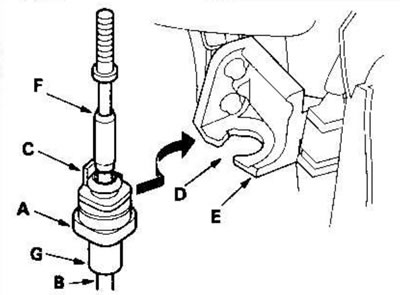
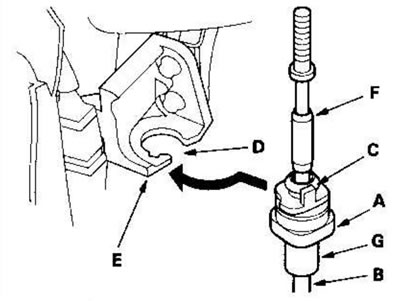
32. Rotate the cartridge holder (A) on the shift cable (B) so that the tab (C) on the holder aligns with the slot (D) in the cartridge holder bracket (E). Align the holder with the hole in the bracket, then insert the holder into the bracket. Turn the holder a quarter turn and secure the gear shift cable. Do not install the shift cable by twisting the cable guide (F) and shock absorber (G).
Left hand drive models
Right hand drive models
33. Insert the gear shift cable end (A) into the holder (B), making sure that no grease gets on the gear shift cable end and holder.
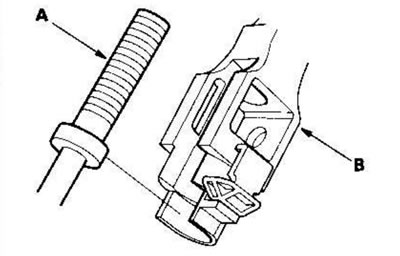
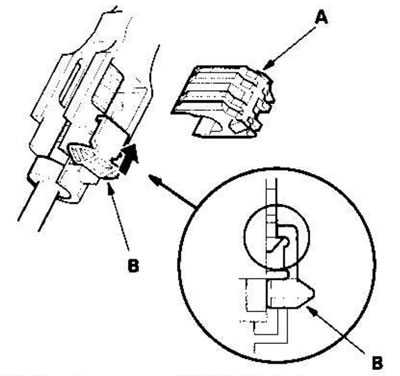
34. Install a new shift cable retainer (A) and secure the shift cable end and shift cable holder, then press the locking tab (B) until it stops and secure the connection.
35. Remove the 6.0 mm diameter rod inserted to secure the selector lever.
36. Connect the O/D switch/shift lock solenoid valve/pin park switch connector.
37. Move the selector lever through all gears and make sure that the automatic transmission gear position indicator follows the movement of the transmission range selector.
38. Make sure the O/D switch is working.
39. Install the instrument cluster cover assembly, driver side instrument panel lower cover, heater control panel, front console and ashtray.