Glove box
1. Remove the 2 side screws from inside the drawer.
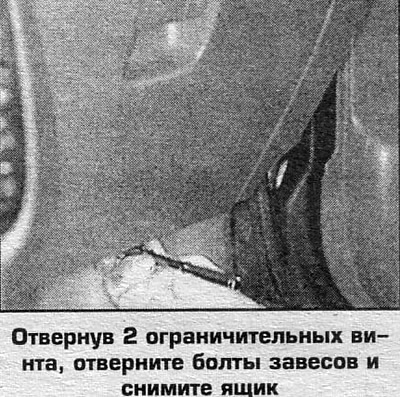
2. Loosen the bolts of the drawer curtains and remove the drawer.
3. Installation is carried out in the reverse order.
Bottom cover, driver's side
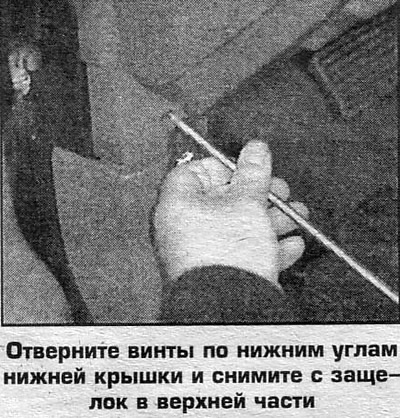
1. Loosen the screws at the bottom corners of the cover.
2. Gently push the cover towards you and remove it from the latches (The cover is attached with 3 latches at the top).
3. Installation is carried out in the reverse order.
Driver side knee pad
1. Remove the lower instrument panel cover from the driver's side.
2. Loosen the bolts and remove the knee pad from the air curtains.
3. Installation is carried out in the reverse order.
Lower decorative trim of the center section (on vehicles with automatic transmission)
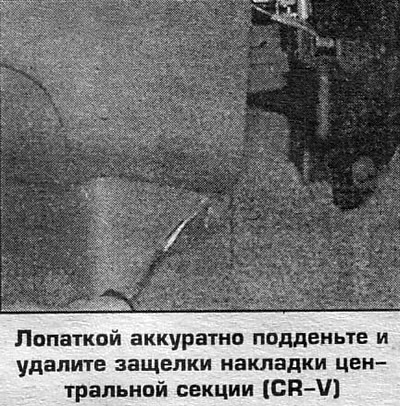
1. Using a spatula, carefully pry and remove the tabs on the pad.
2. Gently push the trim at the bottom and remove.
3. Installation is carried out in the reverse order.
Beverage container/holder (on vehicles with automatic transmission)
1. Remove the lower instrument panel cover.
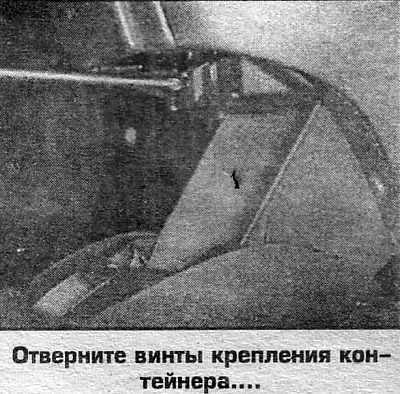
2. Open the container and remove the 6 screws securing the container to the frame of the center section.
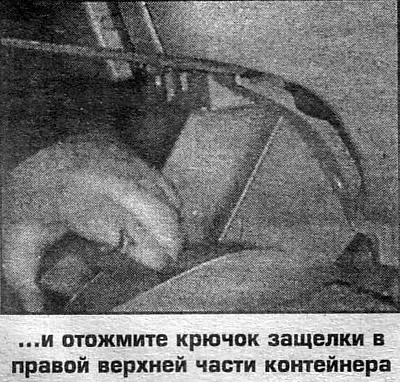
3. Using a small flat-blade screwdriver, pry out the latch hook on the top right side of the container while pushing the container towards you. Remove the container.
4. Installation is carried out in the reverse order.
Central floor section (vehicles with manual transmission)
1. Remove the shift lever handle.
2. Loosen the side screws securing the section and the 2 screws directly under the container.
3. Loosen the container fixing screws.
4. Remove container and center section.
5. Installation is carried out in the reverse order.
Lower central instrument panel cover
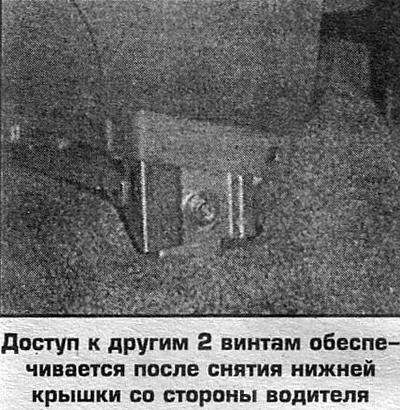
1. Remove the lower instrument panel cover from the driver's side.
2. Remove the glove box.
3. On vehicles with automatic transmission, remove the container.
4. On vehicles with manual transmission, remove container and center floor section.
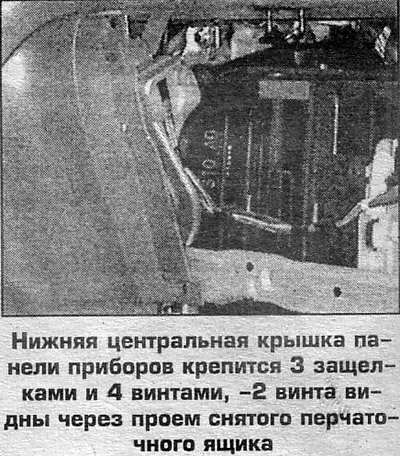
5. Remove 2 screws each at the top and bottom of the center cover.
6. Feed the left side of the cover and remove from the latches.
7. Installation is carried out in the reverse order.
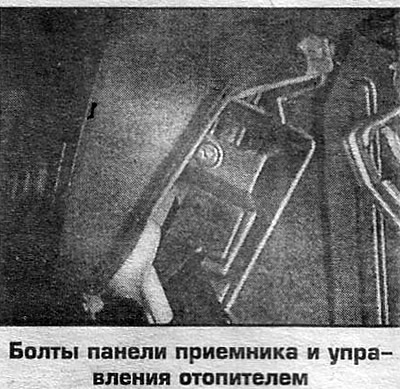
Receiver and heater control panel in the central part of the instrument panel
1. Remove the lower instrument panel cover from the driver's side.
2. Remove the glove box
3. On vehicles with automatic transmission, remove the container.
4. On vehicles with manual transmission, remove container and center floor section.
5. Remove the central bottom cover of the instrument panel.
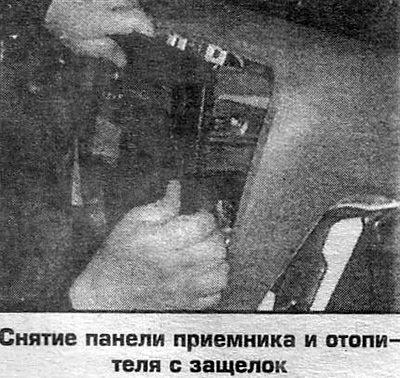
6. Unscrew the side bolts and remove the receiver and the heater control panel from the latches (the panel is fastened with 6 latches).
7. Disconnect the wires from the back of the panel. Remove the panel.
8. Turn away 2 bolts and remove the receiver.
9. Installation is carried out in the reverse order.
Driver's side switch panel
1. Remove the lower instrument panel cover from the driver's side.
2. Remove the panel from the latches and disconnect the wires.
3. Installation is carried out in the reverse order.
Ventilation nozzles
The nozzles are attached with curtains on top and latches on the bottom. Pry and remove the lower part of the nozzle from the latches, fold up and remove from the hooks. On parts of cars, disconnect the connector and remove the nozzle.
 |  |
 |  |
 |  |
 |  |