
Note. With an increase in noise background associated with the operation of the balancing shaft drive belt, first of all, you should always adjust its tension. This procedure can be performed without removing the timing covers. The adjustment of the tension force of the belt in question is made by the timing belt tensioner.
Withdrawal
1. Bring the piston of the right cylinder to the TDC position of the end of the compression stroke (see Section Bringing the piston of the first cylinder to the top dead center position (TDC)). Disconnect the negative cable from the battery.
Attention! If the stereo system installed in the car is equipped with a security code, before disconnecting the battery, make sure that you have the correct combination to activate the audio system!
2. Remove the steering pump drive belt. Detach the pump from the support bracket (see chapter Suspension and steering) and move it to the side.
3. Remove the generator with brackets from the timing belt cover (see chapter Engine electrical equipment).
4. Jack up the car and put it on stands. Remove crankcase protection (see chapter Body) and a cover in the arch of the left wheel.
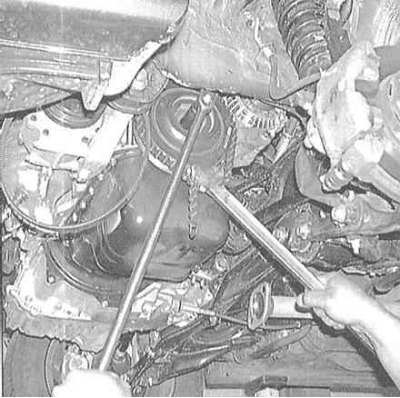
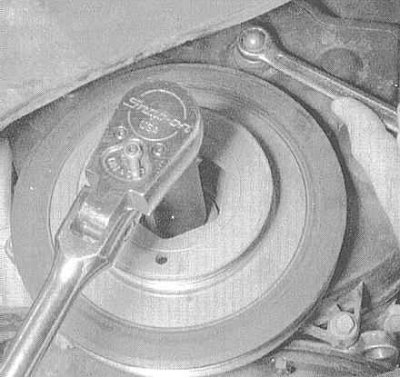
5. Holding the crankshaft pulley from turning with a chain wrench, give the bolt of its fastening. Remove the pulley, using a puller if necessary.
6. Support the power unit with a jack, laying a wooden block between the head of the latter and the oil pan to distribute the load. Remove the pillow of the left support of the power unit with its bracket (see Section Checking the condition and replacing the suspension bearings of the power unit).
7. Remove the engine oil dipstick and its guide tube from the engine block.
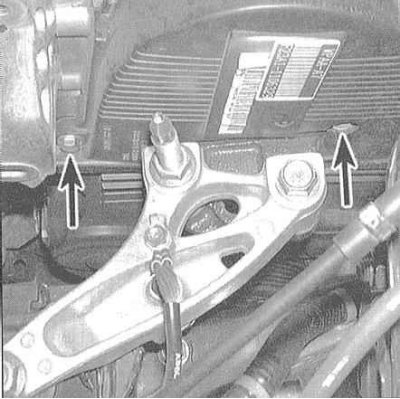
8. Turn out bolts of fastening of covers of a gas-distributing belt to the block. Draw up a diagram for yourself explaining the arrangement of fasteners of various lengths, which, during assembly, must be screwed strictly into the previous holes.
 | 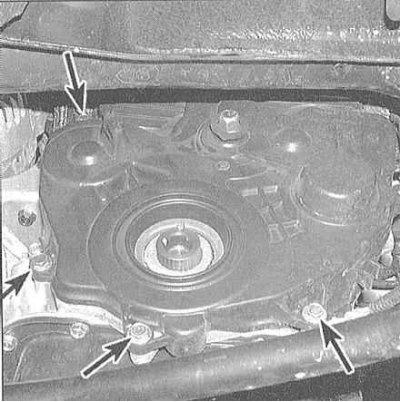 |
9. Remove the upper and lower timing belt covers.
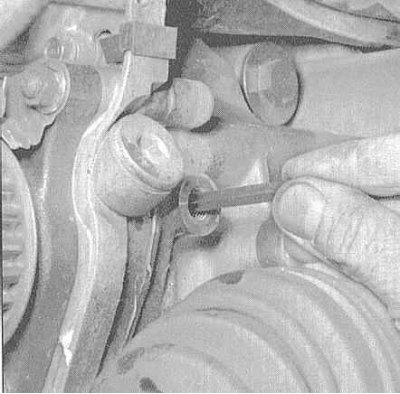
10. Insert a 6x100 mm bolt or bar wrench into a special hole in the rear wall of the engine block (the hole is plugged with a bolt, which must first be unscrewed), which will block the rear balance shaft from turning while removing the drive belt.
Attention! The bolt/key should not be inserted deeper than 74 mm into the hole (mark accordingly)!
 |  |
Note. Detailed information on the removal of the balancing shaft is contained in Section Removing and checking the condition of the balancing shafts (4-cylinder engines).
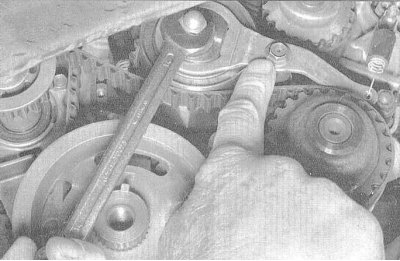
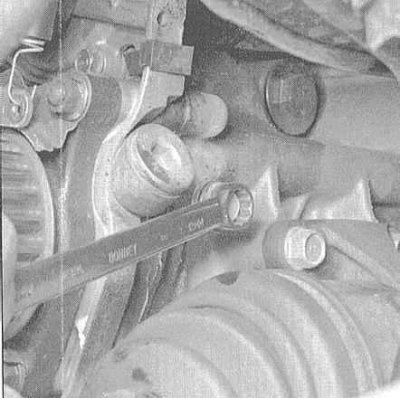
11. Temporarily screw one of the bolts securing the timing belt cover into the hole on the left side of the timing belt tension adjuster lever, tighten the bolt to lock the adjuster while loosening the tensioner nut. Loosen the tensioner nut and press its roller from the balance shaft drive belt, thereby loosening the tension of the latter. Remove the belt.
Note. If the belt will not be replaced, mark its original direction of rotation, which must be observed during installation.
12. If the gear wheels of the balancing shafts (front and back) are damaged, remove the screws securing them. Locking of the rear shaft is already secured by inserting a suitable bolt/rod into the access hole on the rear side of the engine block, fixing the front shaft can be done by threading into the service hole in its end (directly below the gear) suitable screwdriver. Also remove the crankshaft gear.
Note. The rear balancing shaft is equipped with a set of gears, the position of which must be clearly marked before removal to avoid assembly errors.
Examination
Carefully check the drive belt and gears of the balancing shafts for signs of wear, cracks and other mechanical damage. Replace defective components.
Installation
1. Evaluate the condition of the front crankshaft oil seal, if necessary, replace it (see Section Replacing the front crankshaft oil seal). Put the gear wheel on the front crankshaft trunnion, - make sure that the landing key on the trunnion is aligned with the keyway in the wheel hub.
2. Before installing the balancing shaft drive belt and its gears, make sure that the timing belt is installed correctly (see Section Removing, checking the condition and installing the gas distribution belt and timing gears). Also make sure that the number one piston stays at TDC at the end of its compression stroke (see Section Bringing the piston of the first cylinder to the top dead center position (TDC)). Both balancing shafts and the oil pump must be in their original positions, with the rear shaft locked with a bolt/wrench inserted into the access hole. Remove the drive belt tensioner and lock it in the new position following the procedure described in paragraph 11.

3. If removed, put your gears on the balancing shafts. Make sure that both sets of front balance shaft alignment marks are correctly aligned. The correct installation of the rear balance shaft is automatically guaranteed due to the presence of the guide pin (or bolt), included in a special service hole. Place the drive belt over the gear wheels.
4. Once again make sure that the position of the alignment marks is correct, then screw in the gear mounting bolts and tighten them with the required force.
5. Now you can proceed to adjust the belt tension. Make sure the tensioner adjusting nut is loose, then turn the crankshaft until the camshaft sprocket is rotated approximately three teeth, and the slack in both belts must be completely removed. Tighten the tensioner nut to the required torque.
Note. To check that the belt is properly tensioned, press firmly on the belt with your thumb near the camshaft sprocket until the belt is tight on both sides of the wheel.
It is possible to adjust the tension of the timing belt and the balancing shaft drive belt without removing the timing drive covers. However, it is more reasonable to remove the covers in order to be able to check the correct alignment of the alignment marks.
6. If only the balancing shaft drive belt was removed/replaced, remove the bolt used to fix the adjuster. Reinstall the timing belt covers and tighten the fixing bolts to the required torque. Make sure that the edges of the gaskets do not stick out from under the ribs at the joints of the front covers.
 |  |
7. When installing the crankshaft pulley, do not forget to lubricate the threads and the bottom surface of the head of its fastening bolt. Screw in the bolt and tighten it to the required torque.