
Removal
Note: If you hear any extraneous noises when the timing belt is operating, first check the adjustment of its tension. This procedure can be performed without removing the front covers (see paragraph 5 of Section Removal, condition check and installation of gear wheels and balance shaft drive belt).
1. Bring the engine to the TDC position of the first cylinder and, in order to provide access to the timing belt, remove the front covers and the balance shaft drive belt (see Section Bringing the piston of the first cylinder to the top dead center (TDC) position).
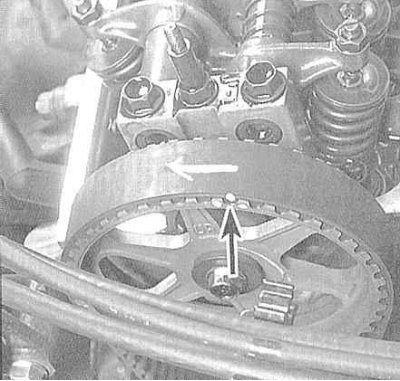
2. With the tensioner nut loosened, push the tensioner roller down, then tighten the nut. Now the timing belt can be removed from the timing drive gears.
Note: If the old belt is in good condition and will be reinstalled, mark its direction of rotation and position relative to the shaft gears with chalk or white paint.
3. If necessary, the camshaft gear can be removed by inserting a large screwdriver into the hole in the wheel casting, then carefully loosening the mounting bolt with a socket wrench.
Attention! Try not to allow the camshaft to turn while loosening the bolt securing its gear!
4. Removing the timing gear will provide access to the two bolts securing the rear belt cover, as well as the camshaft oil seal.
Examination
Manually check the tensioner roller for free rotation, then tug it from side to side, checking for play in the bearing. Check the condition of the timing gear teeth (pay attention to chips, cracks and other mechanical damage). Estimate the amount of axial play of the camshaft. Carefully inspect the timing belt on both sides, checking for signs of wear (especially the tooth thrust walls), cracks, cuts, abrasions and traces of oiling. Replace defective components.
Note: While you're at it, replace the water pump at the same time (see Chapter Cooling and heating systems).
Installation
1. If removed, reinstall the camshaft gear and tighten its mounting bolt to the required torque.
2. Make sure that the engine still remains in the TDC position of the end of the compression stroke of the first cylinder (see Section Bringing the piston of the first cylinder to the top dead center (TDC) position).
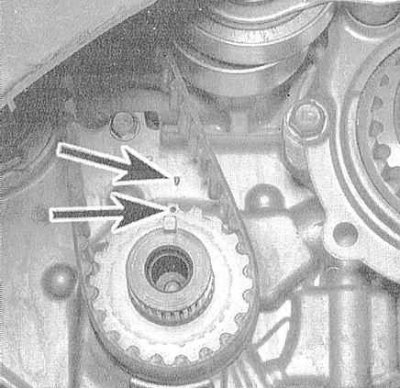
3. Align the timing marks on the camshaft and crankshaft gears with the corresponding marks on the engine block.
Note: The marks on both sides of the camshaft pulley must be aligned with the top edge of the cylinder head.
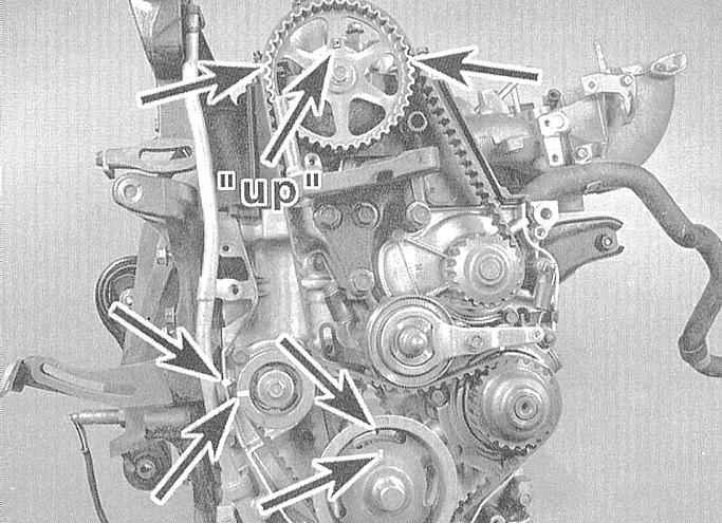
4. Make sure the rear balance shaft is locked with the bolt or 6 x 100mm socket wrench. Fit the timing belt over the timing gears, moving counterclockwise in the following order: crankshaft gear, tensioner, water pump, camshaft gear.
5. Loosen the tensioner nut to ensure belt tension. Tighten the nut and install the balance shaft drive belt (see Section Removal, condition check and installation of gear wheels and balance shaft drive belt).
6. Adjust the tension of both belts (see Section Removal, condition check and installation of gear wheels and balance shaft drive belt), turn the crankshaft by its pulley bolt two full turns, again stopping it in the TDC position of the end of the compression stroke of the piston of the first cylinder. Make sure that all the timing marks have returned to their original positions. Repeat the adjustment of the belt tension forces (see paragraph 5 of Section Removal, condition check and installation of gear wheels and balance shaft drive belt).
7. Further installation is carried out in the reverse order of dismantling the components. When installing the crankshaft pulley, do not forget to lubricate the threads and the lower surfaces of the heads of the bolts that secure it.
Note: Do not use an impact wrench to tighten the pulley bolt.