
Attention! Wait until the engine has completely cooled down before starting work.
Withdrawal
1. Bring the piston of the first cylinder to the TDC position of the end of the compression stroke (see Section Bringing the piston of the first cylinder to the top dead center position (TDC)).
2. Disconnect the negative cable from the battery.
Attention! If the stereo system installed in the car is equipped with a security code, before disconnecting the battery, make sure that you have the correct combination to activate the audio system!
3. Empty the cooling system and remove the spark plugs (see chapter Settings and ongoing maintenance).
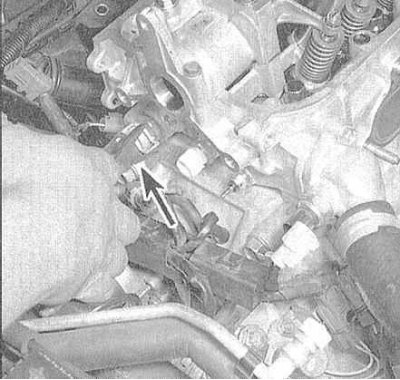
4. Turn out bolts of fastening of a mounting bracket of the inlet pipeline and bolts of fastening to a final collector of a flange of a reception pipe of system of release of the fulfilled gases (see Sections Removal and installation of the inlet pipeline and Removal and installation of a final collector).
Note. The head can be removed complete with piping and exhaust manifold, but the procedure is greatly simplified (due to the reduction in the weight and size characteristics of the unit), if the mentioned elements are previously dismantled.
5. Remove the air intake (see Section Removal and installation of the inlet pipeline) and cylinder head cover (see Section Removal and installation of a cover of a head of cylinders). Remove the ignition distributor assembly with cover and BB wires (see chapter Engine electrical equipment).
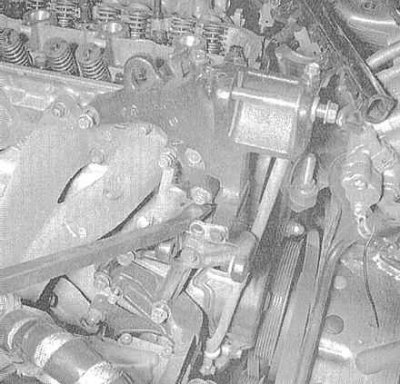
6. Remove the steering pump (see chapter Suspension and steering).
7. Remove the timing belt (see Section Removing, checking the condition and installing the gas distribution belt and timing gears), rocker arm assembly (see Section Removal, condition check and installation of rocker arm assembly) and camshaft (see Section Removal, condition check and installation of a camshaft).
8. Release a collar and disconnect the water hose brought to a head of cylinders directly under the ignition distributor.

9. Acting in the reverse order shown in the illustration, in several steps (1/4 turn per approach) loosen the head bolts just enough to be able to turn them out by hand. Try to remember the installation position of each of the mounting bolts - during assembly, they must be screwed strictly into their original places.
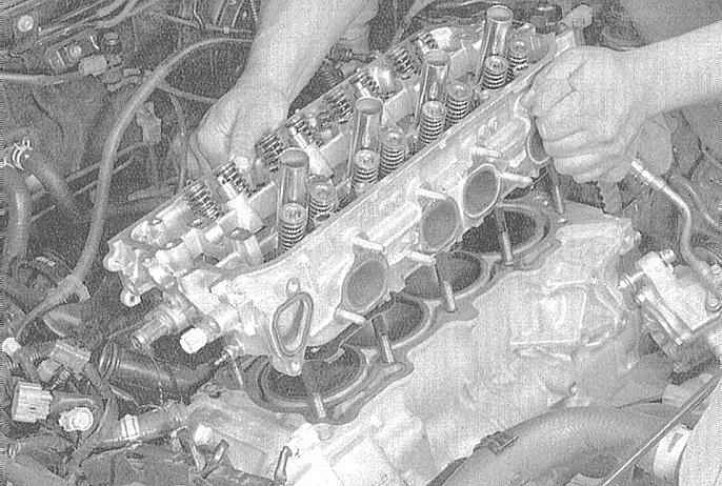
10. Remove the cylinder head from the engine. If the head does not separate from the block, you can use the lever, which should be wound between the steering pump bracket and the block (never pry the head under the mating surface). Place the head removed from the engine on a couple of wooden blocks to avoid damaging the gasket surfaces.
10. A description of the procedures for disassembling the head and checking the condition of its internal components is given in Part General and overhaul of the engine of this chapter. At this stage, evaluate only the flatness of the mating surface.
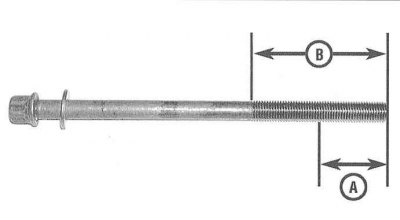
11. Assess the condition of the threaded part of the head mounting bolts by measuring its diameter at two points with a micrometer. If any of the bolts show signs of wear, replace the entire set.
Installation
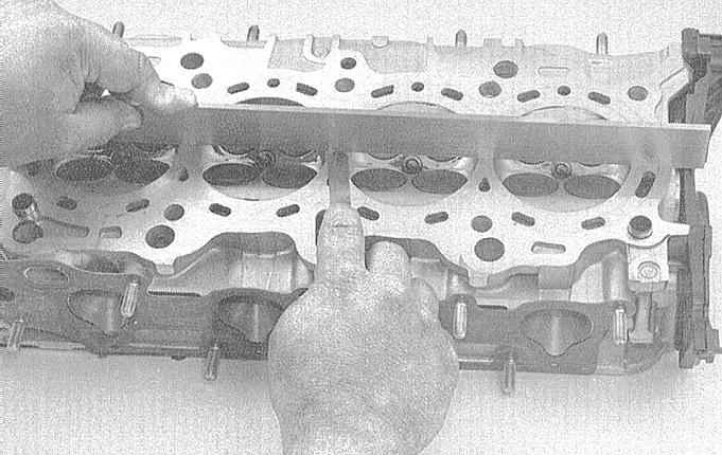
1. The mating surfaces of the head and cylinder block must be absolutely clean and dry.
2. Thoroughly clean the mating surfaces of the head and cylinder block. After scraping off the remnants of the gasket material and carbon deposits, wipe the surfaces with a rag soaked in acetone. The presence of an old gasket on the mating surfaces of the material at the time of installation of the head can lead to a violation of the tightness of the gasket fit and, as a result, the development of leaks. When processing the block, plug the cylinder bores with rags to prevent small debris and various foreign objects from getting into them (as a last resort, vacuum the cylinders thoroughly). Since the cylinder head and cylinder block are made of soft aluminum alloy, proceed with extreme care, trying not to leave scratches and burrs on the mating surfaces (use only copper or plastic tools to scrape deposits).
3. Check the mating surfaces of the head and block for deep scratches, nicks and other damage. Light defects can be removed with fine-grained sandpaper. In more serious cases, the only alternative is to re-groove or replace components. Using a suitable size tap, drive the threaded holes for the head mounting bolts. Alternately clamping the bolts in a vice by the head, go through their threads with a lerka - the presence of old sealant, dirt and corrosion products in the threads leads to a discrepancy between the actual tightening force of the fasteners and the indications of the torque wrench indicator. On engines of the F23A5 series (without VTEC) remove the oil sprayer from the block, clean it and reinstall it.
4. Lay a new gasket on the cylinder block (type marking "TOR" up). Lubricate the edges of the timing belt cover mating with the block with sealant. Carefully install the head on the cylinder block.
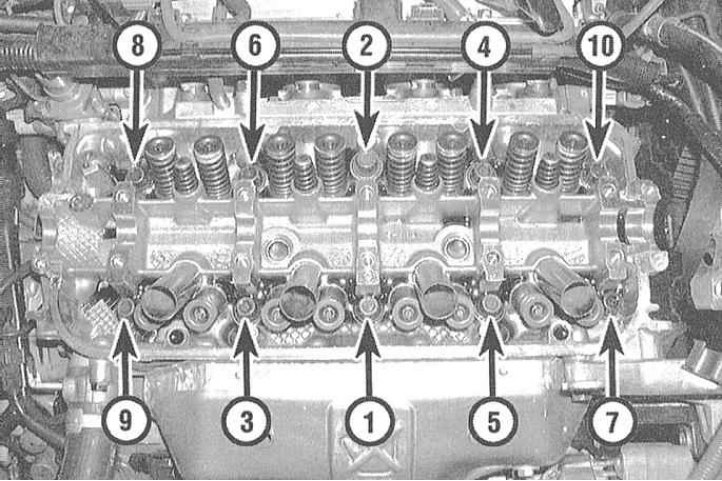
5. Lubricate the threads and bottom surfaces of the mounting bolt heads with clean engine oil and screw the fasteners into place. Working in a strictly defined order, tighten the cylinder head bolts in three steps to the required torque (see Specifications). Due to the critical nature of the purpose of bolts, the compilers of this Guide recommend the following precautions when tightening bolts:
- a) It is preferable to use a torque wrench equipped with a ratchet drive with a force limiter. Otherwise, proceed very carefully, trying not to accidentally break the thread.
- b) If, when screwing in, the bolt starts to make any sounds (squealing, creaking, clicking, etc.), unscrew it completely and try again.
6. Put the gear on the camshaft trunnion (see Section Removal, condition check and installation of a camshaft).
7. Install the remaining components in the reverse order of their dismantling.
8. Be sure to top up the cooling system and check all fluid levels.
9. Manually slowly turn the crankshaft counterclockwise two full turns.
Attention! If there is resistance when turning the shaft, stop immediately to prevent damage to the valves when they come into contact with the piston bottoms, return to their original position and check that the alignment marks are correctly aligned.
10. Start the engine and check the correct ignition timing (see chapter Settings and ongoing maintenance).
11. Warm up the engine to normal operating temperature and check it for signs of leaks. Make sure the engine is working properly.