
Cylinders
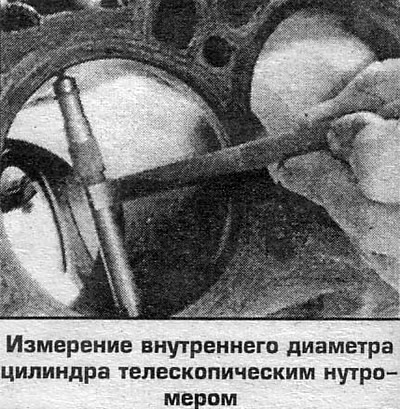
The clearance between the cylinder and the piston should be within 0.038-0.0635 mm. Check the surface condition, ovality and taper of the cylinders by measuring the diameter in three planes, in directions parallel and perpendicular to the block axis. Taper (difference in diameters at the top and bottom of a cylinder measured in one direction) should not exceed 0.305 mm. The ovality of the cylinder is due to the difference in loads on the wall in the direction perpendicular to the engine axis. Compare the measurement results with the piston diameter measurement results.
Crankshaft
Check the condition of the crankshaft journals. The necks should have a mirror surface. Check the roughness of the necks by rubbing them with your fingernail. Minor signs of wear are permitted.
Measure the diameter of the necks in several places and determine the taper and ovality.
The permissible taper and ovality are 0.0127 mm. If all dimensions are normal, then the crankshaft should only be polished before installation.
Pistons
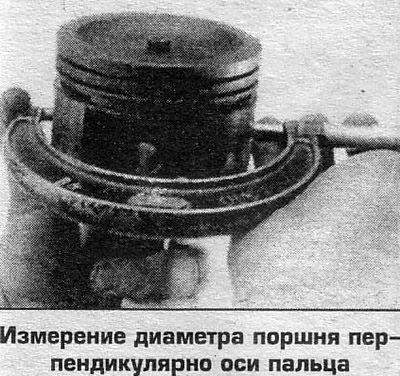
Check for cracks on the piston. The piston should move freely along the pin and rotate on it, but there should not be a noticeable gap (the piston pin is pressed into the piston). The clearance is checked by rocking the piston relative to the pin in the plane passing through the axis of the pin and the connecting rod. The permissible clearance of the pin in the connecting rod bushing is 0.025-0.051 mm. Measure the piston diameter along the pin axis and in the perpendicular direction. The difference between the diameter of the cylinder and the piston gives the clearance between them. If the clearance and piston diameter are within the norm, the piston can be installed. If the piston diameter is within the norm, but the cylinder diameter is not, then the piston should be replaced. If the cylinder diameter exceeds the norm, it should be bored out and the pistons replaced with repair ones. As a rule, if two or more pistons (cylinders) are worn, the cylinder should be bored and the pistons replaced with repair ones as a set.
Connecting rods
Check the connecting rods for deformation. If any bending or propeller deformation is detected, replace the connecting rod. If the clearance in the connecting rod bushing is within the norm and there is no damage to the connecting rod, then check the inner diameter of the connecting rod bearings by inserting them into the connecting rod and cover and tightening the nuts (bolts) of the covers to the specified torque. If the clearance in the crankshaft connecting rod journal is not within the norm (is determined by subtracting the diameter of the corresponding crank pin), then replace the bearing shells with new ones and check the diameter again. If the clearance is still not within the norm, and the diameter of the crankshaft connecting rod journal is within the norm, then the connecting rod must be repaired or replaced.
Bearings
If you find severe wear on the bearings, deep grooves, pits or signs of overheating, the bearing and the corresponding shaft should be taken to a car service for inspection. For removing ring bearings (for example, balance shafts, camshafts, engine drive shafts), pressed into the cylinder block, the block should be taken to a car service center, since special equipment is required.
Oil pump
Disassemble the pump and check the condition of the gears and housing. Check the freedom of movement of the pressure reducing valve plunger. If all parts are in satisfactory condition, then lubricate all parts and assemble the pump.
(The text can be found on the website www.HondaBook.ru)