
Crankshaft
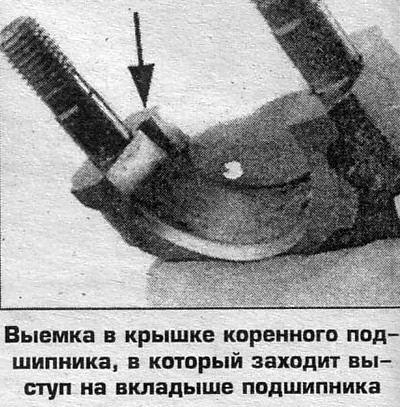
1. Install the liners in the bed of the cylinder block and in the bearing caps (when installed in the covers, the protrusion of the insert must go into the recess on the cover). Make sure that the lubrication holes of the liner and cylinder block match. If the crankshaft journals have been reground, then select liners from the appropriate repair group.
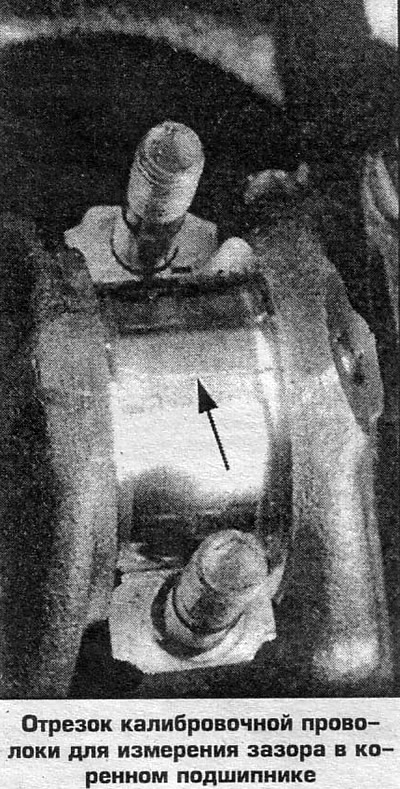
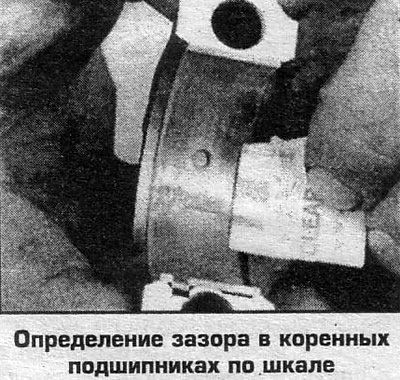
2. Establish a crankshaft and check backlashes in radical bearings by means of a plastic calibration wire. To do this, put a piece of calibration wire on each crankshaft main journal parallel to its axis. Clean the surfaces of the liners in the covers, install the covers and tighten the cover bolts to the specified torque. Loosen the bolts and carefully lift the covers, compare the thickness of each of the crushed wires with the scale on the package and determine the gap.
3. If the gaps are greater than the norm, then replace the liners with repair ones from the standard size group (0.025-0.05 mm thicker than installed). If the clearance is still greater than normal, then grind the crankshaft journals and install repair liners.
4. Remove wire residue. Lubricate the crankshaft main journals, install all covers except the middle one in their original places and tighten the bolts to the specified torque.
5. Install the middle cover and finger-tighten the bolts.
6. Move the crankshaft forward until it stops against the surface of the upper bearing. While holding the crankshaft, slide the middle cover back. In this case, the thrust surfaces of the liners in the cover will be aligned.
7. Without loosening the effort on the crankshaft, tighten the middle cover bolts to the specified torque.
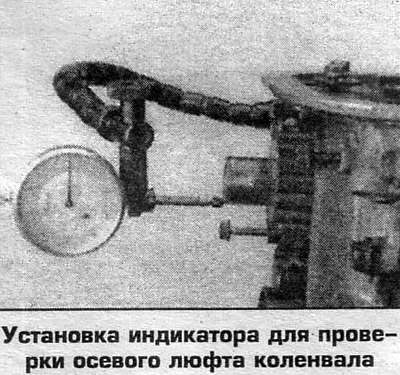
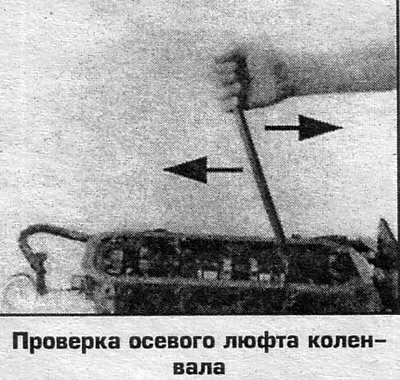
8. Check up an axial backlash of the crankshaft, having established the indicator and having displaced a crankshaft at first back, then forward against the stop.
9. If the play is not correct, replace the middle main bearing with a new one. If this measure does not bring the axial play back to normal, then remove the crankshaft and hand it over to a car service for inspection and repair
10. Check up freedom of rotation of the crankshaft.
11. Install the rear oil seal.
Pistons and connecting rods
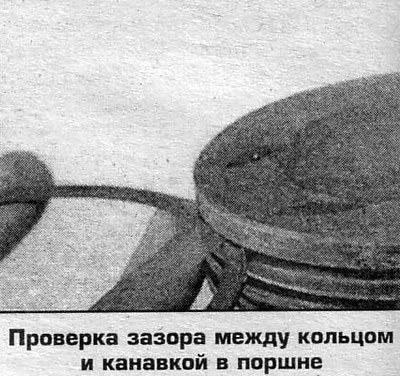
1. Lubricate the cylinder surface with light-viscosity engine oil before installing the pistons and connecting rods. Pick up the rings, check the clearance at the junction of the rings by pushing the ring into the cylinder with a piston. As a rule, the gap in the joint of the ring in the worn cylinder exceeds the norm. If the gap is more than normal, then pick up a set of repair rings. Check clearance between ring and groove in piston (photo). The feeler gauge must pass freely between the ring and the groove wall. If it is felt that there is a ledge on the inside of the groove wall due to wear, then replace the piston.
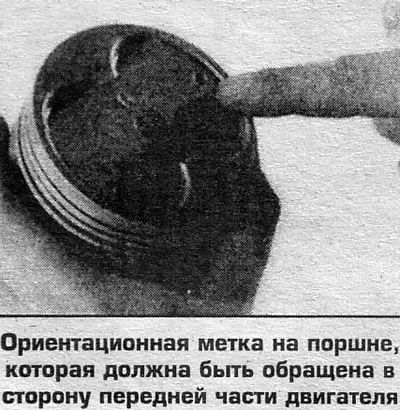
2. If removed pistons are installed, then they should be installed in the cylinder from which they were removed. Connecting rods should be installed according to the marks made during disassembly. If the connecting rod is moved to another cylinder, then replace the connecting rod bearings with new ones, mark the number of the cylinder into which the connecting rod is installed. The notch on the connecting rod must face the front of the engine.
3. Establish loose leaves in covers and rods.
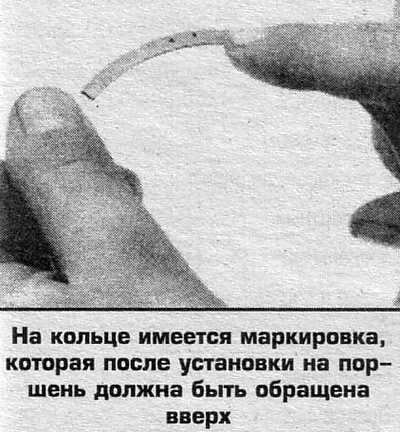
4. Put rings on the pistons (starting with oil scraper) using an expander.
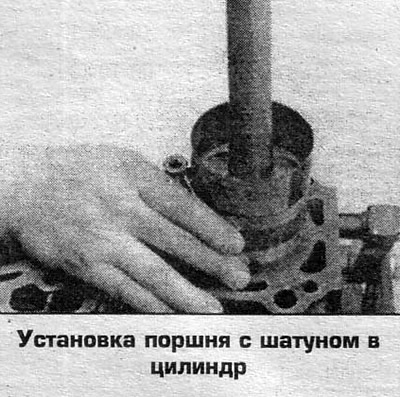
5. Arrange the joints of the piston rings, correctly orient and install the piston with the connecting rod in the cylinder, covering the rings with a clamp (photo).
6. Pulling each connecting rod to the crankshaft, check the clearance in each connecting rod journal by repeating the procedure for checking clearances in the main journals.
7. Assemble the connecting rods with caps and check the end play of the connecting rods on the crankshaft journals.
8. Fill the oil pump and oil receiver with petroleum jelly.
9. On Odyssey models, install balancer shafts.
10. Install the cylinder head, sprockets, drive belts and removed components and assemblies.
11. On Odyssey 2.2 and 2.3 L models, install balancer shaft drive belts.
12. Install the engine on the car.
 |  |
 |  |
 |  |
 |  |