
Removal the pressure plate and driven clutch disc
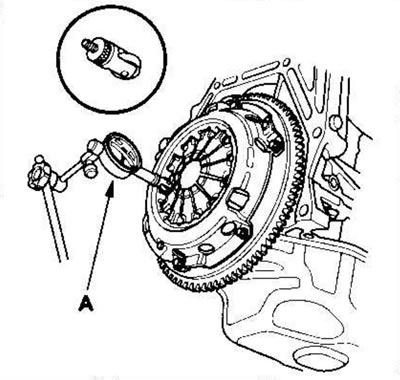
1. Check the height of the diaphragm spring tips using the indicator (A). If the height exceeds the permissible limit, replace the pressure plate.
| Standard (new) | 0.6 mm |
| Limit | 0.8 mm |
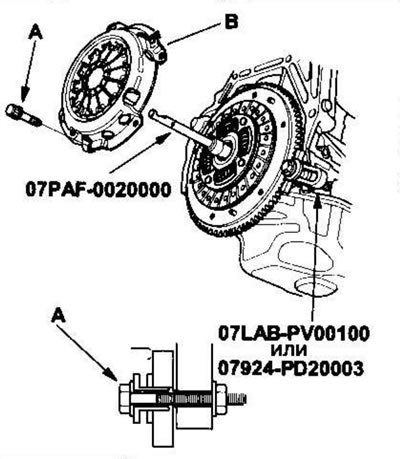
2. Install the special tool as shown in the figure.
3. To prevent warping, loosen the pressure plate mounting bolts (A) crosswise in several passes, then remove the pressure plate (B).
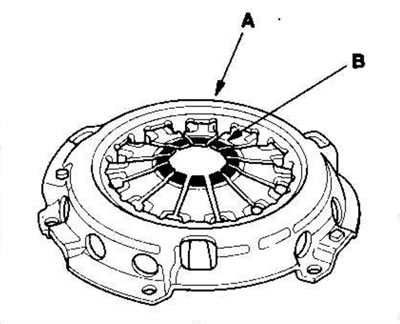
4. Check the surface of the pressure plate (A) for wear, cracks or burning.
5. Check for wear on the tips of the diaphragm spring (B) in the area where it contacts the release bearing.
6. Check for warpage on the surface of the pressure plate using a ruler (A) and feeler gauge (B). Measure across the pressure plate (C). If the warpage exceeds the permissible limit, replace the pressure plate.
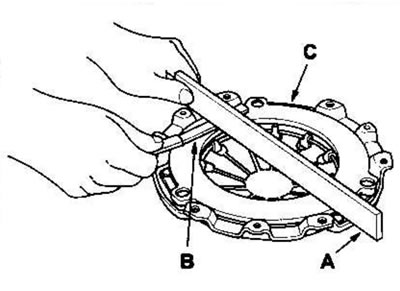
| Standard (new) | 0.03 mm |
| Limit | 0.15 mm |
7. Remove the driven clutch disc using a special tool.
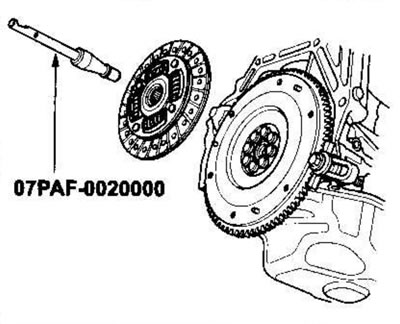
8. Check the clutch slave disc friction lining for any signs of slippage or oil. If the clutch disc is burnt, blackened or oily, replace it.
9. Measure the thickness of the clutch driven disc. If the thickness is less than the permissible limit, replace the clutch disc.
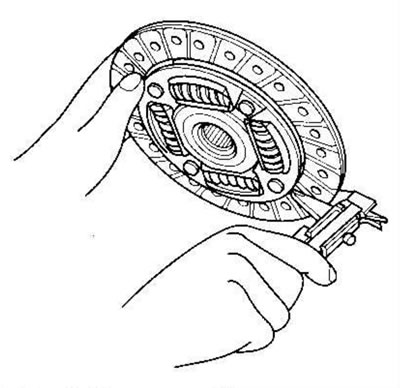
| Standard (new) | 8.7-9.3 mm |
| Limit | 6.0 mm |
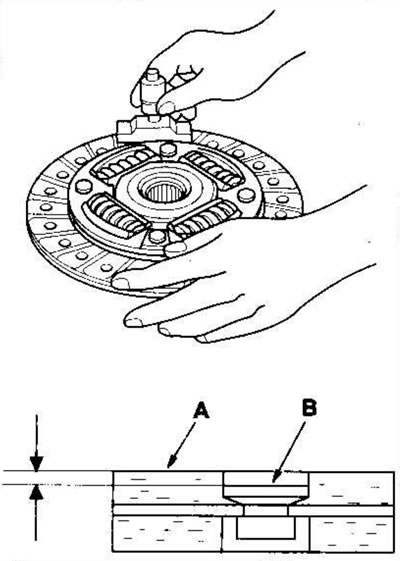
10. Measure the distance between the surface (A) of the friction material and the rivet (B) on both sides. If the thickness is less than the permissible limit, replace the clutch disc.
| Standard (new) | 1.65-2.25 mm |
| Limit | 0.7 mm |
(The article was copied from the website: hondabook)