
Note:
- To avoid damage to the paintwork, cover the fenders with protective aprons.
- Do not spill brake fluid on your vehicle; it can ruin the paint; if brake fluid gets on the paint, wash it off immediately with water.
1. Write down the frequencies of the radio stations with fixed tuning. First disconnect the cable from the negative (-) battery terminal, then from the positive (+) terminal. Remove the battery.
2. Remove the air cleaner housing.
3. Remove the air intake pipe.
4. Remove the battery tray.
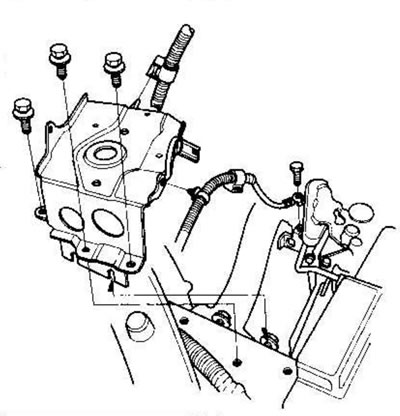
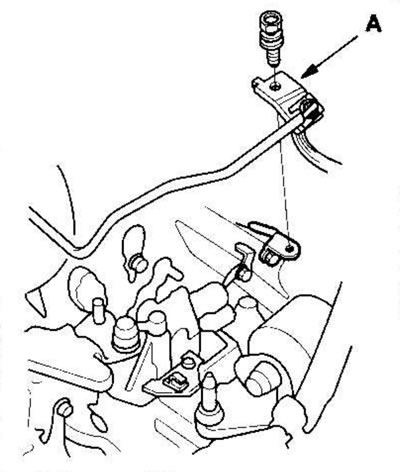
5. Remove the clutch pipe bracket (A).
6. Loosen the mounting bolts (A) and remove the clutch slave cylinder (B).
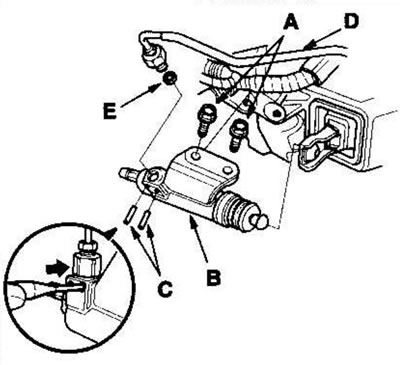
7. Remove the roller pins (C). Disconnect the clutch pipe (D) and remove the O-ring (E). To prevent brake fluid from leaking out of the clutch pipe, seal its end with a napkin.
8. Installation of the working cylinder is performed in the reverse order of removal. Install a new O-ring (A).
9. Pull back the boot (B) and apply brake grease to the boot and piston rod (C) of the slave cylinder.
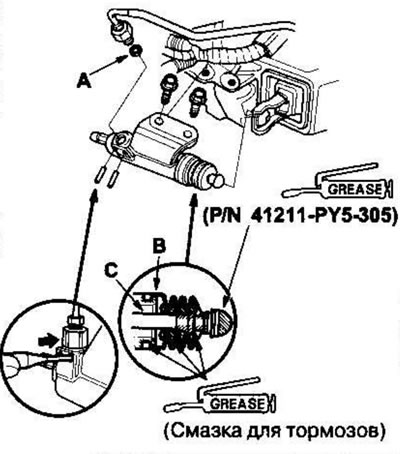
10. Apply Urea Grease UM264 to the pressure rod of the working cylinder (P/N 41211-PY5-305). Tighten the slave cylinder mounting bolts to 22 Nm (2.2 kgf·m).
11. Bleed the hydraulic clutch system.
- Connect the hose to the bleed nipple (A) and lower the other end of the hose into a container with brake fluid.
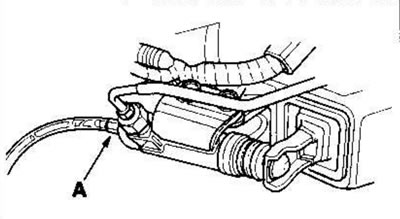
- Make sure there is sufficient fluid in the clutch master cylinder, then slowly pump the clutch pedal until no more air bubbles come out of the hose connected to the bleeder screw.
- Tighten the bleed nipple to 8 Nm (0.8 kgf·m); don't overtighten.
- When finished, fill the clutch master cylinder with fluid.
- Use only Genuine Honda DOT 3 or 4 brake fluid.
- Make sure the clutch is working properly and check for fluid leaks.
12. Install the clutch pipe bracket and battery tray.
13. Install the air intake pipe.
14. Install the air cleaner housing.
(Full version on the source website Hondabook.ru)