Removal and installation
Caution: Do not allow the working fluid to come into contact with painted surfaces. If the working fluid comes into contact with a painted surface, wash it off immediately.
1. Disconnect the cable from the negative terminal of the battery.
Note: Before disconnecting the wire from the battery, make sure you know the access code for the radio. Otherwise, the radio will be blocked.
2. Remove the battery.
3. Remove the air filter housing (see chapter "Maintenance and general check and adjustment procedures").
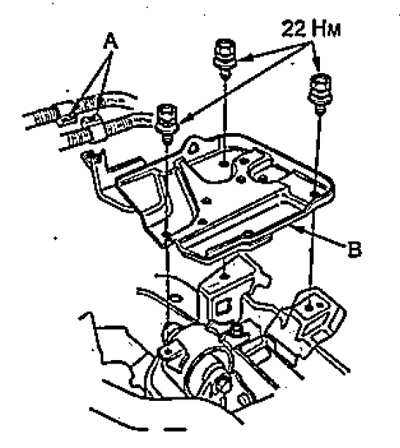
4. Disconnect the wire clamps (A) and remove the battery tray (B).
- Tightening torque - 22 Nm
5. Loosen the bolts (A) securing the clutch slave cylinder (8).
- Tightening torque - 22 Nm
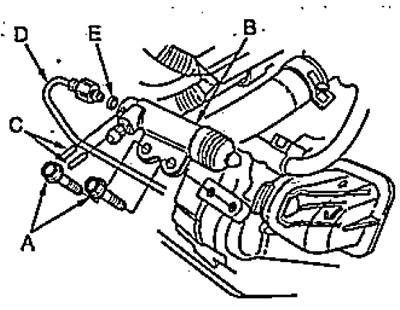
6. Remove the pins (C).
7. Disconnect the pipe (D) from the clutch slave cylinder and remove the O-ring (E).
8. Remove the clutch slave cylinder (B).
Note:
- Installation is carried out in the reverse order of removal.
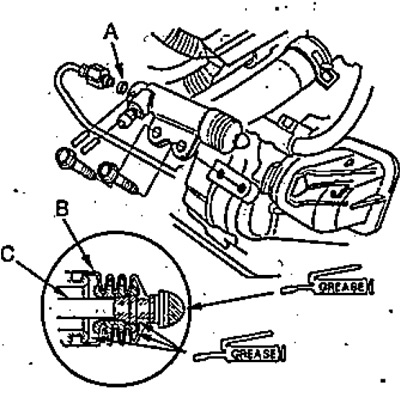
- When installing, apply grease to the places shown in the figure.
- After installation, bleed the clutch release hydraulic drive (see section "Bleeding the clutch hydraulic drive").