
Attention! See the warnings at the beginning of the Section Depressurizing the supply system.
To check the fuel pressure, you will need a special pressure gauge with a wide range scale and an adapter to connect the pressure gauge to the injection system.
General Checks
1. Make sure there is enough fuel in the gas tank.
2. Make sure the fuel pump is actually working. Ask an assistant to turn on the ignition by turning the key to the ON position - a characteristic sound of a running pump should be heard in the gas tank (the pump should run for about two seconds).
Note. The sound of the running pump is clearly audible through the open neck of the fuel tank. If the pump does not turn on, go straight to checking its electrical circuit.
Checking the pressure characteristic of the fuel pump
1. Remove fuel pulsation damper (see Section Depressurizing the supply system) and screw in its place the adapter for connecting the pressure gauge.
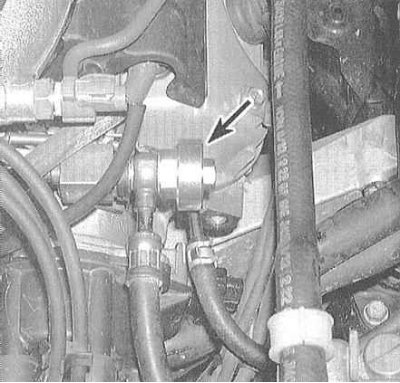 | 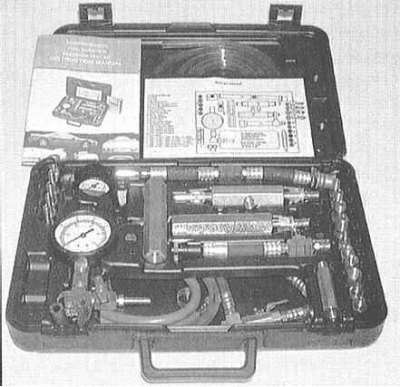 |
2. Without starting the engine, turn on the ignition. Make sure K/V is turned off. The fuel pump will turn on for a couple of seconds - the pressure in the power system should rise (check the pressure gauge) and stabilize.
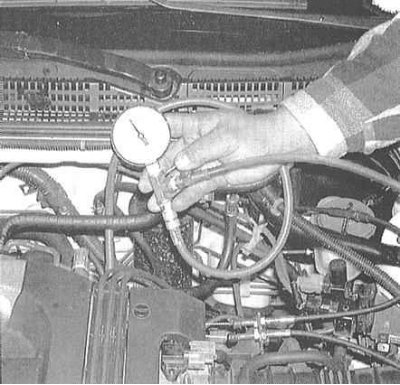
3. Start the engine and warm it up at idle to normal operating temperature. Compare the pressure gauge reading with the requirements of the Specifications. Now disconnect the vacuum hose from the fuel pressure regulator - the pressure gauge reading should immediately rise, again to the value specified in the Specifications.
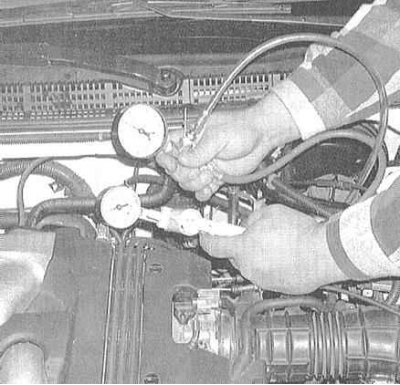
4. If the pressure does not increase when the vacuum hose is disconnected, use a manual vacuum pump to create a vacuum in the regulator with a depth of 305 ÷ 355 mm Hg. Art. If the pressure now drops, check that the vacuum source is working properly, otherwise replace the regulator.
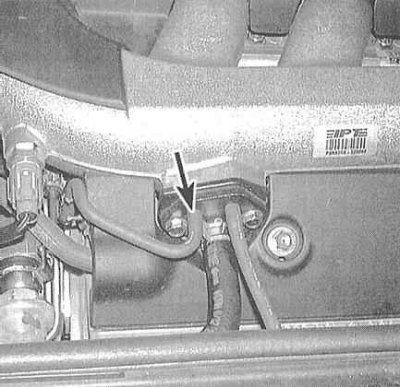
5. If the pressure readings are out of range, perform the following checks:
- a) If the pressure is excessively high, check the supply to the vacuum regulator. The depth of vacuum should fluctuate with changes in engine speed. If vacuum is present, check the condition and patency of the fuel return hose/pipe. If the return line is OK, replace the regulator.
- b) If the pressure is too low, change the fuel filter, eliminating the possibility of a violation of its patency (the filter is built into the assembly of the fuel pump / fuel flow sensor and is removed along with the latter, - see Section Removal and installation of the fuel pump). If replacing the filter does not correct the situation, install a shut-off valve between the regulator and the fuel return line (instead of a valve, you can install a piece of flexible hose, which can be easily pinched with tongs or a clamp). Start the engine and begin to slowly shut off the valve / pinch the hose. If the pressure rises above 3.3 kgf/cm2, replace the regulator (see Section Removal and installation of the fuel pressure regulator). Attention: Do not allow the pressure to rise above the value of 4.2 kgf/cm2. Do not pinch the fuel return line itself to avoid the risk of damaging it.
- c) If the pressure remains excessively low even with the return line blocked, check the injector for leaks (s) injection (see Section Removal and installation of the fuel line and fuel injectors). Also check the fuel pump.
6. When finished checking, relieve pressure (see Section Depressurizing the supply system) and disconnect the pressure gauge.
Checking the electrical circuit of the fuel pump
Note. More detailed information on the scheme of an electric chain of the fuel pump contains in the Chapter Onboard electrical equipment.
1. If the fuel pump does not function when the ignition is turned on (no characteristic sounds are heard from the gas tank), check the condition of the fuel pump fuse (№ 1), or fuse ACG S (both 15 A) in the mounting block located in the engine compartment. If necessary, replace the blown fuse and recheck. If the pump starts to run after the fuse has been replaced, check the pump circuit wiring for signs of a short circuit between the PGM-FI relay and the pump.
Note. The models discussed in this manual are equipped with a special engine start enable circuit that supplies power to terminal No. 2 of the main relay only when the clutch is depressed (RKPP) /installed in position "R" AT selector lever. This circuit is protected from overloads by a special 7.5 A fuse - check the condition of fuse No. 13 in the mounting block in the engine compartment of the car.
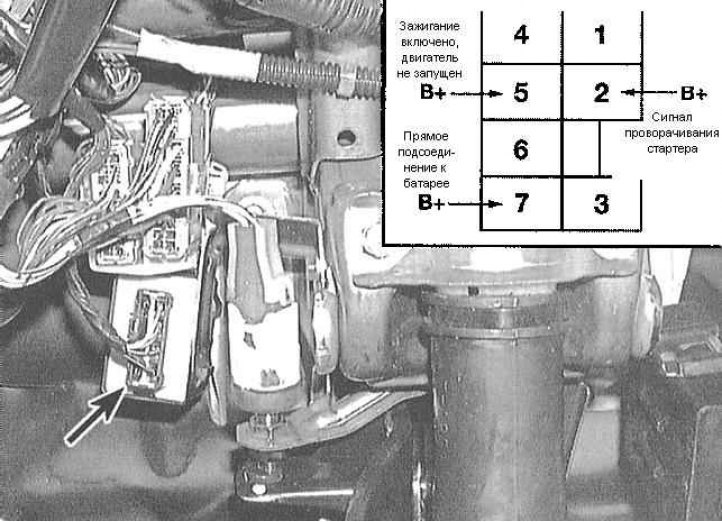
2. If replacing the fuses does not restore pump function, check the condition of the main relay circuit.
Note. The main relay is mounted on a bracket mounted under the dashboard of the car, to the left of the steering column. Ask an assistant to turn the ignition on and off several times and check the battery voltage supply to the relay connector (see accompanying illustration).
3. With the ignition off, voltage should be present at terminal 7 of the connector. Voltage must be present at terminal 5 only when the ignition is on (do not start the engine), while terminal 2 should only be energized when the clutch pedal is depressed (models with manual transmission) / translated into position "R" selector lever.
4. If there is no voltage, check the condition of the circuit in the area between the relay and the PCM, otherwise make sure that the relay itself is working.
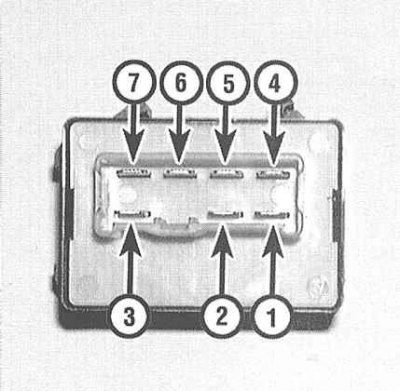
5. Use a jumper wire to connect the positive battery terminal to terminal 2, and ground terminal 1. Use an ohmmeter to check for continuity between terminals 4 and 5. If there is no continuity, replace the relay.
6. Now apply battery power to relay terminal 5, ground terminal 3. There should now be continuity between terminals 6 and 7, otherwise replace the relay.
7. If there is continuity, apply power to terminal 6, ground terminal 1 and check continuity between terminals 4 and 5. If there is no continuity, replace the relay, otherwise check the condition of the circuit between the fuse, relay and pump.
8. If during the test described above it is not possible to identify the cause of the pump failure, make sure that the power supply to the fuel pump assembly in the gas tank is working properly. If voltage is OK, replace pump/fuel flow sensor assembly (see Section Removal and installation of the fuel pump).