
Attention! See the warnings at the beginning of the Section Depressurizing the supply system.
The procedure is greatly simplified if the gas tank is emptied in advance. Some tanks are equipped with a drain plug, while others must be pumped out of the fuel or run out of fuel in advance by the engine. NEVER suck fuel with your mouth!
1. To relieve excess pressure, remove the fuel tank filler cap.
2. Relieve pressure in the supply system (see Section Depressurizing the supply system).
3. Disconnect the negative cable from the battery.
Attention! If the stereo system installed in the car is equipped with a security code, before disconnecting the battery, make sure that you have the correct combination to activate the audio system!
4. If the car is equipped accordingly, remove the drain plug and drain the remaining fuel in the tank into a prepared container of a suitable volume. If a drain plug is not provided, drain the fuel using a special kit available from almost any auto accessory store.
Attention! Never suck gasoline with your mouth!
5. Disconnect the electrical wiring from the fuel flow sensor and the fuel pump (see Sections Checking the condition and replacing the fuel lines and Removal and installation of the fuel pump). Also disconnect the fuel hoses from the pump (see Section Checking the condition and replacing the fuel lines).
6. Loosen the nuts securing the rear wheels, jack up the rear of the vehicle and place it on jack stands. Remove rear wheels.
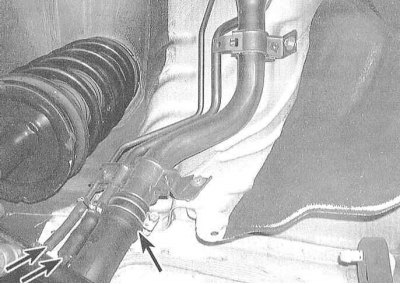
7. Remove the catalytic converter (see chapter Engine management).
8. Turn out fixing bolts and separate a cover of fuel tubes from a body.
9. Mark and disconnect the fuel supply and return hoses from your metal lines, also disconnect the rubber sections of the filler neck and vent lines from the tank.
10. At a corresponding complete set of the car disconnect an electroconducting from wheel gauges ABS.
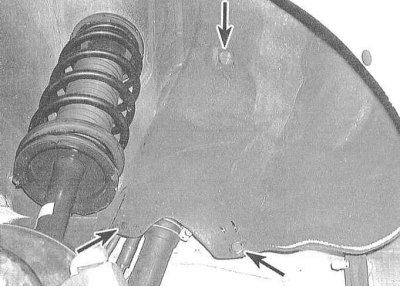
11. Remove the anti-roll bar (see chapter Suspension and steering), parking brake cable bracket (see chapter Brake system) and rear suspension heat shield.
12. Remove rear wheel brakes (see chapter Brake system):
- a) On models with rear disc brakes, disconnect the parking brake cables, unscrew the mounting bolts, remove the brake calipers and tie them with wire to the suspension elements, - make sure that the brake lines are not twisted or otherwise deformed;
- b) On models with rear wheel drum brakes, remove the drums and brake shoes. You will also need to disconnect the brake lines from the wheel cylinders at the back of the brake shields. Disconnect the parking brake cables from the shields (see chapter Brake system), unscrew the shields from the hub assemblies.
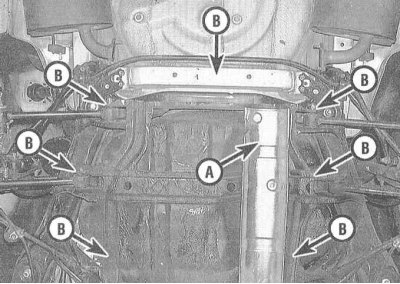
13. Turn out a bolt from the bottom end face of each of shock-absorbers (see chapter Suspension and steering). Get the truck jack under the rear suspension subframe and unscrew the bolts of the latter - on models with 4-cylinder engines there are four mounting bolts, on V6 models - twelve. Lower the subframe.
14. Support the fuel tank with a floor jack - to distribute the load, lay a solid wooden beam between the head of the jack and the bottom of the tank.
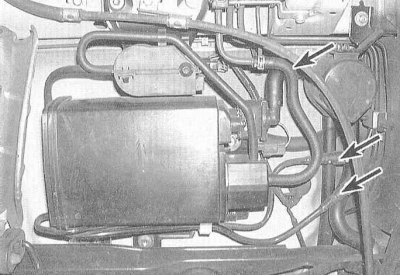
15. The considered car models are equipped with the ORVR ventilation system, which functions in conjunction with the fuel vapor recovery system (EVAP). Release the clamps and disconnect the corresponding lines from the tank and its filler neck. Disconnect the hoses from the EVAP carbon canister.
16. Remove the heat shield.
17. Disconnect both mounting brackets and lower them down, providing enough space to remove the fuel tank.
18. Remove the tank from under the car.
19. Installation is carried out in the reverse order.