
2. Remove the mud deflector.
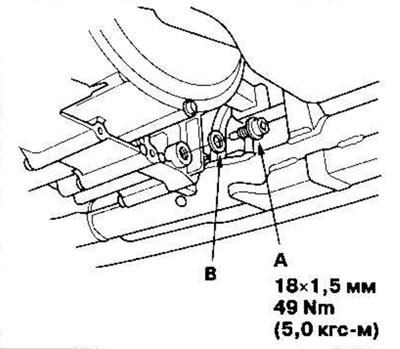
3. Remove the drain plug (A) and drain the transmission fluid (ATF). Screw the plug into the drain hole, installing a new sealing washer (B).
4. Disconnect the cable from the negative battery terminal, then from the positive one.
5. Remove the air cleaner housing and air intake pipe.
6. Remove the battery hold-down bracket, then the battery and its tray.
7. Remove the harness clamp from the battery base, then the battery base.
8. Disconnect the ground cable (A) from the transmission.
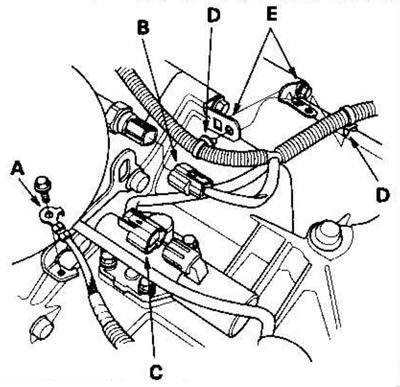
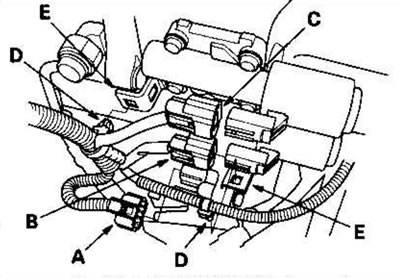
9. Disconnect the connector from the 2nd gear clutch pressure switch (B) and the connector from the automatic transmission clutch pressure control solenoid valve A (C) and remove the harness clamps (D) from the brackets (E).
10. Disconnect the connector from the intermediate shaft speed sensor (A) and from the main shaft speed sensor (B).
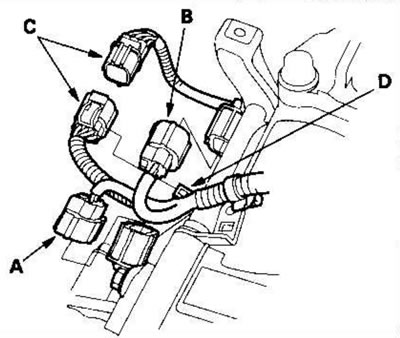
11. Remove the transmission range switch connector (C) from the bracket (D), then disconnect it.
12. Disconnect the connector from the 3rd gear clutch pressure switch.
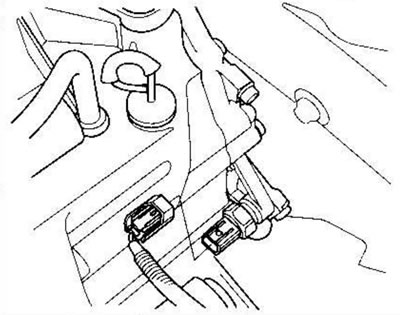
13. Disconnect the shift solenoid valve harness connector (A), the connector from the clutch pressure control solenoid valve B and the connector from the solenoid valve C, then remove the harness clamps (D) from the brackets (E).
14. Disconnect the ATF cooler hoses (A) from the ATF cooler pipes (B). To prevent ATF fluid from leaking, turn the ends of the ATF cooler hoses upward, then plug the ATF hoses and pipes.
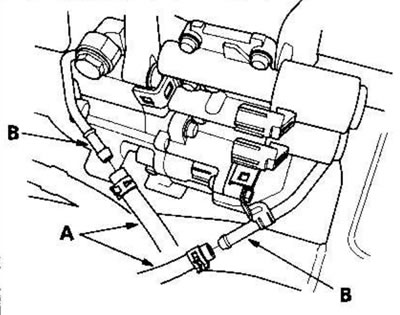
15. Check for signs of leakage at the hose joints.
16. Remove the cover (A) from the wiring harness, unscrew the water pipe mounting bolts (B). Loosen the mounting bolt (C) in the air cleaner housing mounting bracket, then lower the water pipe.
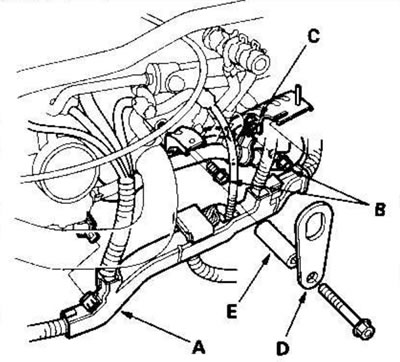
17. Secure the hanger bracket (D) with the spacer sleeve (E) to the hose clamp bracket bolt hole on the engine block and lift the engine.
18. Place a 5mm socket wrench (A) on the tip of the ball joint pin (B) and remove the nut (C), then separate the stabilizer link (D) from the lower control arm.
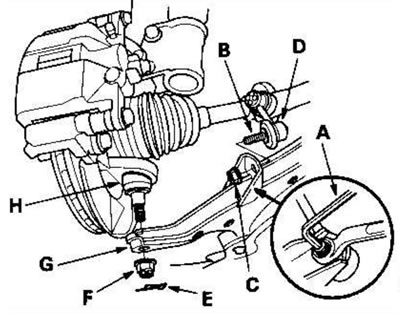
19. Remove the spring clips (E) and castle nuts (F), then separate the lower control arms (G) from the steering knuckles (H).
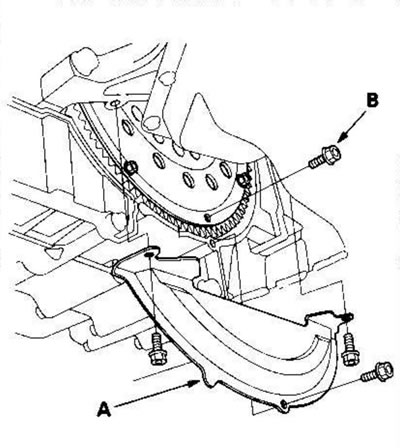
20. Remove the torque converter cover (A) and remove the eight bolts from the drive plate (B) by rotating the crankshaft pulley.
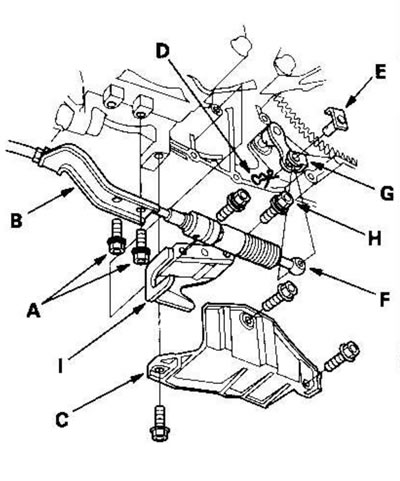
21. Remove the shift cable on 4WD models.
- Remove the bolts (A) securing the shift cable bracket (B), then remove the cover (C) from the shift cable.
- Remove the spring clip (D) and check pin (E), then separate the shift cable (F) from the control lever (G). Do not kink the shift cable.
- Remove the bolts (H) securing the shift cable bracket (I), then remove the shift cable bracket (I) from the shift cable.
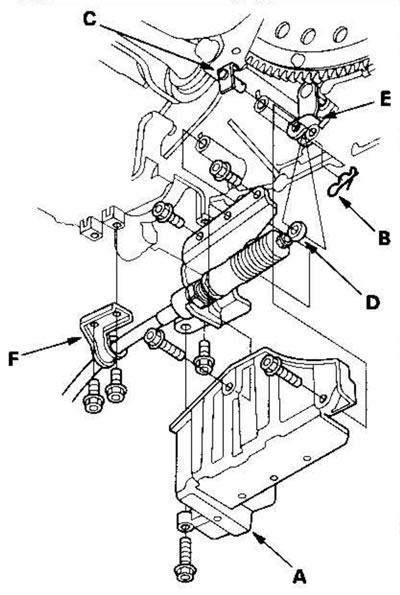
22. Remove the shift cable on 2WD models.
- Remove the cover (A) from the gear shift cable.
- Remove the spring clip (B) and check pin (C), then separate the shift cable (D) from the control lever (E).
- Remove the bolts securing the shift cable bracket (F). Do not kink the shift cable.
23. Disconnect the ATF cooler hose (A) from the ATF cooler pipe (B), then plug the hose.
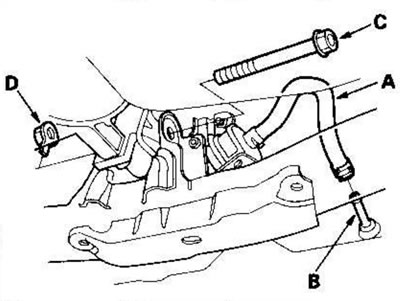
24. Remove the bolt (C) and nut (D) from the front support.
25. Remove the bolts from the rear support.
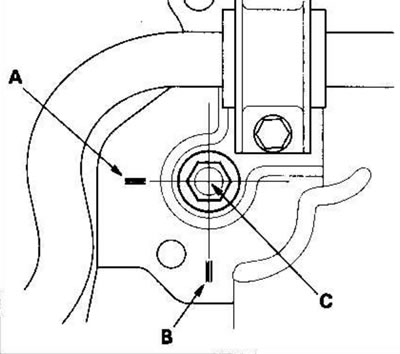
26. Apply marks in positions A and B, which correspond to the center of the subframe mounting bolts (C).
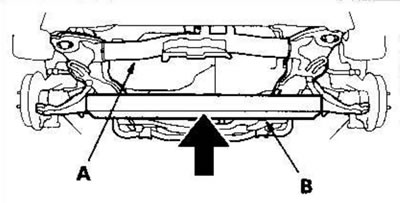
27. Support the subframe (A) with a jack, placing a 10x10x100 cm wooden block (B) underneath.
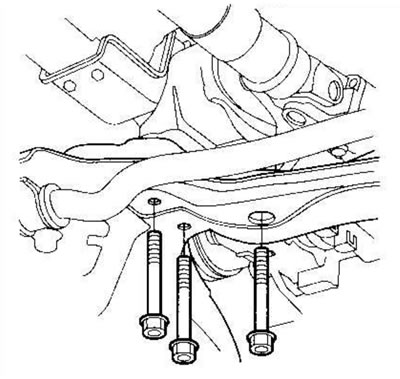
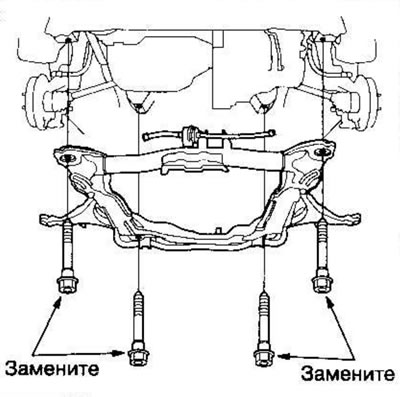
28. Remove the four mounting bolts from the subframe, then lower the subframe.
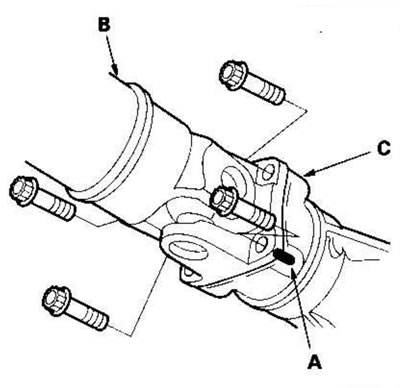
29. On 4WD models; Place marks (A) on the propeller shaft (B) and the transfer case coupling flange (C), then separate the propeller shaft from the transfer case assembly.
30. Pry the left drive shaft out of the differential.
31. Remove the drive shafts from the differential and intermediate shaft.
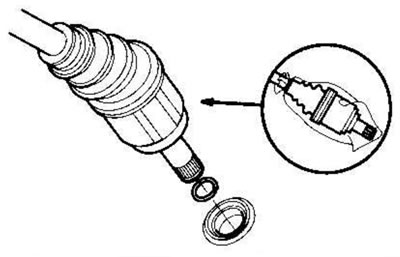
32. Remove the cover (A) from the intermediate shaft.
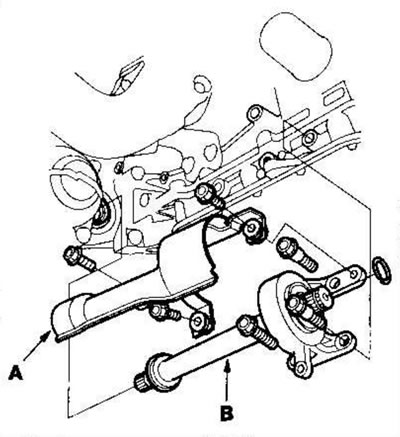
33. Remove the intermediate shaft. Apply clean motor oil to all high-cleanliness surfaces, then tie plastic bags to the ends of the drive shafts and intermediate shaft.
34. Support the gearbox with a jack.
35. Remove the mounting bolts from the gearbox housing.
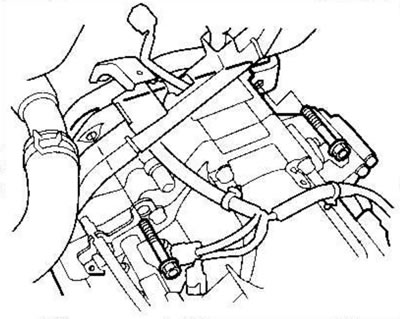
36. Remove the bolt (A) and nuts (B) from the transmission support bracket, then remove the bolt (C) from the transmission support.
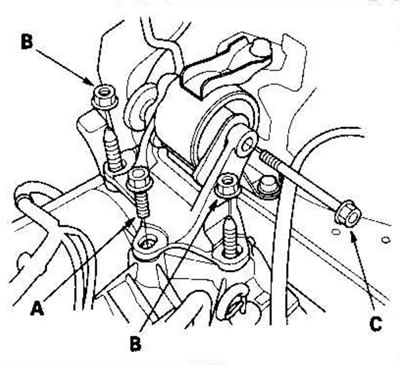
37. Remove the mounting bolts from the front lower part of the gearbox housing.
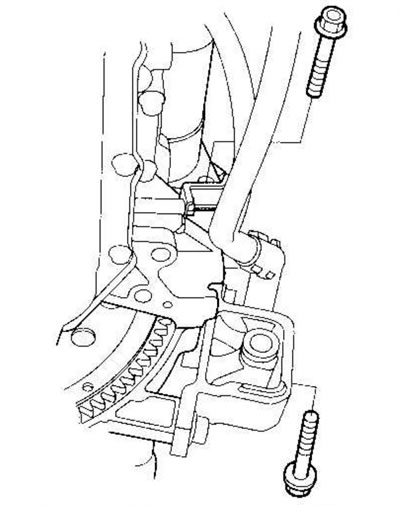
38. Remove the stiffener (A), then remove the mounting bolts (B) from the rear lower part of the gearbox housing.
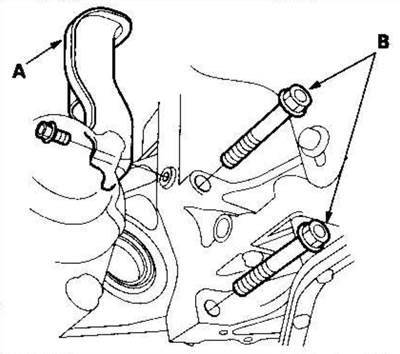
39. Move the gearbox away from the engine and remove it from the vehicle.
40. Remove the torque converter assembly.
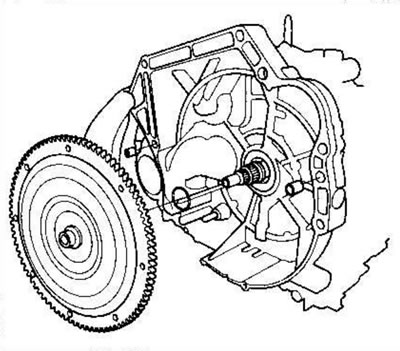
41. Remove the front support.
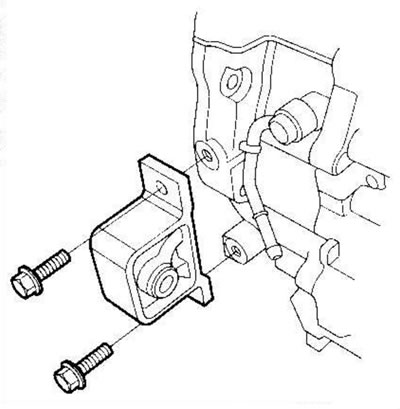
42. Remove the rear support/bracket.
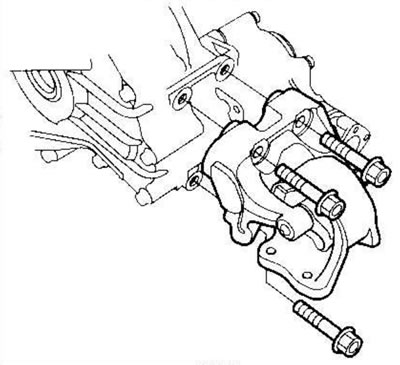
Note: 4WD model shown. 2WD model is similar.
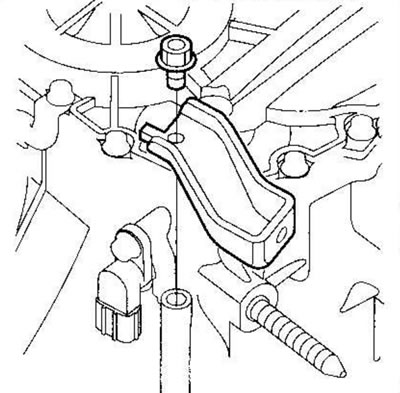
43. Remove the air cleaner housing mounting bracket.
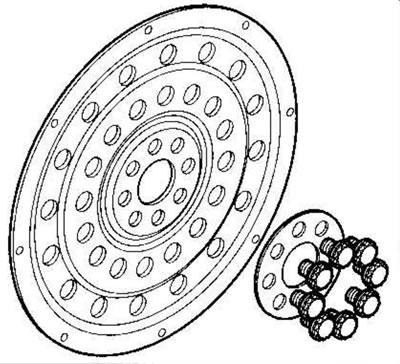
44. Check the drive disk and replace it if it is damaged.
(The text of the article is available on the website: «HondaBook.ru»)