
Contents: Removal ⇊ Installation ⇊
On these models, the engine is removed from the vehicle along with the transmission.
Removal
1. Mark the position of the hinges and remove the hood.
2. Remove the battery with the tray.
3. Remove the front lower engine shield and protective bar. To do this, remove the piston-type latches from the side of the wings, unscrew the bolts and screws.
4. Decompress the fuel system (Chapter 5), drain the oil and fluid from the engine and transmission, drain the coolant and disconnect the hoses from the radiator.
5. Remove the air filter and air ducts, remove all parts that are connected to the air duct.
6. Remove the cooling system fan by unscrewing the mounting bolts to the radiator and disconnecting the wires.
7. Mark (including the routes) and disconnect all hoses, cables and wires from the engine. Disconnect the automatic transmission hoses from the radiator.
9. Remove the radiator by unscrewing the mounting bolts to the brackets.
10. Remove the accessory drive belts.
11. Remove the power steering pump, air conditioning compressor (if provided), move aside and secure without disconnecting the hoses.
12. On a vehicle with a manual transmission, remove the clutch slave cylinder, move it to the side and secure it without disconnecting the hoses.
13. Raise the car.
14. Disconnect the oxygen sensor connector.
15. Disconnect the exhaust pipe from the manifold.
16. On a vehicle with an automatic transmission, disconnect the ground bus from the gearbox and disconnect the drive cable from the transmission.
17. Remove the front wheels.
18. Remove the axle shafts (Chapter 7).
19. On all-wheel drive vehicles, mark and disconnect the cardan shaft from the transfer case.
20. Remove the air conditioner hose bracket.
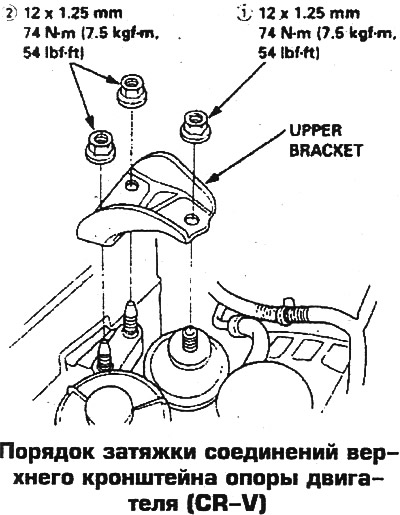
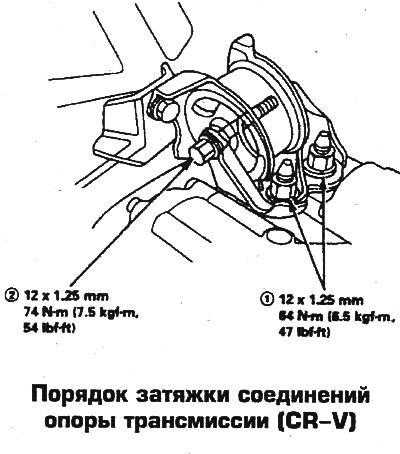
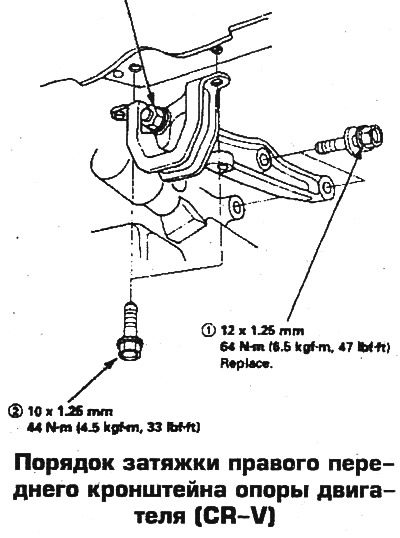
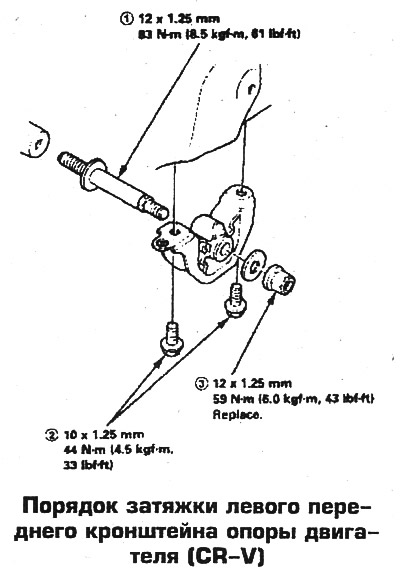
21. Raise the engine and remove the left and right supports. Remove the upper engine mount bracket from the left side of the cylinder head. Remove the transmission mount bracket and mount.
22. Make sure all hoses and wires are disconnected and slowly remove the engine from the engine compartment.
Installation
23. The engine is installed in reverse order. Ensure that the engine mount components are oriented correctly. Replace all fuel hose fitting and pressure line gaskets. Connect and secure all wires, hoses and cables, following the marks made during disassembly. Tighten the engine mount mounting bolts to the torques shown in the photo. Fill the engine with oil and add coolant. Adjust all cables and belt tension. Warm up the engine and check for fluid leaks.
 |
 |
 |
 |
(The original is located on the website: «hondabook»)