
WARNING: Vehicles equipped with anti-lock brake systems (ABS) require a separate bleeding procedure if any ABS components have been removed or lines disconnected. Refer to the section on ABS of this Chapter. If a repair is required that does not affect the ABS, such as replacing the master cylinder, brake lines or hoses, then the normal bleeding procedure can be used.
It is always necessary to bleed the hydraulic system if it has been opened or if air has entered the lines. It may be necessary to bleed all four brakes if air has entered due to low fluid levels or if the brake lines have become disconnected in the master cylinder.
If the line is separated at only one wheel, then usually only the brake circuit needs to be bled, although it is always recommended to bleed all four wheels. If the lines were separated at any junction between the master cylinder and the brake, then the corresponding circuit must be bled.
On vehicles equipped with rear drum brakes, improperly adjusted brake shoes can cause a "long" pedal effect and weak braking, creating the sensation of air entering the lines. To correct this problem, adjust the brakes and test drive the vehicle before bleeding the system.
1. Fill the master cylinder reservoir with brake fluid to the MAX or FULL mark and maintain at least half of the full volume during the bleeding procedure.
2. It is strongly recommended to always bleed all wheels, not just one or two. The correct order for bleeding is:
- Prelude: Front left, rear right, front right, rear left.
- 1984-89 Accord: Front left, rear right, front right, rear left.
- 1990-91 Accord: Rear right, front left, rear left, front right.
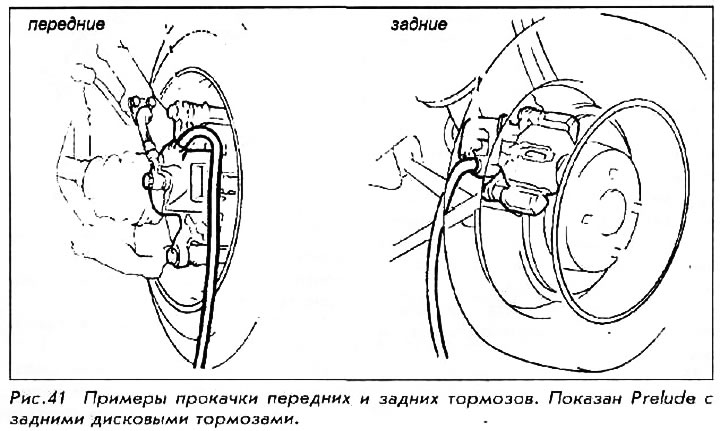
3. Attach a tight-fitting transparent hose to the wheel to be bled, holding the bleeder valve with a suitable spanner. Hang it and submerge it in a transparent container half filled with clean brake fluid. The end of the hose should remain submerged in the fluid at all times.
4. Ask an assistant to slowly press the brake pedal several times and then hold it down.
5. Slowly unscrew the bleed valve (usually 1/4-1/2 turn is enough). After the first appearance of air and fluid escaping, close the bleed valve and have an assistant slowly release the pedal.
6. Repeat steps 4 and 5 until no air bubbles are visible in either the hose or the container. If air continually appears during repeated pumping, the system should be checked for the source of the leak. When finished, the bleed screw should be tightened to 7-9 Nm.
7. Check the master cylinder reservoir periodically to maintain the proper brake fluid level.
WARNING: Do not reuse brake fluid.
8. After bleeding, check the pedal for "spongyness" or other suspicious sensations. Repeat the bleeding procedure if adjustment is necessary. Drain excess fluid from the reservoir.
9. Check the correct functioning of the brakes while driving.