
Attention:
- Keep foreign particles and water out of the system when adding brake fluid.
- To prevent chemical changes in the brake fluid, do not mix fluids of different types.
- Use genuine Honda Ultra DOT 3 or DOT 4 brake fluids.
- Be careful not to get brake fluid on paintwork. If it does get on the coatings, rinse immediately with water.
- Do not reuse drained brake fluid.
1. Remove the filter and remove the brake fluid and sediment from the reservoir,
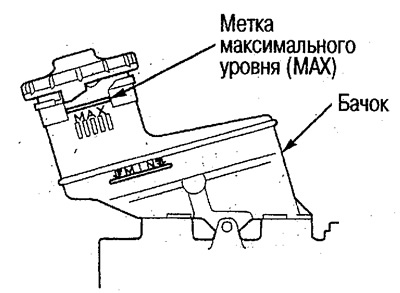
2. Install the filter on the tank and fill in fresh brake fluid to the maximum level mark (MAX).
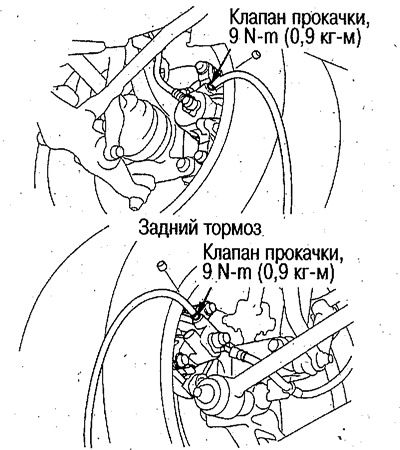
3. Put a transparent tube on the bleed valve and substitute a suitable container to receive the liquid,
4. The assistant slowly presses the brake pedal several times and leaves it pressed.
5. Slowly loosen the bleed valve and release the brake fluid along with the air. When the brake pedal has reached the floor and the brake fluid has stopped flowing, tighten the bleed valve.
6. Repeat steps 4, 5 until the flow of air bubbles stops, and then tighten the bleed valve with the required force.
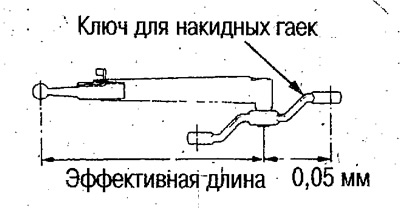
Determine the tightening torque using a flare nut wrench as follows:
Formula for calculation:
Value read from Torx key = Effective length of Torx key (m) x Required tightening torque N·m (kg m) / Effective Torx key length (m) +0,05 (m)
Calculation example:
If a Torx key with an effective length of 250 mm is used, then the value read from the Torx key will be: 0.25x0.9 / 0.25 + 0.05 = 0.75 kg m
7. Place caps on each bleed valve.
Add brake fluid to the reservoir.
9. In a safe place, check the braking performance.