
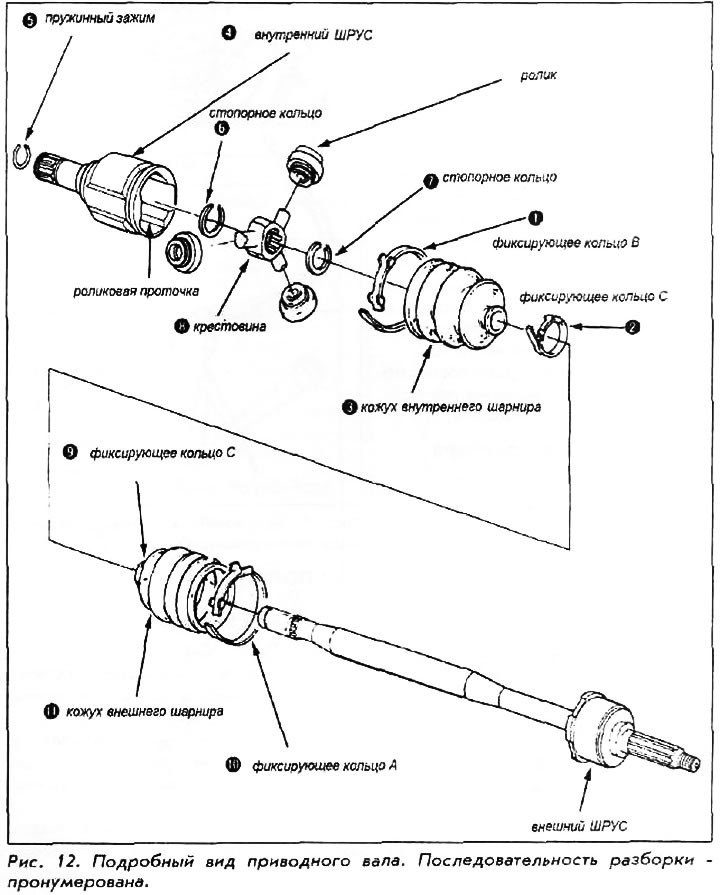
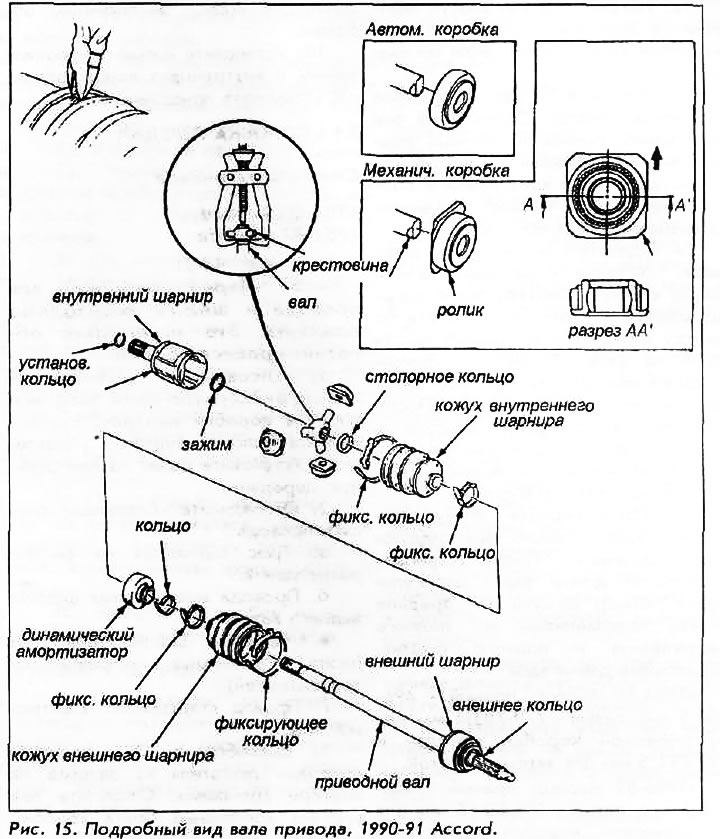
1. Remove the axle shaft.
2. Only the inner hinge can be disassembled. If the outer hinge or casing is out of order, then to gain access to them, it is necessary to disassemble the inner hinge.
3. Remove the large retaining ring from the inner casing. Then remove the small retaining ring and pull the casing off the hinge.
The casing is filled with a lubricant made of molybdenum disulfide. This is an extremely slippery and dirty substance. Prepare a sufficient number of rags in advance. It is recommended to wear a work coat.
4. Carefully remove the inner joint end cap. Inspect it for cracks, wear, and damage. Inspect the inner surface for wear.
5. Remove the non-reusable retaining ring from the end of the axle shaft. This will allow the crosspiece to be removed.
6. Mark the positions of the rollers, crosspiece and axle end so that all parts can be reassembled in the same way. Remove all rollers from the crosspiece.
7. Remove the second snap ring from the shaft. Remove the ball joint housing. On 1988-91 Prelude and 1990-91 Accord models, the dynamic shock absorber must also be removed from the shaft.
8. If the outer joint housing needs to be replaced, first remove the housing clamps, then pull the housing off the joint and then off the shaft. Hold the outer joint and rotate the end of the shaft. Listen for noise from faulty bearings inside the joint. If the joint is noisy, it should be replaced. New joints already have a new shaft assembled, so the inner joint must be mounted on the new shaft when replacing.
9. Clean and inspect all individual parts. If any sign of wear is present, the part should be replaced.
To install:
10. Fill the outer and inner joints completely with molybdenum grease. Use only molybdenum disulfide grease, as other lubricants will not withstand the load. Before installing the housings, wrap the shaft grooves with vinyl or electrical tape to protect the housings.
11. Pull the outer joint housing onto the shaft and then onto the joint. Do not rush to put on the retaining rings.
12. Pull the inner joint housing onto the shaft. Install the dynamic shock absorber if it was removed.
13. Place the inner retaining ring on the shaft. Place the rollers and bearing races on the crosspiece axles. Holding the shaft vertical, insert the crosspiece assembly into the inner joint. Install the outer retaining ring.
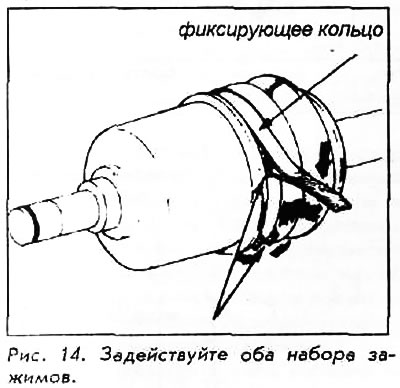
14. Place the shrouds on both pivots. Place the narrow end of the shroud in place. The shroud retaining ring should be centered between the positioning tabs on the shaft. Install the retaining ring. Bend both sets of retaining clips. Once the ring is secured, expand and contract the shrouds once or twice, and release to their normal size and length.
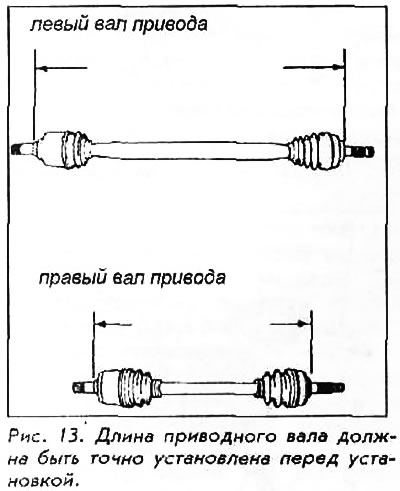
15. Adjust the length of the drive shaft according to the following instructions. After setting the correct shaft length, adjust the housing size to the middle between its fully extended and fully compressed positions. Correct shaft lengths:
- 1984-85 Accord: right - 496-500.5 mm, left - 779-783.5 mm for manual transmission and 787-791.5 mm for automatic.
- 1986-89 Accord: Right - 506-510.5 mm, Left - 805-809.5 mm for manual transmission and 812-816.5 mm for automatic.
- 1984-87 Prelude, with carburetor: right - 514-518.5 mm, left - 800-804.5 mm for manual transmission and 809-813.5 mm for automatic.
- 1984-87 Prelude, with injector: right - 506-510.5 mm, left - 805-809.5 mm for manual transmission and 812-816.5 mm for automatic.
- 1988-91 Prelude: 496mm left and right shafts.
- 4990-91 Accord, manual transmission: left and right shaft 478.7-483.7 mm.
- 1990-91 Accord, automatic: left - 836.7-841.7 mm, right - 478.7-483.7 mm.
16. Install new retaining rings on the wide ends of the housings. Be sure to bend both sets of retaining clips. To reduce the height, lightly tap the rings where the protruding edges are. Do not hit the housing.
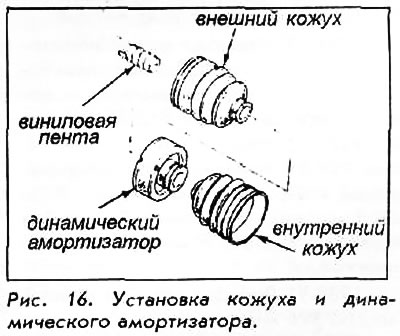
17. Install the dynamic shock absorber at a distance of 3-7 mm from the casing. Install a new retaining ring in the same way.
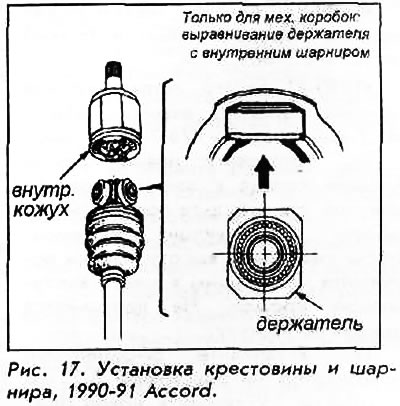
18. Install the new spring clip to the inner end of the hinge; install the drive shaft.
The original is located on the website: Hondabook.ru