
Refer to section "Camshaft, removal and installation". The camshaft can be removed after removing the rocker arms, their axles and rack assemblies.
For all SOHC engines
1. Disconnect the cable from the negative battery terminal.
2. Remove the valve cover and bring the number one cylinder to top dead center.
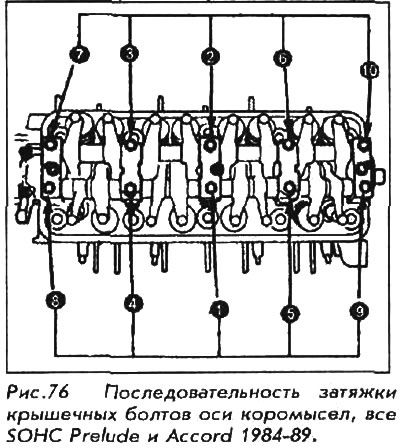
3. Remove the rocker arm kit mounting bolts. The bolts should be unscrewed two turns each in a cross pattern (as shown in fig. 76 and 77), so that the load on the rocker-to-axle connections is reduced evenly to avoid damage.

4. Remove rocker arms complete with axles. Leave the rocker arm bolts in place as the axles are released so that the bearing caps, springs and rocker arms remain on the axles.
5. If you need to disassemble the rocker arm set, remember the location of all parts for subsequent proper assembly.
For installation:
6. Lubricate the cams and camshaft journals.
7. Reinstall the rocker arm assembly and tighten the bolts by hand, lightly. Screw them in two turns each in the proper order, making sure the rocker arms do not interfere with the proper movement of the valves. Tighten 6 mm bolts with a force of 12 Nm, and 8 mm with a force of 22 Nm.
8. Install the valve cover and connect the cable to the negative battery terminal.
For DOHC engines
1. Disconnect the cable from the negative battery terminal.
2. Remove the valve cover and bring the number one cylinder to top dead center.
3. Remove the camshaft drive belt cover and the belt itself.
4. Remove the camshaft bearing caps and the camshafts themselves.
5. Remove the rocker kit.
For installation:
6. Make sure the keyway is facing up. Before installation, loosen the valve lock nuts and adjusting screws.
7. Place rockers on support bolts and stems (rods) valves.
8. Install camshafts and oil seals. The seals are installed with the spring-loaded side inward.
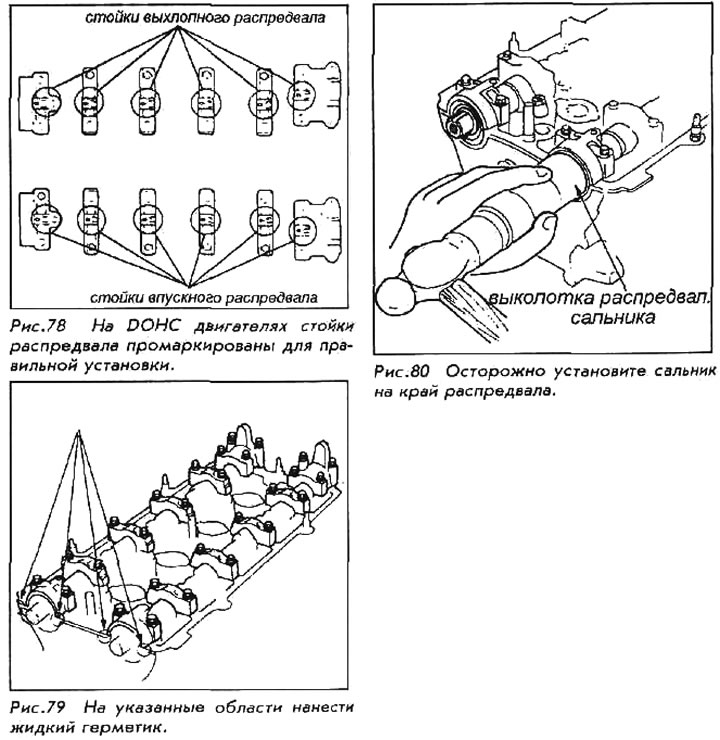
9. Please note that the camshaft racks are marked with letters "I" And "E" and numbered consecutively for correct installation. Do not use oil to lubricate strut surfaces that are mated with oil seals. Apply liquid sealant to the mating surfaces of the #1 and #6 camshaft struts.
10. Establish racks of a camshaft.
11. Temporarily tighten them.
12. Having chosen the suitable size mandrel, press in epiploons on a camshaft.
13. Tighten all bolts two turns each, starting with the 13 post bolt. Go from bolt to bolt in an expanding spiral, twisting each two turns and, having reached the edge, go again to bolt 13 until all bolts are tightened to 12 Nm.
14. Adjust valve clearances.
15. Install the valve cover.