
Check and replacement
At each adjustment, visually inspect the cables for deposits, breaks, or damage to the insulation. Check the caps and nipples on the distributor cap and coil. Replace any damaged wires. Always replace wires to spark plugs with whole bundles (sets) along with wires to the coils. Length is also important; use the correct kit for your car.
Approximately every 50,000 km, the resistance of the wires should be checked with an ohmmeter. Wires with excessive resistance can cause no ignition and make the engine difficult to start in bad weather. Typically, the service life of cables is approximately 50,000-80,000 km.
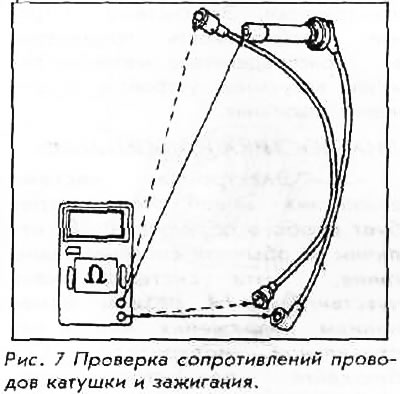
To check the resistance, remove the wire from the spark plug and the distributor cap. Examine each pin in the wire for any sign of breakage or burning. A slight change in color is normal, but there should be no obvious signs of burning. Connect one tester test lead to each end of the cable. Replace any wire that has a resistance greater than 25 kΩ. In the same way, check the high-voltage wires from the coil. If the resistance is greater than 25 kΩ, then replace the cable. It must be remembered that the resistance also depends on the length; the longer the cable, the greater the resistance. Thus, if the cables on your vehicle are longer than the factory ones, the resistance will be higher, quite possibly above the limits shown here. Honda recommends keeping the 25 kΩ limit in any case.
When installing new cables, replace them one at a time to avoid confusion. Start with the longest cable. Install the cap tightly on the spark plugs. Lay the wires along the same path as they were originally laid. Firmly insert the nipples into the tabs on the cap or spool. Secure each cable in all holders or grips along the wiring path.