
ACCORD and PRELUDE 1984-89 with HITACHI distributor
1. Disconnect the wires from the breaker module.
2. Using a voltmeter, check the voltage between the blue wire and ground, and then between the black-yellow wire and ground, with the ignition system on. This should be the battery voltage.
3. If there is no voltage, check the wiring in the breaker module.
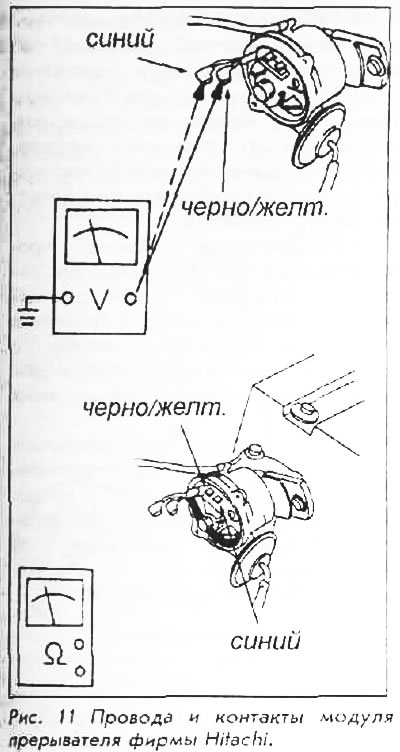
4. Set the Rx100 scale on the ohmmeter. Disconnect the wires from the breaker module. Check continuity at the breaker module terminals.
5. Connect the positive of the ohmmeter to the black-yellow output wire, and the negative to the blue wire; conductivity must be within the selected scale on the ohmmeter.
6. Then connect an ohmmeter in the opposite direction; the arrow should not deviate (conduction must be absent).
7. If the readings of the ohmmeter do not correspond to points 5 and 6, then it is necessary to replace the breaker module.
1984-85 ACCORD AND PRELUDE with TOYO DENSO distributor
1. Disconnect the wires from the breaker module.
2. Using a voltmeter, check the voltage with the ignition on between the blue wire and ground, then between the black-yellow wire and ground; should be battery voltage.
3. If there is no voltage, then check the wires to the breaker module.
ACCORD AND PRELUDE 1988-89 with TOYO DENSO distributor
1. Remove the distributor cap.
2. Remove the breaker device from the distributor.
3. With the ignition on (ignition key in the ON position) Use a voltmeter to check for battery voltage at the black/yellow wire and then at the blue wire. Voltage should be in both cases.
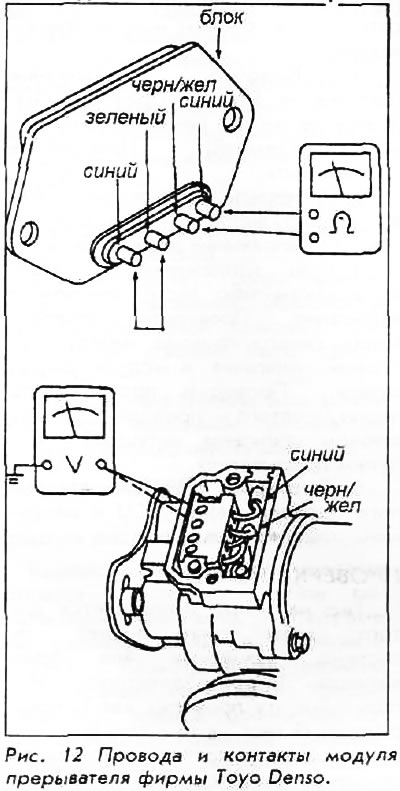
4. In the breaker module, connect the blue and adjacent green terminals with a jumper. Set the ohmmeter to Rx100 scale.
5. There should be no conductivity when connecting an ohmmeter plus to the black/yellow terminal and minus to the blue.
6. With reverse polarity, the conductivity should be (visible on the set scale).