HondaBook.ru
Auto companies Volkswagen Auto companies Ford Auto companies Lada Auto companies Skoda Auto companies BMW Auto companies Mazda Auto companies Peugeot
English Русский
Български
Беларускі
Український
Српски
Hrvatski
Română
Polski
Slovenský
Magyar
Bookmark Contacts Sitemap   


Accord Civic Fit / Jazz CR-V HR-V Others Articles
CR-V 1 (1995-2001, petrol) CR-V 2 (2002-2006, petrol)

Removal and installation the intake manifold (Honda CR-V 2)

  • Main
  • Honda CR-V
  • 2 (2002-2006, petrol)
  • Power unit
  • Exhaust system
  • Removal and installation the intake manifold
0

Removal and installation the intake manifold


Removal and installation the intake manifold


Removal


1. Remove the cover from the intake manifold.
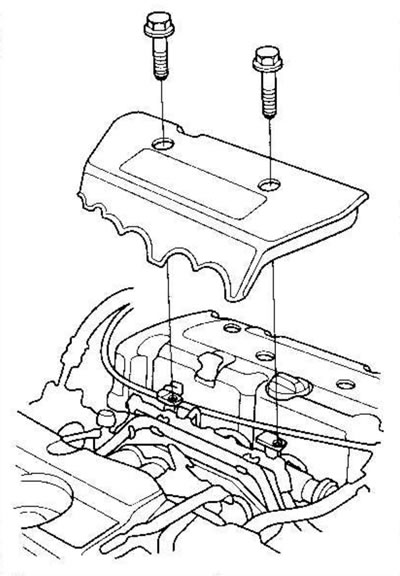
1. Remove the cover from the intake manifold.


2. Disconnect the connector (A) from the intake air temperature (IAT) sensor and remove the breather hose (B), then remove the air cleaner housing (C).
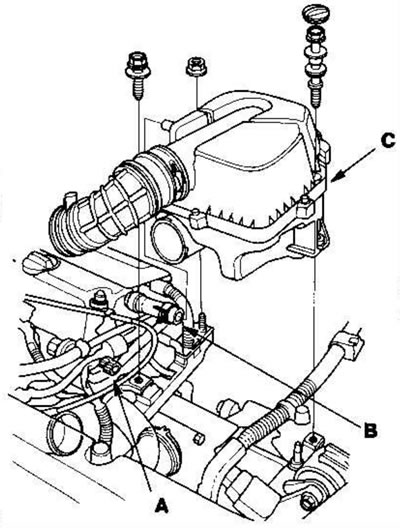
2. Disconnect the connector (A) from the intake…


3. Remove the throttle cover (A). Fully open the throttle linkage and cruise control linkage by hand, then disconnect the throttle cable (B) and cruise control cable (C) from the linkages. Loosen the locknuts (D), and then remove the cables from the bracket.
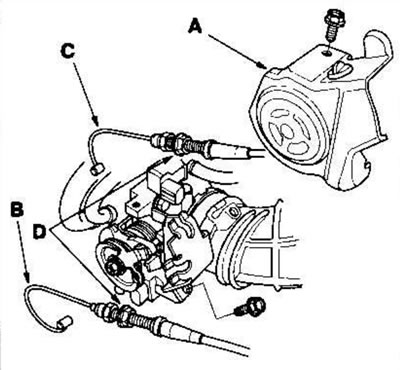


3. Remove the throttle cover (A). Fully open the…


4. Disconnect the hose (A) from the carbon filter (EVAP) and the vacuum hose (B) from the power brake.
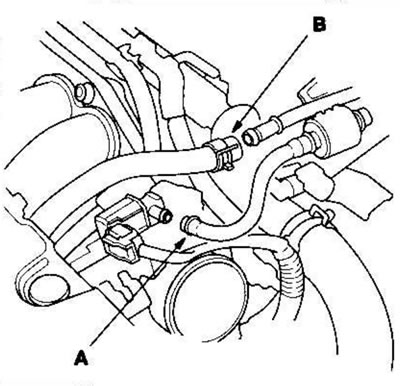
4. Disconnect the hose (A) from the carbon filter…


5. Disconnect the water bypass hoses, then plug them.
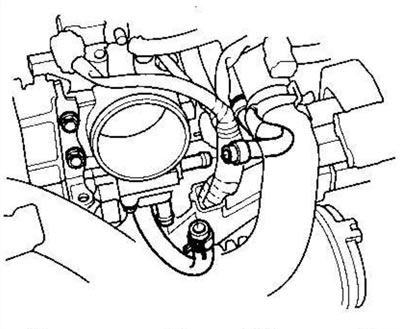
5. Disconnect the water bypass hoses, then plug…


6. Disconnect the connector (A) from the intake manifold regulating control (IMRC) valve actuator solenoid, then disconnect the positive crankcase ventilation (PCV) hose (B) and remove the IMRC valve actuator solenoid mounting bolt (C).
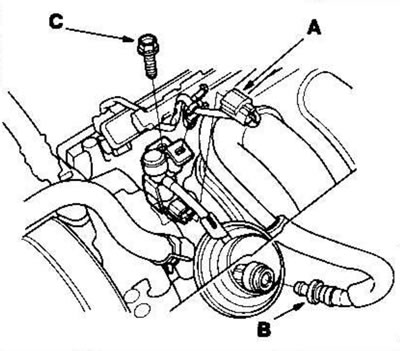


6. Disconnect the connector (A) from the intake…


7. Remove the bolt (A) securing the battery retainer, then remove the bulkhead cover (B).
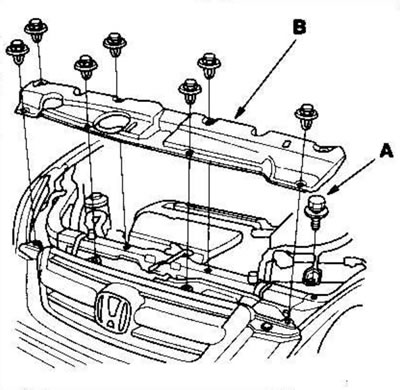
7. Remove the bolt (A) securing the battery…


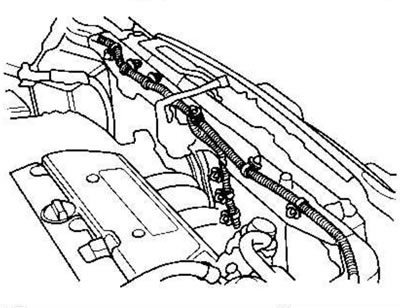
8. Remove the harness clamps.

8. Remove the harness clamps.


9. Loosen the air intake mounting bolts (A) and remove the upper bracket and cushion (B), then remove the partition (C).
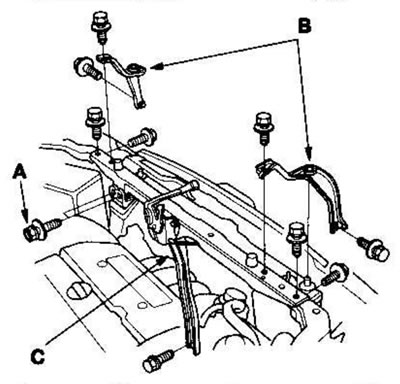
9. Loosen the air intake mounting bolts (A) and…


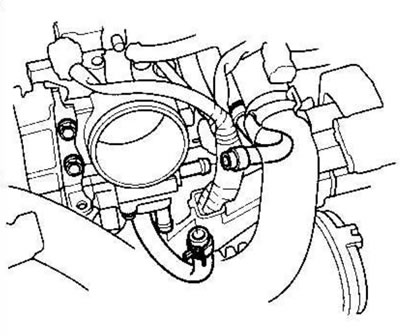
10. Disconnect the engine wiring harness connectors and remove the wiring clamps from the intake manifold.


  • Idle Air Control Valve (IAC) Connector
  • Throttle Position Sensor (TP) Connector
  • Manifold Absolute Pressure (MAP) Sensor Connector
  • Connector of the electric valve for purging the carbon filter for capturing fuel vapors (EVAP)

11. Remove the intake manifold.
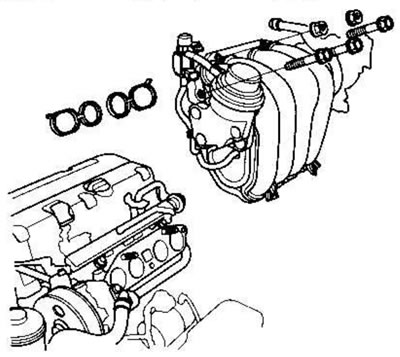
11. Remove the intake manifold.


Installation


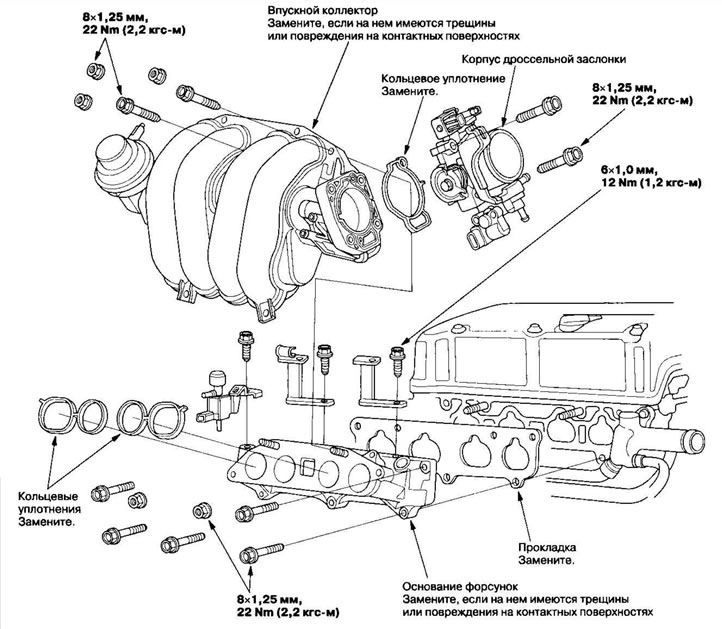
1. Install the intake manifold (A) and tighten the bolts/nuts in a crisscross pattern in two or three passes, starting with the inner bolt. Install new O-rings.
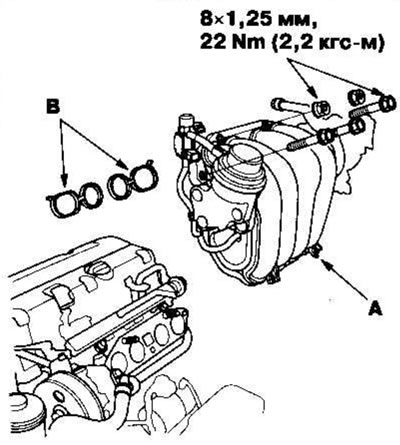
1. Install the intake manifold (A) and tighten…


2. Install the partition (A), then the upper bracket and cushion (B) and tighten the air intake mounting bolts (C). Apply paint to the bulkhead mounting bolts.
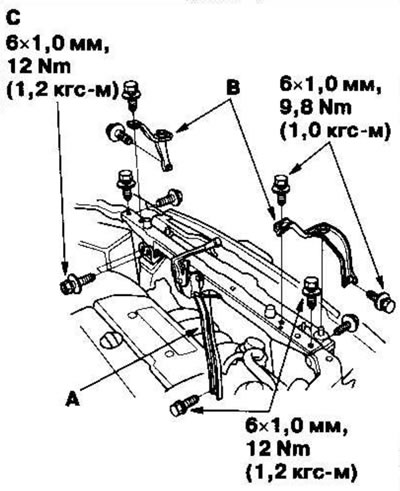
2. Install the partition (A), then the upper…


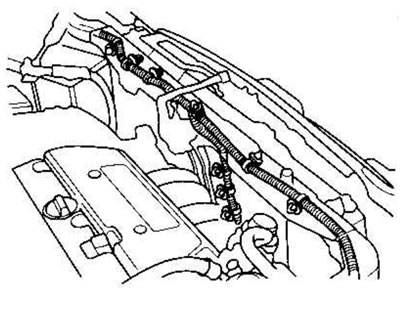
3. Place the clamps on the harness.


3. Place the clamps on the harness.

4. Install the bulkhead cover (A), then tighten the bolt (B) securing the battery retainer.
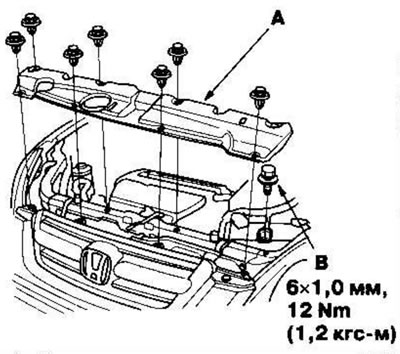
4. Install the bulkhead cover (A), then tighten…


5. Connect the connector (A) to the intake manifold regulating control (IMRC) valve actuator control solenoid valve, then connect the positive crankcase ventilation (PCV) hose (B) and tighten the IMRC valve control solenoid mounting bolt (C).
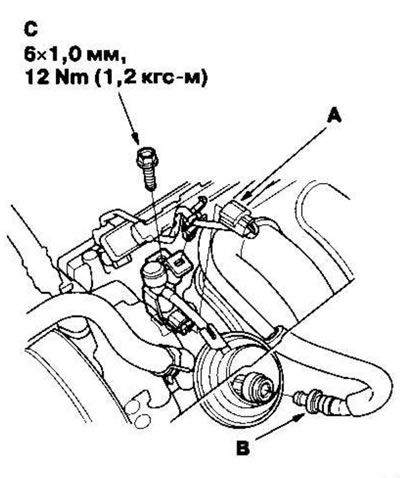
5. Connect the connector (A) to the intake…


6. Connect the water bypass hoses.


6. Connect the water bypass hoses.


7. Connect the hose (A) to the carbon filter (EVAP) and the vacuum hose (B) to the brake booster.
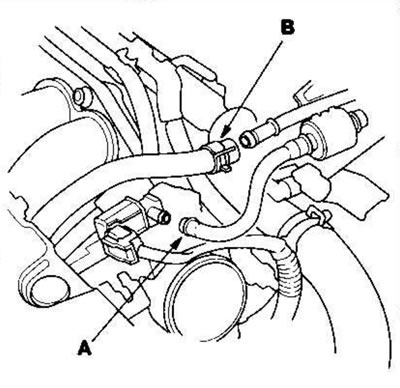
7. Connect the hose (A) to the carbon filter…


8. Connect the throttle cable, then adjust the cable.

9. Connect the cruise control cable, then adjust the cable.

10. Install the air cleaner housing (A) and connect the connector (B) to the intake air temperature (IAT) sensor.
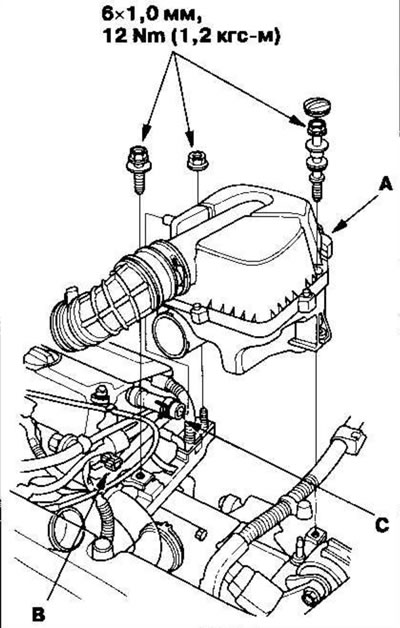
10. Install the air cleaner housing (A) and…


11. Connect the hose (C) to the breather.

12. Install the cover on the intake manifold.
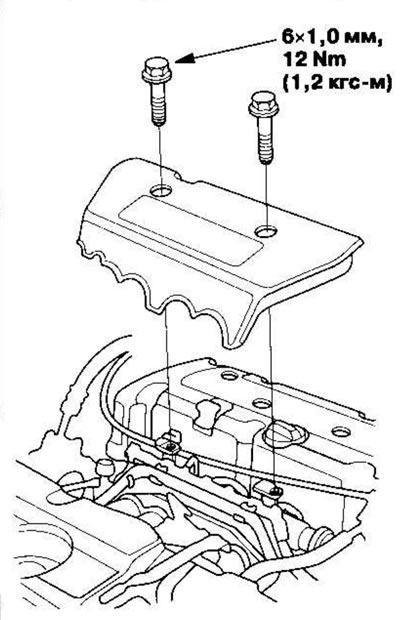
12. Install the cover on the intake manifold.


13. Wipe up any spilled engine coolant.

14. After installation, check that all tubes, hoses and connectors are connected correctly.

15. Fill the radiator with engine coolant and bleed the cooling system by opening the heater tap.
This article is available at: russian, bulgarian, belarusian, ukrainian, serbian, croatian, romanian, polish, slovak, hungarian
This information has been verified: Mikhail Kopasov
Share with friends:
◀ Previous
CR-V 2: Exhaust system
Next ▶

 
Removal and installation the exhaust manifold
Replacing the exhaust pipe and muffler
See also other articles from Honda manuals:
Intake manifold — removal and installation Honda Accord 3 (1985-1989)
Intake manifold — removal and installation Honda Civic 3 and 4 (1983-1991)
Intake manifold Honda Fit 1 (2001-2008)
Replacing the intake manifold Honda HR-V 1 (1998-2006, petrol)
Replacing the intake manifold Honda Avancier 1 (1999-2003, petrol)
Link in different formats to this article
Comments and feedback from visitors
No comments yet


How much will 44 + 23 ?


CR-V 2 (2002-2006, petrol) 
  • General information
  • User manual
  • Technical data
  • Maintenance
  • Power unit
  • Engine repair
  • Lubrication system
  • Cooling system
  • Exhaust system
  • Fuel system
  • Engine management
  • Engine electrical equipment
  • Transmission
  • Clutch
  • Manual gearbox
  • Automatic gearbox
  • Rear differential
  • Drive shafts
  • Chassis and running gear
  • Steering
  • Front suspension
  • Rear suspension
  • Brake system
  • Body and interior
  • Exterior (external elements)
  • Interior (internal elements)
  • Doors, locks and windows
CR-V 1 (1995-2001, petrol) 
  • General information
  • Maintenance
  • Tips for car owner
  • Power unit
  • Engine repair
  • Engine overhaul
  • Cooling and lubrication system
  • Engine electrical equipment
  • Control system
  • Fuel system
  • Transmission
  • Clutch and drive shafts
  • Car gearbox
  • Chassis and running gear
  • Front suspension
  • Rear suspension
  • Steering
  • Brake system
  • Body and interior
  • Body service
  • Exterior (external elements)
  • Interior (internal elements)
  • Electrical equipment
  • Equipment and devices
  • Electrical circuits
HondaBook.ru © 2018–2026 • Mobile version • Sitemap: EN BG BY UA RS HR RO PL SK HU • Feedback • Driver Information • Search system • Bookmark
Accord 3 (1985-1989) • Accord 6 (1997-2002) • Civic 3 and 4 (1983-1991) • Civic 5 and 6 (1991-2000) • Civic 6 (1995-2000) • Civic 7 (2000-2005) • Civic 8 (2005-2011) • Fit 1 (2001-2008) • CR-V 1 (1995-2001) • CR-V 2 (2002-2006) • HR-V 1 (1998-2006) • Avancier 1 (1999-2003) •
 
This website uses cookies to ensure proper functioning. By clicking "OK," you agree.