
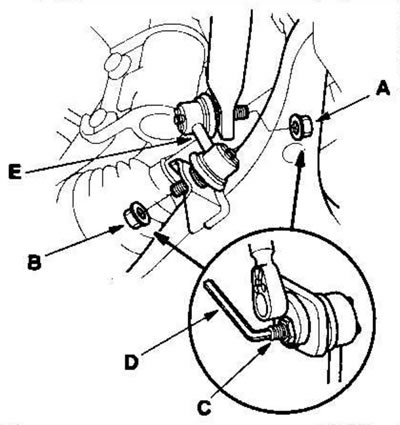
2. Loosen the self-locking nut (A) and flange nut (B) while holding the corresponding ball joint pin (C) with an Allen key (D), and remove the stabilizer link (E).
3. Install the stabilizer link onto the stabilizer bar and lower control arm, locating the ball joint pin in the center of the travel range.
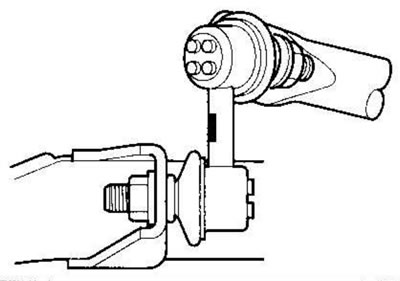
4. Install the self-locking nut and flange nut and tighten them slightly.
Note: When assembling, install a new self-locking nut.
5. Place a jack under the lower suspension arm ball joint and raise the suspension so that it supports the weight of the vehicle.
Warning. Do not place a jack under the ball joint pin on the lower control arm.
6. Tighten the self-locking nut (A) and flange nut (B) to the specified torque while holding the corresponding ball joint pin (C) with an Allen key (D).
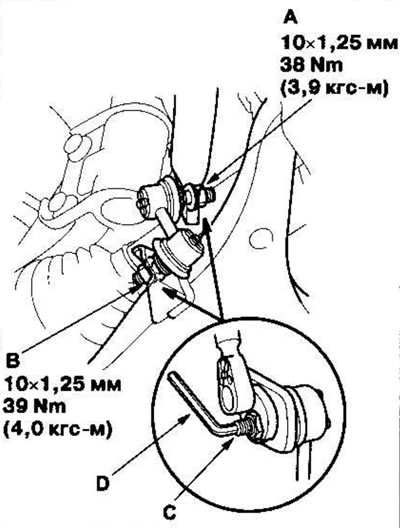
7. Drive for 5 minutes and tighten the self-locking nut again to the specified torque.