
Warning!
- Make sure lifts, jacks and safety stands are installed correctly (see chapter 1).
- Set the parking brake and block the rear wheels so that the vehicle does not roll off the stands and fall on you while you are working underneath it.
1. Raise the front of the vehicle and support it securely.
2. Apply the parking brake and chock both rear wheels.
3. Shift to neutral.
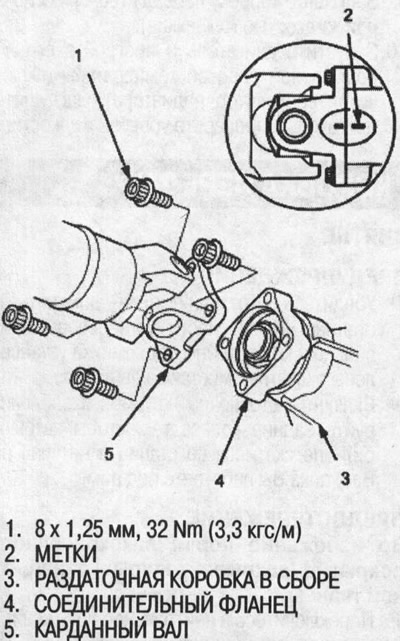
4. Apply marks to the propeller shaft and the transfer case connecting flange assembly.
5. Separate the propeller shaft from the transfer case assembly.
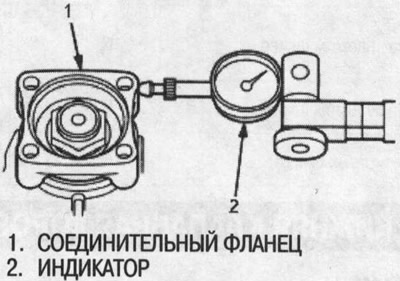
6. Install the indicator head on the transfer case flange, then measure the clearance in the transfer case gear engagement. Standard: 0.06-0.16 mm.
7. If the clearance is different from the norm, remove the transfer case assembly and adjust the clearance of the transfer case gear (see below).
8. Check the transfer case assembly for damage and fluid leakage.
- If the fluid leak is between the crankcase and the transfer case cover, remove the transfer case cover and replace the O-ring.
- If the fluid leak is between the flywheel and the transfer case housing, remove the transfer case assembly and replace the O-ring.
- If the fluid leak is between the transfer case coupling flange and the oil seal, remove the transfer case assembly and replace the oil seal and the O-ring on the transfer case shaft. If the oil seal needs to be replaced, reassemble the transfer case and check and adjust the transfer case gear contact pattern, transfer case gear engagement clearance, tapered roller bearing starting torque, and total starting torque (see below).
- Do not replace the oil seal on a transfer case that is mounted on the transmission.
(Based on materials from the website www.hondabook.ru)