
Contents: Without using devices ⇊ Using instruments ⇊
Without using devices
Note: If you find that the brake booster is not working properly, replace the brake booster assembly.
1. Checking the operation of the brake booster.
a) Start the engine.
b) Press the brake pedal with normal force.
c) Keeping the pedal depressed, turn off the engine.
d) Keep the pedal depressed for approximately 30 seconds.
d) If the pedal height has not changed, no faults in the vacuum booster have been detected.
2. Check for vacuum leaks.
a) Start the engine and let it idle for approximately 30 seconds.
b) Turn off the ignition and wait 30 seconds.
c) Press the brake pedal several times with normal force.
d) If the pedal travel is small when first pressed, but becomes larger with subsequent presses, no faults in the vacuum booster have been detected.
Note: If any faults are found, check the vacuum hose or check valve and check their installation. If faults are found, repair them and recheck the brake booster operation.
3. Check the vacuum hose and check valve.
a) Disconnect the vacuum hose (A) from the brake booster.
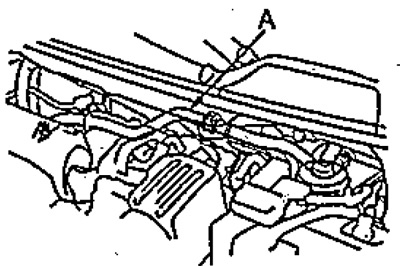
b) Start the engine and set the idle speed.
c) Make sure there is a vacuum in the vacuum hose.
If there is no vacuum, replace the vacuum hose with the check valve built into it.
If there is a vacuum in the vacuum hose, replace the brake booster.
d) Stop the engine and connect the vacuum hose.
Using instruments
1. Checking the reduction in vacuum.
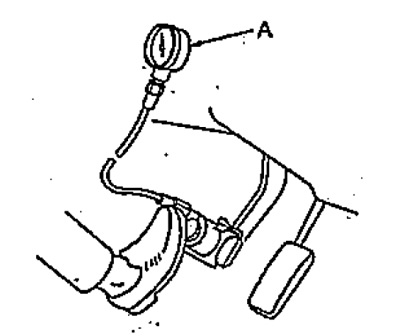
a) Connect the vacuum gauge (A) as shown in the figure.
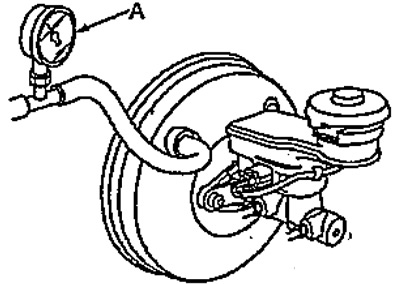
b) By adjusting the engine crankshaft speed with the accelerator pedal, set the vacuum shown by the vacuum gauge to 66.7 kPa.
d) Stop the engine and observe the vacuum gauge readings for 30 seconds. The vacuum should decrease by no more than 2.7 kPa.
- Decrease in vacuum - no more than 2.7 kPa (within 30 seconds)
If the vacuum reduction is not within normal limits, check the following items:
- vacuum hose with check valve;
- vacuum tubes and hoses;
- vacuum brake booster;
- the piston rod seal and the piston cuff of the master brake cylinder.
2. Check the pressure in the master cylinder.
a) Connect the vacuum gauge as shown in the figure.
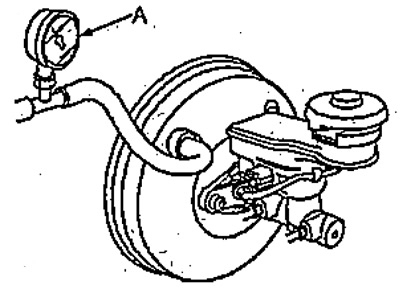
b) Connect the pressure gauges as shown in the figure.
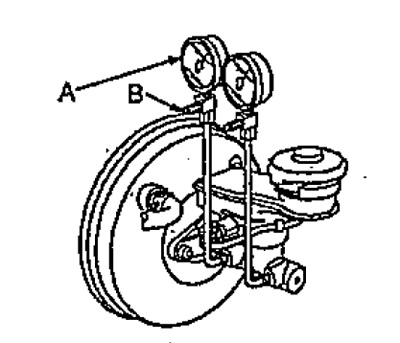
c) Rock the assembled system.
d) Install the brake pedal force measuring device, press the brake pedal with a force of 98 N and read the pressure gauges. Measure the pressure when pressing the brake pedal with a force of 294 N.
d) Start the engine and wait until the engine warms up – the cooling system fan should turn on and off 2 times.
e) By adjusting the engine crankshaft speed with the accelerator pedal, set the vacuum shown by the vacuum gauge to 66.7 kPa.
g) Repeat the measurements described in subparagraph "1".
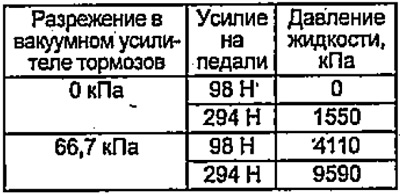
c) Compare the measured values with those given in the table below.
Right hand drive models produced before 10/2003.
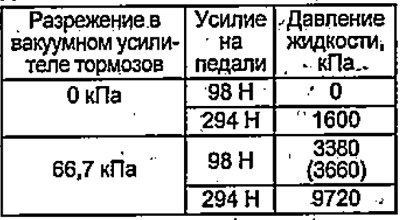
() - 4WD models.
Right hand drive models produced from 10/2003.
Left-hand drive models.
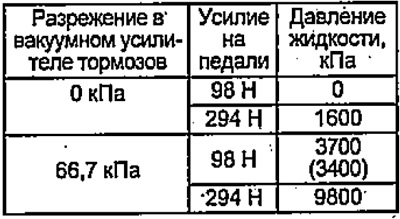
() - models with ABS.
If the pressure is not as shown in the table, check the master cylinder.
(The original is located on the website HONDABOOK)