
Car power and fuel injection system Honda Fit/Jazz 1

Fuel injection system — description
The injection system consists of three main subsystems: fuel, air supply and electronic control. Fuel system Fuel is supplied by a pump through a filter to each injector under pressure set by the fuel pressure...
The injection system consists of three main subsystems: fuel, air supply and electronic control. Fuel system Fuel is supplied by a pump through a filter to each injector under pressure set by the fuel pressure...

Precautionary measures
Precautions when servicing electrical equipment 1. Check that the engine settings are correct (see chapter " Maintenance and general check and adjustment procedures "). 2. Use the battery as a power source for the...
Precautions when servicing electrical equipment 1. Check that the engine settings are correct (see chapter " Maintenance and general check and adjustment procedures "). 2. Use the battery as a power source for the...

Diagnostic system
Vanishing Error The term "intermittent fault" refers to systems that have a fault, but whose testing currently shows no fault. If the "Malfunction indicator lamp" ("Check Engine") does not light, check all connectors...
Vanishing Error The term "intermittent fault" refers to systems that have a fault, but whose testing currently shows no fault. If the "Malfunction indicator lamp" ("Check Engine") does not light, check all connectors...

Fuel injection system device
Fuel injection system. 1 - oxygen sensor, 2 - absolute pressure sensor in the intake manifold, 3 - coolant temperature sensor, 4 - knock sensor, 5 - crankshaft position sensor, 6 - intake air temperature sensor, 7 -...
Fuel injection system. 1 - oxygen sensor, 2 - absolute pressure sensor in the intake manifold, 3 - coolant temperature sensor, 4 - knock sensor, 5 - crankshaft position sensor, 6 - intake air temperature sensor, 7 -...

Fuel system
Caution: Before performing work on removing and installing fuel system components, the residual fuel pressure in the line must be released. 1. Before resetting the memory, make sure you have the code for the radio. 2....
Caution: Before performing work on removing and installing fuel system components, the residual fuel pressure in the line must be released. 1. Before resetting the memory, make sure you have the code for the radio. 2....

Fuel pump
Removal and installation 1. Relieve residual fuel pressure. 2. Unscrew the fuel filler cap and release the pressure in the fuel tank. 3. (2WD models) Remove the center console and parking brake lever. 4. (4WD models)...
Removal and installation 1. Relieve residual fuel pressure. 2. Unscrew the fuel filler cap and release the pressure in the fuel tank. 3. (2WD models) Remove the center console and parking brake lever. 4. (4WD models)...

Additional fuel pump (4WD)
Removal and installation an additional fuel pump 1. Relieve residual fuel pressure. 2. Unscrew the fuel filler cap and release the pressure in the fuel tank. 3. Remove the driver's seat. 4. Remove the service hatch...
Removal and installation an additional fuel pump 1. Relieve residual fuel pressure. 2. Unscrew the fuel filler cap and release the pressure in the fuel tank. 3. Remove the driver's seat. 4. Remove the service hatch...
Fuel filter
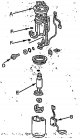
Removal and installation 1. Remove the fuel pump. 2. Remove the fuel level indicator sensor, disconnect the connector, remove the pressure regulator and the fuel pump. 3. Installation is carried out in the reverse order...
Removal and installation 1. Remove the fuel pump. 2. Remove the fuel level indicator sensor, disconnect the connector, remove the pressure regulator and the fuel pump. 3. Installation is carried out in the reverse order...

Pressure regulator
Removal and installation 1. Remove the fuel pump. 2. Remove the bracket and remove the pressure regulator. 3. The regulator is installed in the reverse order of removal. Note: Do not reuse O-rings. Before installation,...
Removal and installation 1. Remove the fuel pump. 2. Remove the bracket and remove the pressure regulator. 3. The regulator is installed in the reverse order of removal. Note: Do not reuse O-rings. Before installation,...
Fuel tank
Removal and installation (2WD models) 1. Remove the fuel pump, pump out the fuel from the tank. 2. Raise the car on a lift. 3. Disconnect the filler tube and breather tube. 4. Remove the floor cross member. 5. Loosen...
Removal and installation (2WD models) 1. Remove the fuel pump, pump out the fuel from the tank. 2. Raise the car on a lift. 3. Disconnect the filler tube and breather tube. 4. Remove the floor cross member. 5. Loosen...

Fuel level sensor
1. Remove the fuel pump. 2. Measure the resistance by slowly moving the float from the "EMPTY" position to the "FULL" position. 2WD models. 4WD models. If the resistance is not as described, replace the fuel level...
1. Remove the fuel pump. 2. Measure the resistance by slowly moving the float from the "EMPTY" position to the "FULL" position. 2WD models. 4WD models. If the resistance is not as described, replace the fuel level...

Injectors — removal and installation
Removal 1. Relieve residual fuel pressure. 2. Remove the air filter. 3. Remove the intake manifold. 4. Disconnect the connectors from the injectors, disconnect the clamps from the fuel manifold. 5. Disconnect the...
Removal 1. Relieve residual fuel pressure. 2. Remove the air filter. 3. Remove the intake manifold. 4. Disconnect the connectors from the injectors, disconnect the clamps from the fuel manifold. 5. Disconnect the...

Throttle body
Checking and cleaning 1. Make sure the throttle valve opens and closes smoothly. 2. Make sure the throttle valve moves freely. 3. Make sure that when the throttle valve is fully closed, there is no gap between the screw...
Checking and cleaning 1. Make sure the throttle valve opens and closes smoothly. 2. Make sure the throttle valve moves freely. 3. Make sure that when the throttle valve is fully closed, there is no gap between the screw...

Removal, installation and adjusting the accelerator cable
1. Open the throttle fully and disconnect the inner accelerator cable. 2. Loosen the lock nut and remove the outer cable from the bracket. 3. Remove the cable from the accelerator pedal. 4. Installation is carried out...
1. Open the throttle fully and disconnect the inner accelerator cable. 2. Loosen the lock nut and remove the outer cable from the bracket. 3. Remove the cable from the accelerator pedal. 4. Installation is carried out...
This section is available on: russian, bulgarian, belarusian, ukrainian, serbian, croatian, romanian, polish, slovak, hungarian
Link in different formats to this section
TEXTHTMLBB Code
- General information
- User manual
- Maintenance
- Power unit
- Engine repair
- Cooling and lubrication system
- Injection and power system
- Control system
- Engine electrical equipment
- Transmission
- Clutch
- Mechanical gearbox
- Automatic gearbox
- Variator (CVT)
- Drive shafts and gearbox
- Chassis and running gear
- Car suspension
- Steering
- Brake system
- Body and interior
- Exterior (external elements)
- Interior (internal elements)
- Doors, locks and windows
- Heater and air conditioner
- Safety system
- Electrical equipment
- Equipment and devices
- Wiring diagrams (since 06.2001)
- Wiring diagrams (since 06.2004)