


Vehicle SRS Security System Honda Fit/Jazz 1

Precautions during operation and repair work
Errors made during maintenance of the security system may result in the system being inadvertently activated during maintenance or in the system not being activated during an accident, so always follow the rules...
Errors made during maintenance of the security system may result in the system being inadvertently activated during maintenance or in the system not being activated during an accident, so always follow the rules...

Location of security system components
Location of SRS components (left-hand drive models). 1 - rear central seat belt, 2 - central, rear seat belt mount on the right side, 3 - central fastening of the rear seat belt on the left side, 4 - upper driver seat...
Location of SRS components (left-hand drive models). 1 - rear central seat belt, 2 - central, rear seat belt mount on the right side, 3 - central fastening of the rear seat belt on the left side, 4 - upper driver seat...

Removal and installation the driver's airbag
Note: Installation is carried out in the reverse order of removal. Be careful not to damage the wiring harness during assembly. 1. Disconnect the negative battery terminal and wait 3 minutes. 2. Remove the steering...
Note: Installation is carried out in the reverse order of removal. Be careful not to damage the wiring harness during assembly. 1. Disconnect the negative battery terminal and wait 3 minutes. 2. Remove the steering...

Removal and installation the passenger airbag
Note: Installation is carried out in the reverse order of removal. Be careful not to damage the wiring harness during assembly. 1. Disconnect the negative battery terminal and wait 3 minutes. 2. Remove the glove box. 3....
Note: Installation is carried out in the reverse order of removal. Be careful not to damage the wiring harness during assembly. 1. Disconnect the negative battery terminal and wait 3 minutes. 2. Remove the glove box. 3....

Removal and installation side airbags
Note: Installation is carried out in the reverse order of removal. Be careful not to damage the wiring harness during assembly. The removal of the left cushion is described; the right one is removed in the same way. 1....
Note: Installation is carried out in the reverse order of removal. Be careful not to damage the wiring harness during assembly. The removal of the left cushion is described; the right one is removed in the same way. 1....

Removal and installation curtain airbags (left-hand drive models only)
Note: Installation is carried out in the reverse order of removal. Be careful not to damage the wiring harness during assembly. The removal of the left curtain is described; the right one is removed in a similar way. 1....
Note: Installation is carried out in the reverse order of removal. Be careful not to damage the wiring harness during assembly. The removal of the left curtain is described; the right one is removed in a similar way. 1....

Removal and installation the spiral wire
Note: Be careful not to damage the wire harness during assembly. 1. Place the vehicle in a straight-ahead position. 2. Disconnect the negative battery terminal and wait 3 minutes. 3. Remove the driver's airbag. 4....
Note: Be careful not to damage the wire harness during assembly. 1. Place the vehicle in a straight-ahead position. 2. Disconnect the negative battery terminal and wait 3 minutes. 3. Remove the driver's airbag. 4....
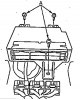
Removal and installation the SRS control unit
Note: Do not open the control unit cover or open the various electrical components unless absolutely necessary (possible damage from static electricity). Installation is carried out in the reverse order of removal. 1....
Note: Do not open the control unit cover or open the various electrical components unless absolutely necessary (possible damage from static electricity). Installation is carried out in the reverse order of removal. 1....

Removal and installation the side SRS sensor
1. Disconnect the negative battery terminal and wait 3 minutes. 2. Disconnect the side airbag connector. 3. Remove the front seats. 4. Remove the lower front door sill trim. 5. Remove the center door pillar trim. 6....
1. Disconnect the negative battery terminal and wait 3 minutes. 2. Disconnect the side airbag connector. 3. Remove the front seats. 4. Remove the lower front door sill trim. 5. Remove the center door pillar trim. 6....

Removal and installation the passenger weight sensor (left-hand drive models)
Note: Installation is carried out in the reverse order of removal. Be careful not to damage the wiring harness during assembly. 1. Disconnect the negative battery terminal and wait 3 minutes. 2. Remove the front...
Note: Installation is carried out in the reverse order of removal. Be careful not to damage the wiring harness during assembly. 1. Disconnect the negative battery terminal and wait 3 minutes. 2. Remove the front...

Removal and installation the passenger presence control unit
Note: Installation is carried out in the reverse order of removal. Be careful not to damage the wiring harness during assembly. 1. Disconnect the negative battery terminal and wait 3 minutes. 2. Disconnect the passenger...
Note: Installation is carried out in the reverse order of removal. Be careful not to damage the wiring harness during assembly. 1. Disconnect the negative battery terminal and wait 3 minutes. 2. Disconnect the passenger...

Removal and installation front SRS sensors
Note: Installation is carried out in the reverse order of removal. Be careful not to damage the wiring harness during assembly. 1. Disconnect the negative battery terminal and wait 3 minutes. 2. Disconnect the...
Note: Installation is carried out in the reverse order of removal. Be careful not to damage the wiring harness during assembly. 1. Disconnect the negative battery terminal and wait 3 minutes. 2. Disconnect the...
Removal and installation the driver's seat position sensor (left-hand drive models)
Note: Installation is carried out in the reverse order of removal. Be careful not to damage the wiring harness during assembly. 1. Disconnect the negative battery terminal and wait 3 minutes. 2. Disconnect the driver's...
Note: Installation is carried out in the reverse order of removal. Be careful not to damage the wiring harness during assembly. 1. Disconnect the negative battery terminal and wait 3 minutes. 2. Disconnect the driver's...

Security system diagnostics
1. Checking the SRS indicator. Set the ignition switch to the "OFF" position. 2. Connect the special tester to the diagnostic connector. Diagnostic connector. 3. Turn the ignition switch to the "ON" position. 4. Make...
1. Checking the SRS indicator. Set the ignition switch to the "OFF" position. 2. Connect the special tester to the diagnostic connector. Diagnostic connector. 3. Turn the ignition switch to the "ON" position. 4. Make...

Clearing fault codes using a tester
1. Make sure the ignition switch is in the "OFF" position. 2. Connect the special tester to the diagnostic connector. Diagnostic connector. 3. Turn the ignition switch to the "ON" position. 4. Make sure the tester has...
1. Make sure the ignition switch is in the "OFF" position. 2. Connect the special tester to the diagnostic connector. Diagnostic connector. 3. Turn the ignition switch to the "ON" position. 4. Make sure the tester has...

Clearing fault codes using a jumper
1. Make sure the ignition switch is in the "OFF" position. 2. Connect the special jumper 07PAZ-001010A to the yellow wire of the relay and fuse box. Left-hand drive models. Right hand drive models. 3. Turn the ignition...
1. Make sure the ignition switch is in the "OFF" position. 2. Connect the special jumper 07PAZ-001010A to the yellow wire of the relay and fuse box. Left-hand drive models. Right hand drive models. 3. Turn the ignition...

Reading fault codes
1. Turn on the ignition, erase the fault codes, after which the indicator will light up for six seconds and go out, then after three seconds it will start to display fault codes of the SRS system. 2. Each fault code...
1. Turn on the ignition, erase the fault codes, after which the indicator will light up for six seconds and go out, then after three seconds it will start to display fault codes of the SRS system. 2. Each fault code...
This section is available on: russian, bulgarian, belarusian, ukrainian, serbian, croatian, romanian, polish, slovak, hungarian
Link in different formats to this section
TEXTHTMLBB Code
- General information
- User manual
- Maintenance
- Power unit
- Engine repair
- Cooling and lubrication system
- Injection and power system
- Control system
- Engine electrical equipment
- Transmission
- Clutch
- Mechanical gearbox
- Automatic gearbox
- Variator (CVT)
- Drive shafts and gearbox
- Chassis and running gear
- Car suspension
- Steering
- Brake system
- Body and interior
- Exterior (external elements)
- Interior (internal elements)
- Doors, locks and windows
- Heater and air conditioner
- Safety system
- Electrical equipment
- Equipment and devices
- Wiring diagrams (since 06.2001)
- Wiring diagrams (since 06.2004)