


Car clutch Honda Fit/Jazz 1

Checking the clutch fluid level
The procedures for checking the working fluid level are described in the chapter " Maintenance and general check and adjustment procedures ".
The procedures for checking the working fluid level are described in the chapter " Maintenance and general check and adjustment procedures ".
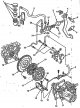
Clutch components — device
Clutch components. 1 - working fluid tank assembly, 2 - hose, 3 - gasket, 4 - clutch pedal, 5 - starter lock switch, 6 - clutch pedal switch, 7 - clutch release drive master cylinder, 8 - clutch damper, 9 - hose, 10 -...
Clutch components. 1 - working fluid tank assembly, 2 - hose, 3 - gasket, 4 - clutch pedal, 5 - starter lock switch, 6 - clutch pedal switch, 7 - clutch release drive master cylinder, 8 - clutch damper, 9 - hose, 10 -...

Bleeding the clutch release hydraulic drive
Caution: Do not allow the working fluid to come into contact with painted surfaces. If the working fluid comes into contact with a painted surface, wash it off immediately. Note: Do not mix different types of working...
Caution: Do not allow the working fluid to come into contact with painted surfaces. If the working fluid comes into contact with a painted surface, wash it off immediately. Note: Do not mix different types of working...

Clutch pedal — checking and adjustment
1. Fold back the floor covering on the driver's side. 2. Measure the pedal height (the distance from the pedal pad to the floor). Pedal height - 163 mm 3. Press the clutch pedal and measure the clutch pedal travel....
1. Fold back the floor covering on the driver's side. 2. Measure the pedal height (the distance from the pedal pad to the floor). Pedal height - 163 mm 3. Press the clutch pedal and measure the clutch pedal travel....

Clutch release master cylinder
Removal Caution: Do not allow the working fluid to come into contact with painted surfaces. If the working fluid comes into contact with a painted surface, wash it off immediately. 1. Pump out the brake fluid from the...
Removal Caution: Do not allow the working fluid to come into contact with painted surfaces. If the working fluid comes into contact with a painted surface, wash it off immediately. 1. Pump out the brake fluid from the...

Clutch release slave cylinder
Removal and installation Caution: Do not allow the working fluid to come into contact with painted surfaces. If the working fluid comes into contact with a painted surface, wash it off immediately. 1. Disconnect the...
Removal and installation Caution: Do not allow the working fluid to come into contact with painted surfaces. If the working fluid comes into contact with a painted surface, wash it off immediately. 1. Disconnect the...

Clutch Damper
Removal Caution: Do not allow the working fluid to come into contact with painted surfaces. If the working fluid comes into contact with a painted surface, wash it off immediately. 1. Disconnect the cable from the...
Removal Caution: Do not allow the working fluid to come into contact with painted surfaces. If the working fluid comes into contact with a painted surface, wash it off immediately. 1. Disconnect the cable from the...

Clutch — removal
1. Remove the gearbox (see chapter " Manual transmission "). 2. Remove the clutch release fork boot (A) from the clutch housing (B). 3. Remove the clutch release fork (C) by squeezing the spring (D) with pliers. 4....
1. Remove the gearbox (see chapter " Manual transmission "). 2. Remove the clutch release fork boot (A) from the clutch housing (B). 3. Remove the clutch release fork (C) by squeezing the spring (D) with pliers. 4....

Clutch — installation
1. Using a drift and hammer, install the new transmission input shaft support bearing into the flywheel as shown. 2. Install the flywheel and tighten the bolts by hand. 3. Using a special tool, secure the flywheel and...
1. Using a drift and hammer, install the new transmission input shaft support bearing into the flywheel as shown. 2. Install the flywheel and tighten the bolts by hand. 3. Using a special tool, secure the flywheel and...

Clutch — check
1. Check the clutch housing. a) Check the clutch housing (A) and diaphragm spring petals (B) for damage, bending or excessive wear. b) Using a ruler (A) and feeler gauge (B), measure the clearance between the pressure...
1. Check the clutch housing. a) Check the clutch housing (A) and diaphragm spring petals (B) for damage, bending or excessive wear. b) Using a ruler (A) and feeler gauge (B), measure the clearance between the pressure...
This section is available on: russian, bulgarian, belarusian, ukrainian, serbian, croatian, romanian, polish, slovak, hungarian
Link in different formats to this section
TEXTHTMLBB Code
- General information
- User manual
- Maintenance
- Power unit
- Engine repair
- Cooling and lubrication system
- Injection and power system
- Control system
- Engine electrical equipment
- Transmission
- Clutch
- Mechanical gearbox
- Automatic gearbox
- Variator (CVT)
- Drive shafts and gearbox
- Chassis and running gear
- Car suspension
- Steering
- Brake system
- Body and interior
- Exterior (external elements)
- Interior (internal elements)
- Doors, locks and windows
- Heater and air conditioner
- Safety system
- Electrical equipment
- Equipment and devices
- Wiring diagrams (since 06.2001)
- Wiring diagrams (since 06.2004)