
Car manual transmission Honda Fit/Jazz 1

Checking the oil level and changing it
The procedures for checking the level and changing the oil in the gearbox are described in the chapter " Maintenance and general check and adjustment procedures ".
The procedures for checking the level and changing the oil in the gearbox are described in the chapter " Maintenance and general check and adjustment procedures ".

Checking the Reverse Light Switch
1. Disconnect the connector from the reversing light switch (A). 2. Check for continuity between the terminals of the reversing light switch when the reverse gear is engaged. 3. Replace the reverse light switch if...
1. Disconnect the connector from the reversing light switch (A). 2. Check for continuity between the terminals of the reversing light switch when the reverse gear is engaged. 3. Replace the reverse light switch if...
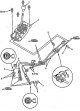
Gear Selection and Shifting Mechanism — Removal and Installation
Removal and installation of gear shift mechanism parts should be performed using the figure "Removal and installation of gear shift mechanism". Removal and installation the gear shift mechanism. 1 - gear shift lever...
Removal and installation of gear shift mechanism parts should be performed using the figure "Removal and installation of gear shift mechanism". Removal and installation the gear shift mechanism. 1 - gear shift lever...

Removal the gearbox
1. Disconnect the cable from the negative terminal of the battery. Note: Before disconnecting the wire from the battery, make sure you know the access code for the radio. Otherwise, the radio will be blocked. 2. Remove...
1. Disconnect the cable from the negative terminal of the battery. Note: Before disconnecting the wire from the battery, make sure you know the access code for the radio. Otherwise, the radio will be blocked. 2. Remove...

Gearbox installation
1. Make sure the pins are installed in the clutch housing. 2. Apply grease to the clutch release fork (A); release bearing (B) and primary shaft (C) of the gearbox. Note: The areas to be lubricated are indicated by...
1. Make sure the pins are installed in the clutch housing. 2. Apply grease to the clutch release fork (A); release bearing (B) and primary shaft (C) of the gearbox. Note: The areas to be lubricated are indicated by...

Gearbox — device
Transmission. 1 - bolt, 2 - washer, 3 - spring, 4 - ball, 5 - plug, 6 - gearbox housing, 7 - bolt, 8 - bracket, 9 - oil guide plate, 10 - retaining ring, 11 - oil drain, 12 - retaining ring, 13 - reversing light switch,...
Transmission. 1 - bolt, 2 - washer, 3 - spring, 4 - ball, 5 - plug, 6 - gearbox housing, 7 - bolt, 8 - bracket, 9 - oil guide plate, 10 - retaining ring, 11 - oil drain, 12 - retaining ring, 13 - reversing light switch,...

Gearbox shafts — device
Primary shaft of the gearbox. 1 - primary shaft, 2 - needle bearing, 3 - third gear leading pinion, 4 - synchronizer ring, 5 - cracker spring, 6 - third and fourth gear synchronizer clutch, 7 - synchronizer hub of third...
Primary shaft of the gearbox. 1 - primary shaft, 2 - needle bearing, 3 - third gear leading pinion, 4 - synchronizer ring, 5 - cracker spring, 6 - third and fourth gear synchronizer clutch, 7 - synchronizer hub of third...
This section is available on: russian, bulgarian, belarusian, ukrainian, serbian, croatian, romanian, polish, slovak, hungarian
Link in different formats to this section
TEXTHTMLBB Code
- General information
- User manual
- Maintenance
- Power unit
- Engine repair
- Cooling and lubrication system
- Injection and power system
- Control system
- Engine electrical equipment
- Transmission
- Clutch
- Mechanical gearbox
- Automatic gearbox
- Variator (CVT)
- Drive shafts and gearbox
- Chassis and running gear
- Car suspension
- Steering
- Brake system
- Body and interior
- Exterior (external elements)
- Interior (internal elements)
- Doors, locks and windows
- Heater and air conditioner
- Safety system
- Electrical equipment
- Equipment and devices
- Wiring diagrams (since 06.2001)
- Wiring diagrams (since 06.2004)