


Car engine management system Honda Fit/Jazz 1

Electronic control system — device
Location of electronic fuel injection system components (L15A, right-hand drive models). 1 - ignition coil, 2 - absolute pressure sensor at the inlet, 3 - fuel vapor recovery system electro-pneumatic valve, 4 - intake...
Location of electronic fuel injection system components (L15A, right-hand drive models). 1 - ignition coil, 2 - absolute pressure sensor at the inlet, 3 - fuel vapor recovery system electro-pneumatic valve, 4 - intake...

Absolute Intake Air Pressure (MAP) Sensor
Note: The sensor is checked using a scanner. Removal and installation 1. Disconnect the absolute pressure sensor connector. 2. Unscrew the bolt and remove the sensor. 3. Install the sensor in the reverse order of...
Note: The sensor is checked using a scanner. Removal and installation 1. Disconnect the absolute pressure sensor connector. 2. Unscrew the bolt and remove the sensor. 3. Install the sensor in the reverse order of...

Coolant temperature sensor
Note: The sensor is checked using a scanner. Removal and installation 1. Drain the coolant. 2. Disconnect the connector. 3. Remove the sensor. 4. Install the sensor in the reverse order of removal.
Note: The sensor is checked using a scanner. Removal and installation 1. Drain the coolant. 2. Disconnect the connector. 3. Remove the sensor. 4. Install the sensor in the reverse order of removal.

Intake Air Temperature Sensor
Note: The sensor is checked using a scanner. Removal and installation 1. Disconnect the air temperature sensor connector. 2. Remove the sensor. 3. Check the intake air temperature sensor. Using an ohmmeter, measure the...
Note: The sensor is checked using a scanner. Removal and installation 1. Disconnect the air temperature sensor connector. 2. Remove the sensor. 3. Check the intake air temperature sensor. Using an ohmmeter, measure the...

Knock sensor
Note: The sensor is checked using a scanner. Removal and installation 1. Remove the intake manifold. 2. Disconnect the sensor connector. 3. Remove the knock sensor. 4. Install the sensor in the reverse order of removal.
Note: The sensor is checked using a scanner. Removal and installation 1. Remove the intake manifold. 2. Disconnect the sensor connector. 3. Remove the knock sensor. 4. Install the sensor in the reverse order of removal.

VTEC System Valve (L15A)
Examination 1. Remove the UTES system valve from the cylinder head (see below). 2. Measure the resistance between terminals "1" and "2" of the valve. Nominal resistance (at 20°C) — 14-20 Ohm If the resistance is within...
Examination 1. Remove the UTES system valve from the cylinder head (see below). 2. Measure the resistance between terminals "1" and "2" of the valve. Nominal resistance (at 20°C) — 14-20 Ohm If the resistance is within...

Oxygen sensor
Removal and installation 1. Disconnect the oxygen sensor connector and unscrew the sensor. A - oxygen sensor connector, B - oxygen sensor. 2. Install the sensor in the reverse order of removal. Checking the oxygen...
Removal and installation 1. Disconnect the oxygen sensor connector and unscrew the sensor. A - oxygen sensor connector, B - oxygen sensor. 2. Install the sensor in the reverse order of removal. Checking the oxygen...
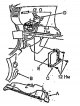
Electronic control unit
Removal and installation 1. Remove the passenger side lower instrument panel trim and the front passenger side trim. 2. Disconnect the connectors of the electronic control unit. Unscrew the bolts and remove the ECU with...
Removal and installation 1. Remove the passenger side lower instrument panel trim and the front passenger side trim. 2. Disconnect the connectors of the electronic control unit. Unscrew the bolts and remove the ECU with...

Checking the crankcase ventilation system
1. Check the ventilation system valve, hoses and connections for leaks and blockages. 2. At idle, use your hands or pliers to pinch the hose between the PCV valve and the intake manifold, making sure the valve clicks....
1. Check the ventilation system valve, hoses and connections for leaks and blockages. 2. At idle, use your hands or pliers to pinch the hose between the PCV valve and the intake manifold, making sure the valve clicks....

Fuel vapor recovery system
Fuel Evaporative Control System (2WD models). Check the fuel vapor recovery system tubes. Make sure that the tubes are not damaged and that the system components are securely fastened. 1. Connect a hand vacuum pump to...
Fuel Evaporative Control System (2WD models). Check the fuel vapor recovery system tubes. Make sure that the tubes are not damaged and that the system components are securely fastened. 1. Connect a hand vacuum pump to...

Recirculation system valve
1. Disconnect the EGR valve connector. 2. Loosen the bolt and remove the EGR valve. 3. Installation is carried out in the reverse order of removal. Note: Do not reinstall the "C" gasket.
1. Disconnect the EGR valve connector. 2. Loosen the bolt and remove the EGR valve. 3. Installation is carried out in the reverse order of removal. Note: Do not reinstall the "C" gasket.

Vacuum line diagram — device
Vacuum line diagram. 1 - absolute pressure sensor in the intake manifold, 2 - fuel vapor recovery system electro-pneumatic valve, 3 - to the fuel vapor recovery system filter, 4 - throttle body.
Vacuum line diagram. 1 - absolute pressure sensor in the intake manifold, 2 - fuel vapor recovery system electro-pneumatic valve, 3 - to the fuel vapor recovery system filter, 4 - throttle body.

Ignition coils
L13A engines use a dual coil, dual spark plug per cylinder ignition system. L15A engines use a single coil, single spark plug per cylinder ignition system. Removal and installation (L13A) 1. Remove the intake manifold...
L13A engines use a dual coil, dual spark plug per cylinder ignition system. L15A engines use a single coil, single spark plug per cylinder ignition system. Removal and installation (L13A) 1. Remove the intake manifold...

Crankshaft and camshaft position sensors
Removal and installation the crankshaft position sensor 1. Disconnect the sensor connector. 2. Loosen the bolt and remove the crankshaft position sensor. 3. Installation is carried out in the reverse order of removal....
Removal and installation the crankshaft position sensor 1. Disconnect the sensor connector. 2. Loosen the bolt and remove the crankshaft position sensor. 3. Installation is carried out in the reverse order of removal....

Reset and write parameters of the crankshaft position sensor
Using a tester 1. Connect the tester to the diagnostic connector. 2. Turn the ignition key to the "ON(II)" position. 3. Make sure the scanner is connected to the ECU. 4. Select "CRANK PATTERN" in the scanner's...
Using a tester 1. Connect the tester to the diagnostic connector. 2. Turn the ignition key to the "ON(II)" position. 3. Make sure the scanner is connected to the ECU. 4. Select "CRANK PATTERN" in the scanner's...
This section is available on: russian, bulgarian, belarusian, ukrainian, serbian, croatian, romanian, polish, slovak, hungarian
Link in different formats to this section
TEXTHTMLBB Code
- General information
- User manual
- Maintenance
- Power unit
- Engine repair
- Cooling and lubrication system
- Injection and power system
- Control system
- Engine electrical equipment
- Transmission
- Clutch
- Mechanical gearbox
- Automatic gearbox
- Variator (CVT)
- Drive shafts and gearbox
- Chassis and running gear
- Car suspension
- Steering
- Brake system
- Body and interior
- Exterior (external elements)
- Interior (internal elements)
- Doors, locks and windows
- Heater and air conditioner
- Safety system
- Electrical equipment
- Equipment and devices
- Wiring diagrams (since 06.2001)
- Wiring diagrams (since 06.2004)