
HondaBook.ru
Auto companies Volkswagen Auto companies Ford Auto companies Lada Auto companies Skoda Auto companies BMW Auto companies Mazda Auto companies Peugeot
English Русский
Български
Беларускі
Український
Српски
Hrvatski
Română
Polski
Slovenský
Magyar
Bookmark Contacts Sitemap   


Accord Civic Fit / Jazz CR-V HR-V Others Articles
Accord 3 (1985-1989) Accord 6 (1997-2002)

Checking the condition of the crankshaft (Honda Accord 6)

  • Main
  • Honda Accord
  • 6 (1997-2002)
  • Power unit
  • Engine overhaul
  • Checking the condition of the crankshaft
0
Checking the condition of the crankshaft


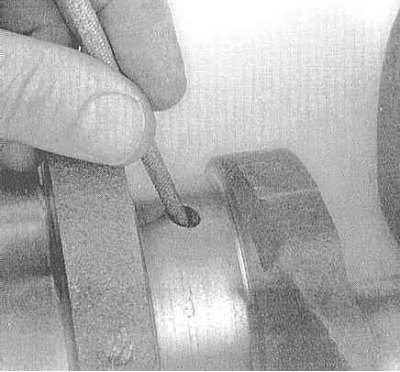
1. Use a sharpening stone, file or scraper to remove burrs from the edges of the oil holes.
1. Use a sharpening stone, file or scraper to…


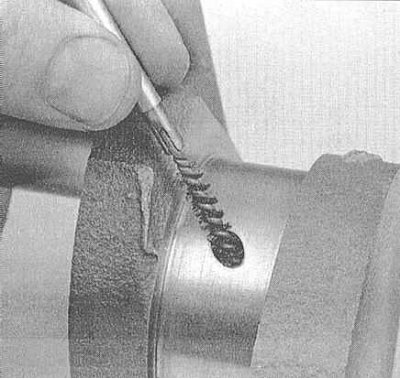
2. Wash the crankshaft with solvent, then dry it thoroughly, using compressed air if possible. Don't forget to clean the oil holes with a stiff brush. Then wash them with solvent.

Caution! When using compressed air, do not forget to wear safety glasses!


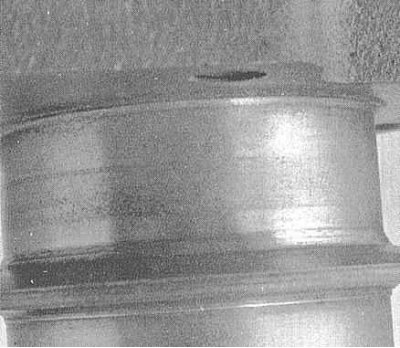
3. Check the crankshaft main and connecting rod journals for scoring, cavities, cracks and signs of uneven wear.

4. Inspect the entire surface of the shaft for cracks and other damage. To detect hidden cracks, magnetic particle inspection should be used - take the shaft to a car service workshop.
4. Inspect the entire surface of the shaft for…


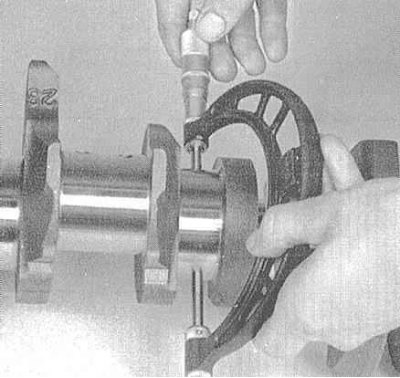
5. Use a micrometer to measure the diameters of the main and connecting rod journals of the shaft. Measure the diameter of each journal at several points along its length and perimeter, which will allow you to estimate the value of its taper and ovality, which should not go beyond the permissible range (see Specifications). You should also evaluate the crankshaft runout value - you will need a pair of V-shaped blocks and a DTI meter. If you do not have the necessary inventory, contact a car service specialist for help.


6. If the wear/taper/ovality of the journals exceeds the permissible value, or there is mechanical damage to the surfaces, the crankshaft should be re-machined. After machining the shaft, it is necessary to select new main and/or connecting rod bearing shells of the appropriate repair size.
6. If the wear/taper/ovality of the journals…


7. Check the condition of the seal journals on both crankshaft journals. The presence of worn grooves, burrs or scuffs will lead to the failure of new seals in the very near future. In some cases, the journals can be restored by turning and pressing special thin-walled bushings onto them. If this type of restoration is not possible, replace the shaft.

8. Check the condition of the main and connecting rod bearing shells (see Section Checking the condition and selecting the liners of the main and connecting rod bearings of the crankshaft).

[Material obtained from the website hondabook]
This article is available at: russian, bulgarian, belarusian, ukrainian, serbian, croatian, romanian, polish, slovak, hungarian
This information has been verified: Timofey Goryachev
Share with friends:
◀ Previous
Accord 6: Engine overhaul
Next ▶

Checking the condition of the connecting rod and piston group components
Honing of cylinder mirrors
Checking the condition of the engine block
Cleaning the engine block
Removal the crankshaft
Checking the condition and selecting the liners of the main and connecting rod…
Engine assembly procedure
Installing piston rings
Installing the crankshaft and checking the main bearing clearances
Installing the rear crankshaft oil seal
See also other articles from Honda manuals:
Checking the condition and selecting the liners of the main and… Honda Civic 6 (1995-2000)
Checking tire pressure and condition Honda Fit 1 (2001-2008)
Checking the general condition of the cylinder head Honda CR-V 1 (1995-2001, petrol)
Checking the starter brushes Honda HR-V 1 (1998-2006, petrol)
Checking and replacing fuses Honda Avancier 1 (1999-2003, petrol)
Link in different formats to this article
Comments and feedback from visitors
No comments yet


How much will 39 + 48 ?


Accord 6 (1997-2002) 
  • General information
  • Introduction to the guide
  • User manual
  • Maintenance
  • Power unit
  • Four-cylinder engines
  • Six-cylinder engines
  • Engine overhaul
  • Cooling system
  • Heater and air conditioner
  • Power and exhaust systems
  • Engine electrical equipment
  • Engine management
  • Transmission
  • Mechanical gearbox
  • Automatic gearbox
  • Clutch and drive shafts
  • Chassis and running gear
  • Brake system
  • Car suspension
  • Steering
  • Body and interior
  • Exterior (external elements)
  • Interior (internal elements)
  • Electrical equipment
  • Equipment and devices
  • Electrical circuits
Accord 3 (1985-1989) 
  • General information
  • Maintenance
  • Power unit
  • Engine adjustment
  • Engine repair
  • Engine electrics
  • Emission management
  • Engine management (carburetor)
  • Electronic injection
  • Programmable injection
  • Schematic of emission system
  • Fuel system
  • Feedback management
  • Transmission
  • Manual gearbox
  • Automatic gearbox
  • Clutch
  • Chassis and running gear
  • Front suspension
  • Rear suspension
  • Steering
  • Brake system
  • Electrical equipment
  • Ventilation and heating
  • Air conditioner
  • Cruise control system
  • Equipment and devices
HondaBook.ru © 2018–2026 • Mobile version • Sitemap: EN BG BY UA RS HR RO PL SK HU • Feedback • Driver Information • Search system • Bookmark
Accord 3 (1985-1989) • Accord 6 (1997-2002) • Civic 3 and 4 (1983-1991) • Civic 5 and 6 (1991-2000) • Civic 6 (1995-2000) • Civic 7 (2000-2005) • Civic 8 (2005-2011) • Fit 1 (2001-2008) • CR-V 1 (1995-2001) • CR-V 2 (2002-2006) • HR-V 1 (1998-2006) • Avancier 1 (1999-2003) •
 
This website uses cookies to ensure proper functioning. By clicking "OK," you agree.